

This guide explains how to configure a Sakai LTI 1.3 integration with Apporto NextGen and complete the first launch that provisions the user in Apporto.
Overview
The configuration requires work in two systems:
-
Sakai (Administration Workspace > External Tools) to register the Apporto tool and obtain the LTI 1.3 platform values
-
Apporto NextGen to create the LTI configuration using those values
Once setup is complete, the tool can be launched from a Sakai site. The first launch creates the user in Apporto.
Prerequisites
-
Administrator access to the Sakai instance (Administration Workspace)
-
Administrator access to the Apporto NextGen environment
-
A publicly reachable Apporto instance URL (do not use
localhost) -
A Sakai site available for launch testing (for example, Next Gen)
Step 1: Sign in to both platforms
-
Log in to Sakai using administrator credentials. Example: https://qa21-mysql.nightly.sakaiproject.org/
-
Log in to Apporto NextGen as an administrator. Example:
https://{instancename}.apporto.com
Step 2: Register the Apporto tool in Sakai
-
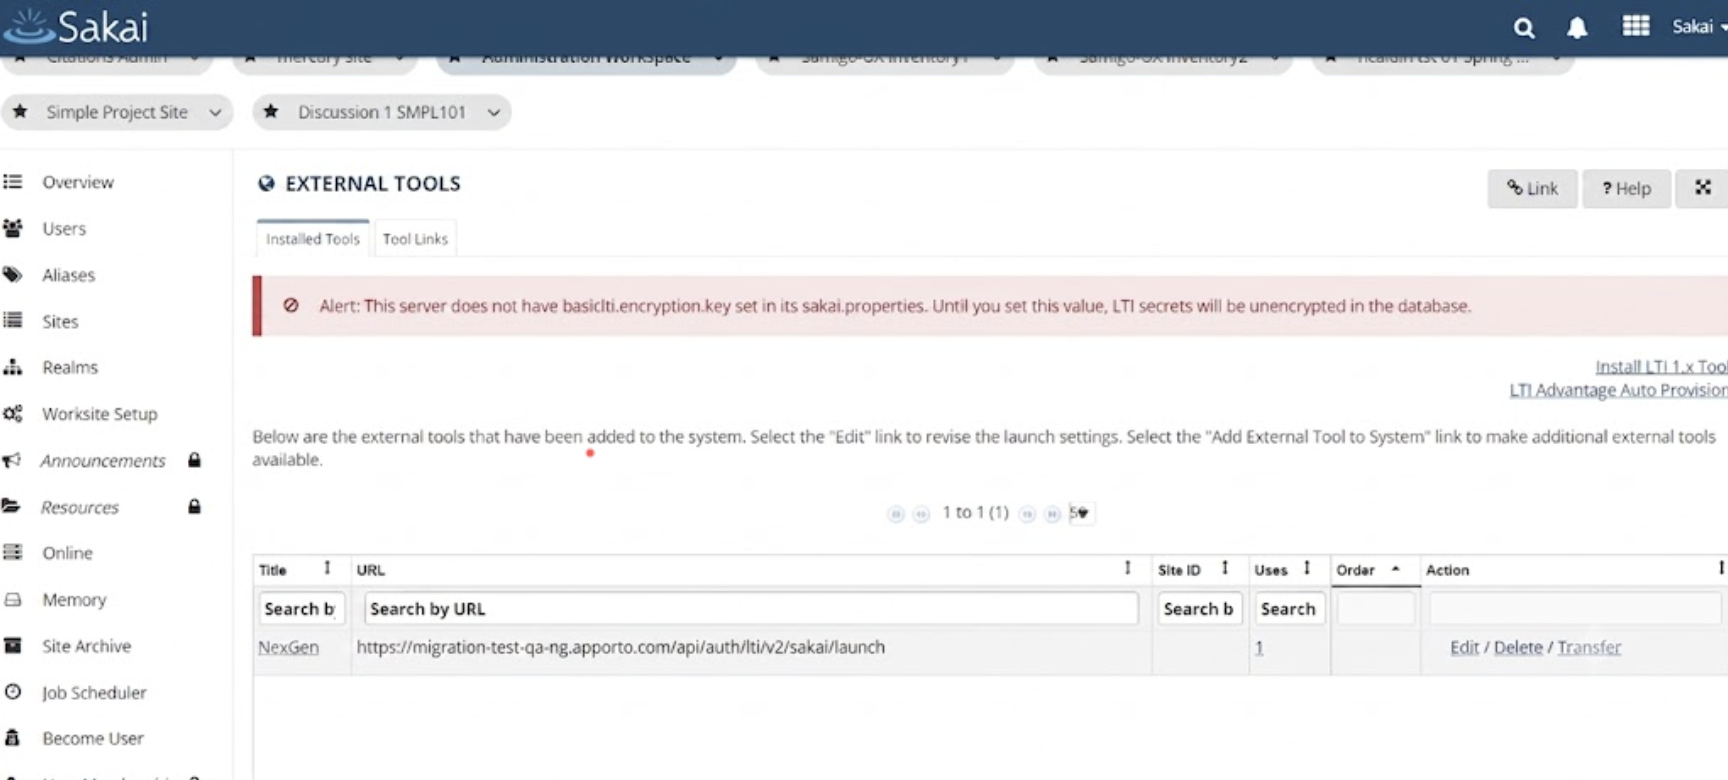
In Sakai, go to Administration Workspace > External Tools.
-
Click Install LTI 1.x Tool.
-
Enable LTI 1.3 for the tool and complete the registration fields using the values below, then save the tool.
|
Field |
Value / Guidance |
|---|---|
|
Tool Name / Title |
Apporto (or any display name). Example: NextGen |
|
OIDC Login Initiation URL |
|
|
Redirect URI / Launch URL |
|
|
Public Keyset URL |
|
-
The tool now appears in the External Tools list.
Step 3: Get the LTI 1.3 values from Sakai
-
In External Tools, click your tool (in this example, NextGen) to view its configuration.
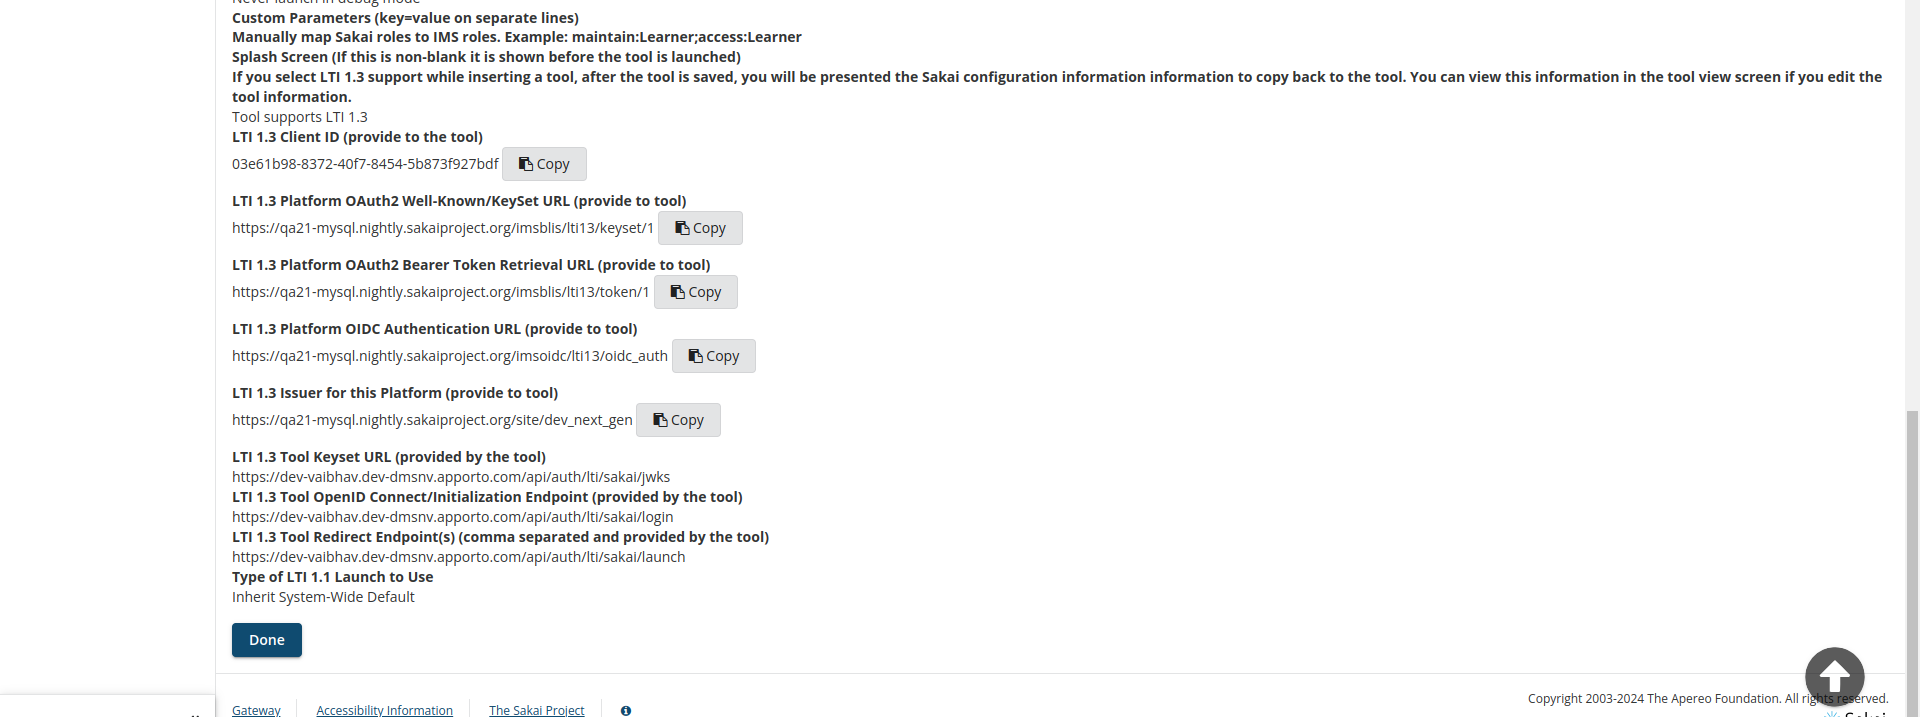
Sakai shows the configuration information to provide to the tool. Copy the values below for Step 4.
|
Field |
Value / Guidance |
|---|---|
|
LTI 1.3 Client ID (provide to the tool) |
Used as the Apporto Client ID.
|
|
LTI 1.3 Issuer for this Platform (provide to tool) |
Used as the Apporto LTI Base URL.
|
|
LTI 1.3 Platform OIDC Authentication URL (provide to tool) |
Used as the Apporto Auth Login URL.
|
|
LTI 1.3 Platform OAuth2 Bearer Token Retrieval URL (provide to tool) |
Used as the Apporto Auth Token URL.
|
Step 4: Create the LTI configuration in Apporto NextGen
-
In NextGen, go to
{Base URL}/system-config. -
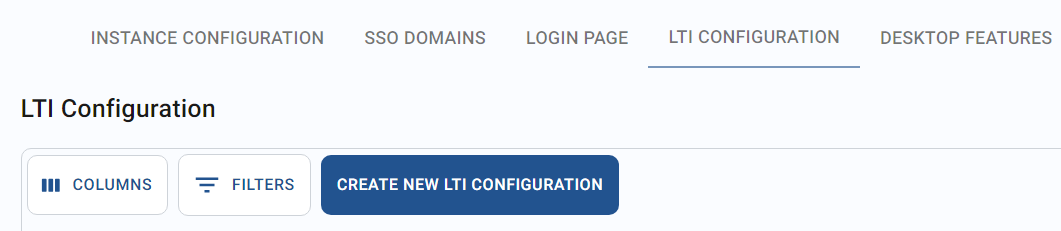
Select the LTI CONFIGURATION tab.
-
Click Create New LTI Configuration.
-
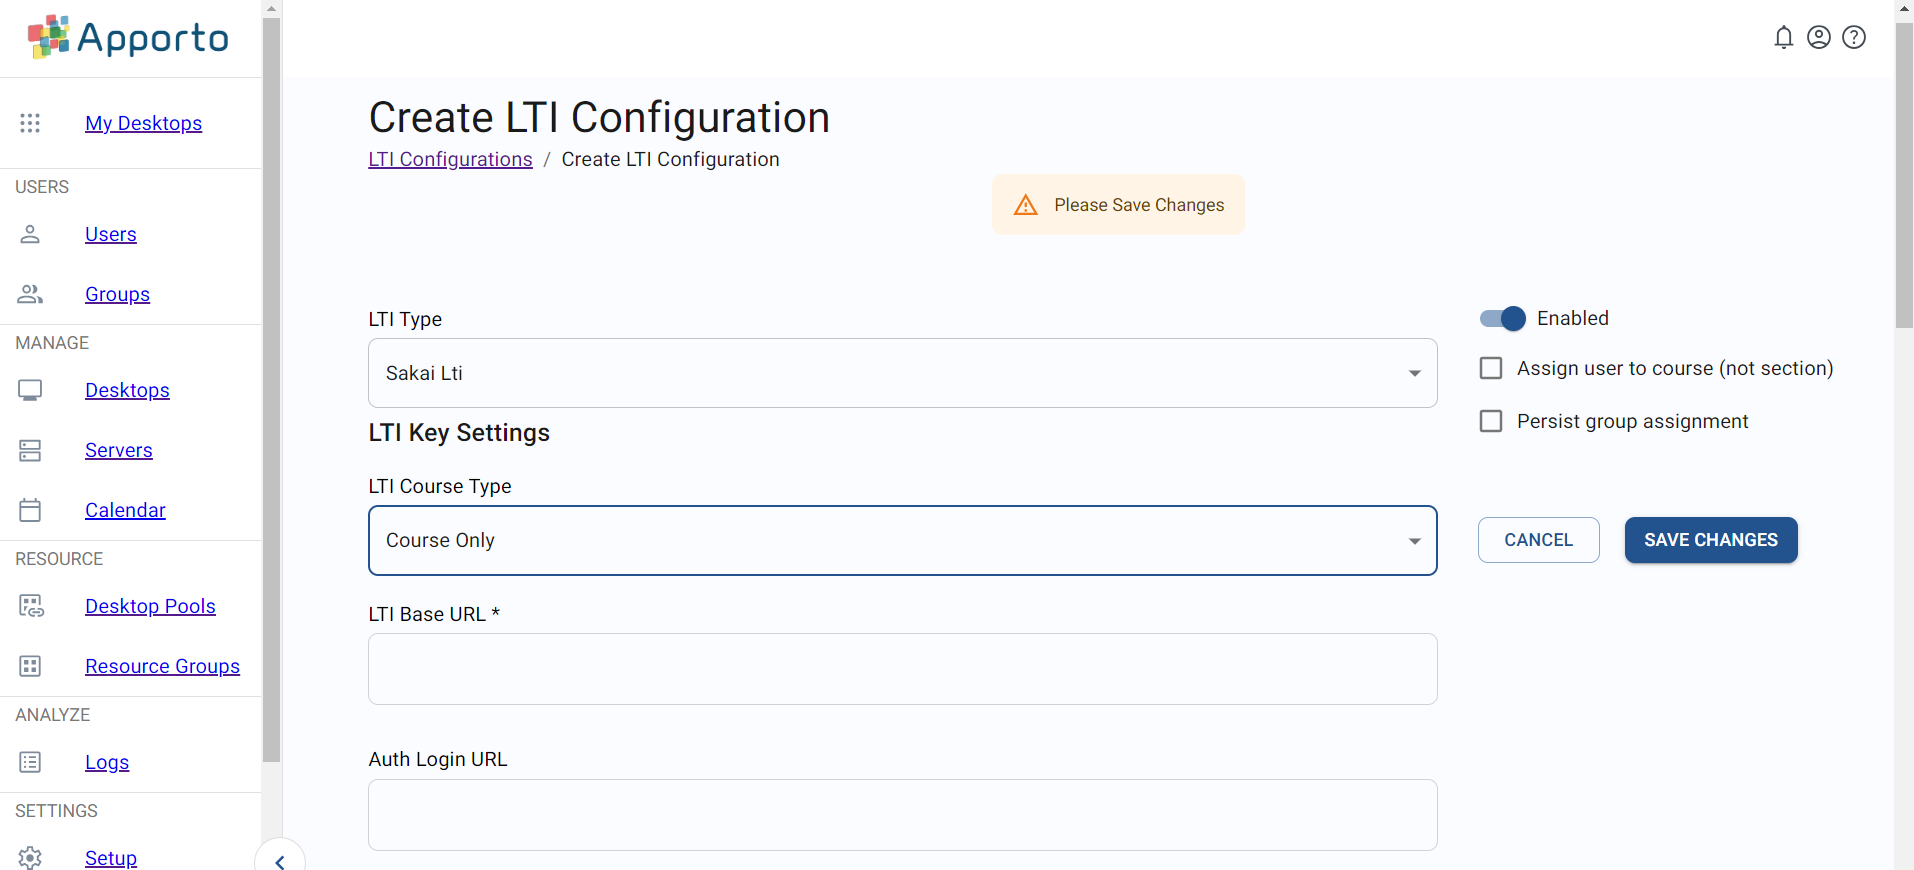
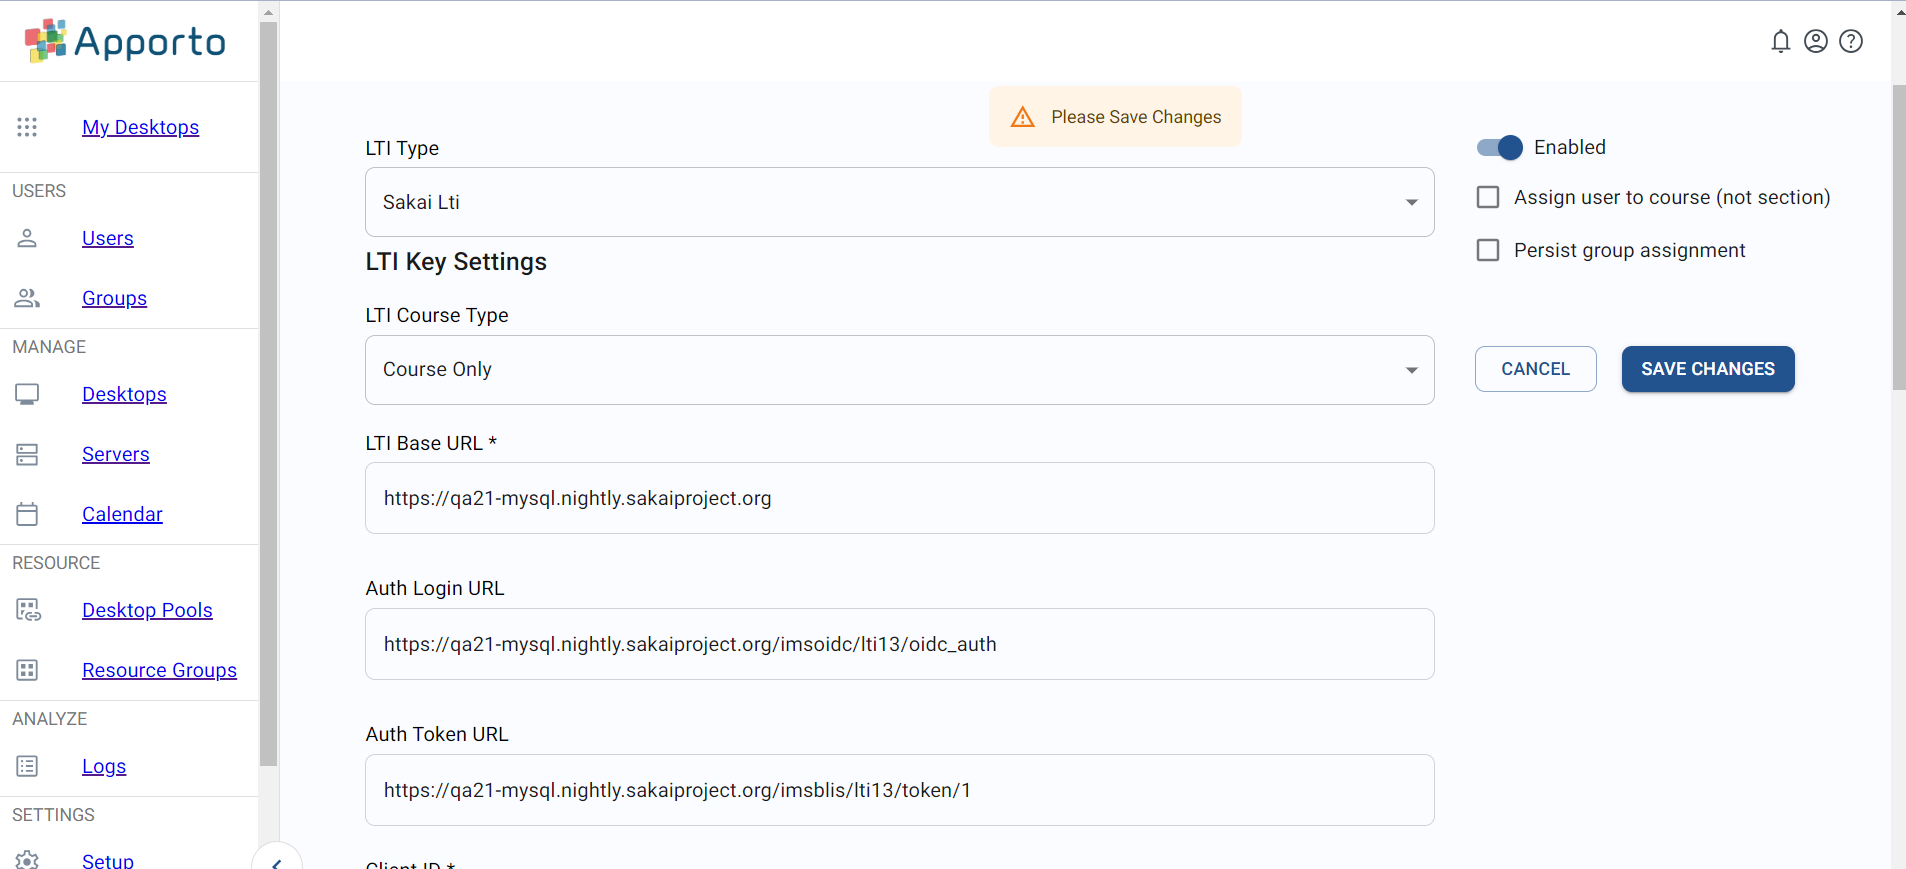
Complete the LTI configuration form using the values below.
|
Field |
Value / Guidance |
|---|---|
|
LTI Type |
Sakai LTI |
|
LTI Course Type |
Set as per need:
|
|
LTI Base URL |
LTI 1.3 Issuer for this Platform from Step 3.
|
|
Auth Login URL |
LTI 1.3 Platform OIDC Authentication URL from Step 3.
|
|
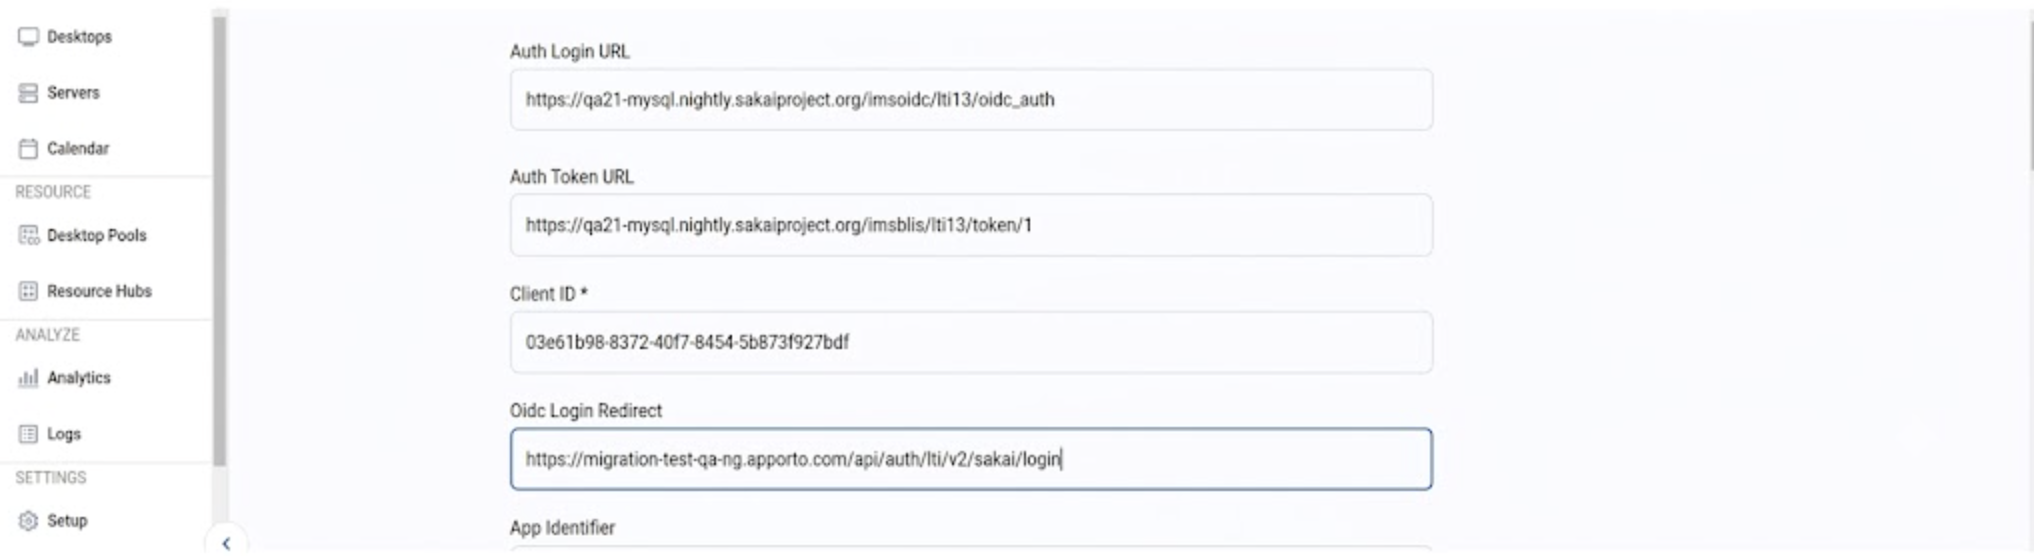
Auth Token URL |
LTI 1.3 Platform OAuth2 Bearer Token Retrieval URL from Step 3.
|
|
Client ID |
LTI 1.3 Client ID from Step 3.
|
|
OIDC Login Redirect |
|
|
App Identifier |
|
Example of a completed Sakai LTI configuration:
Caution: Ensure all URLs exactly match the Apporto environment being used. Mismatched URLs are a common cause of launch failure. Do not use localhost.
Step 5: Save the configuration
-
Click Save Changes.
-
After successful submission, NextGen redirects to
{Base URL}/system-config?tabIndex=5, where the new Sakai configuration is listed.
Expected result: The Sakai LTI configuration is saved and ready to be used from Sakai sites.
Step 6: Launch Apporto from a Sakai site
-
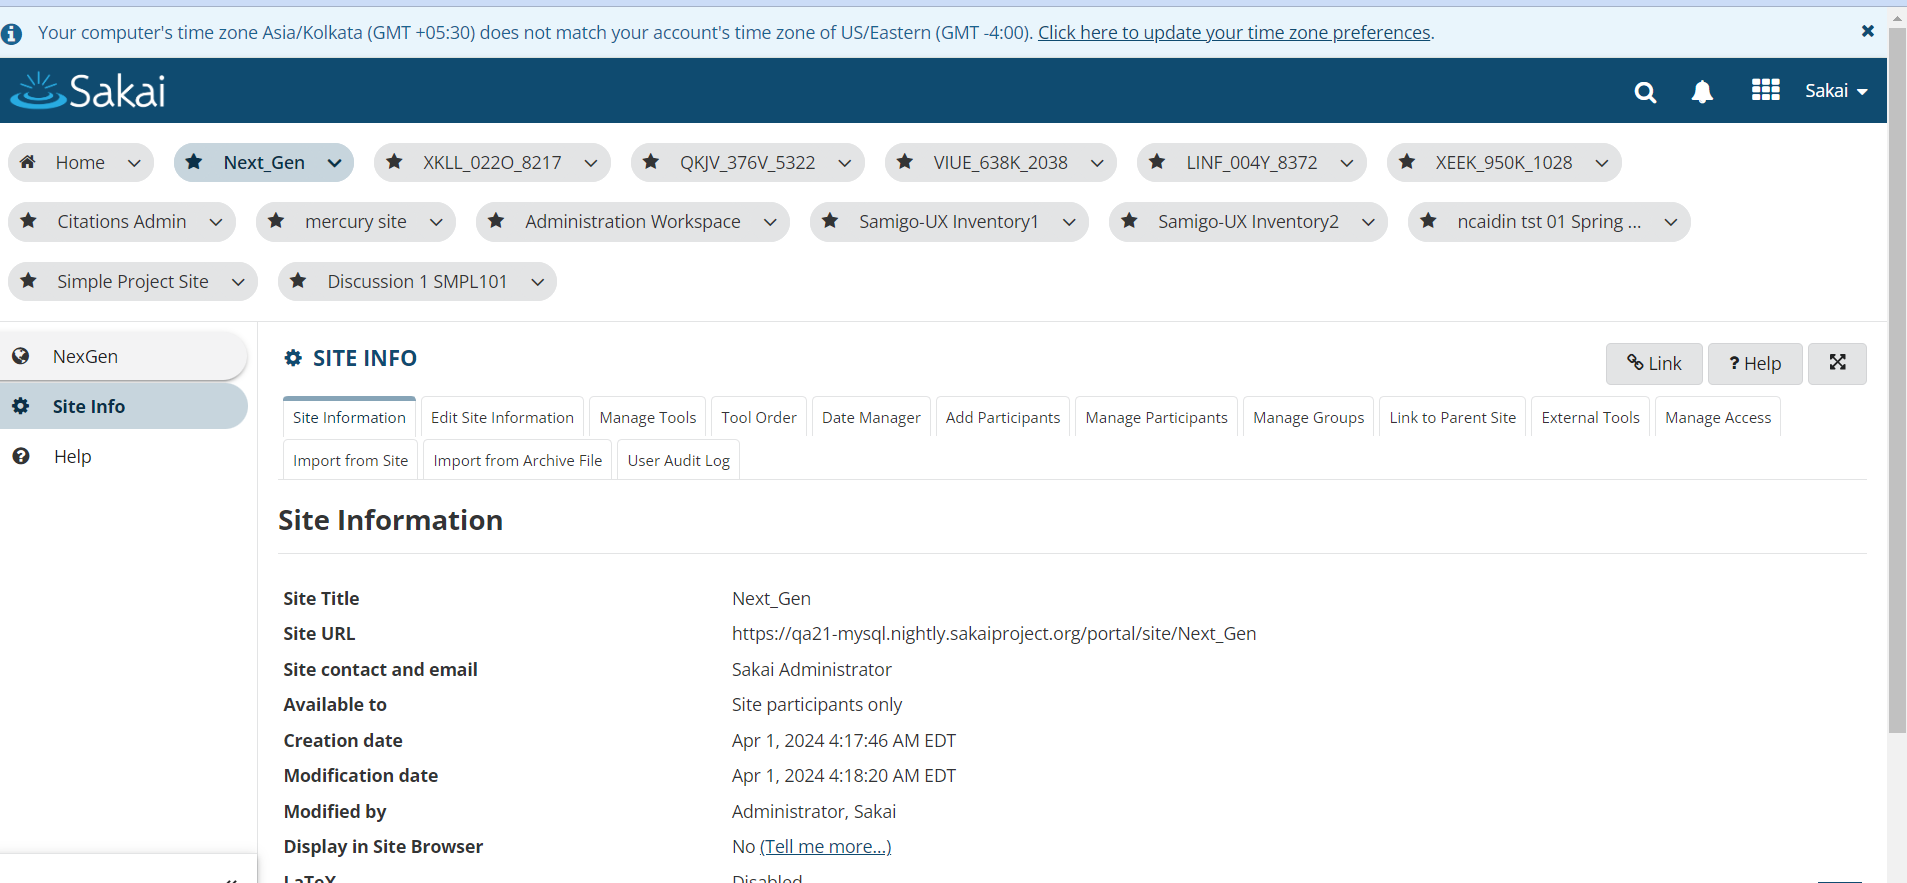
In Sakai, go to the site from which you want to launch Apporto. Example: Next Gen.
-
Click the NextGen tool in the site navigation to get the launch link.
-
This redirects to your Apporto instance and creates the user. You can now launch the desktops assigned to you.
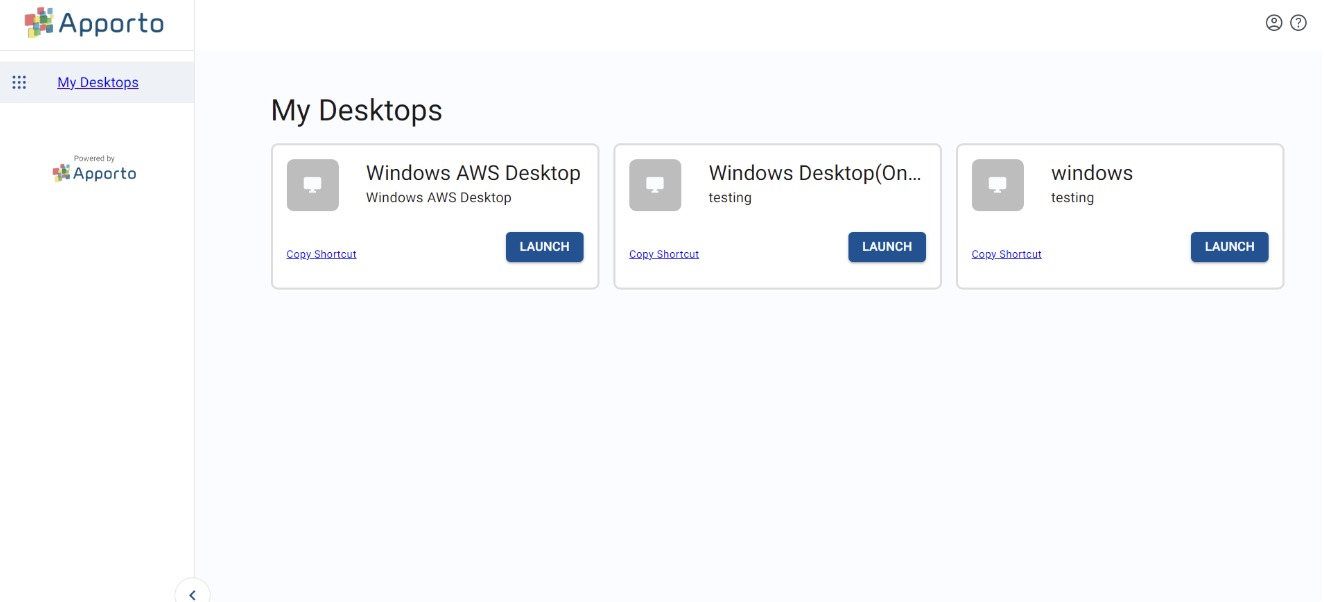
Expected result: The user is provisioned in Apporto NextGen and can launch their assigned desktops.
Deep linking to a specific desktop
-
In Administration Workspace > External Tools, click Edit for the tool.
-
In Custom Parameters (key=value on separate lines), add
nid=<desktop id>.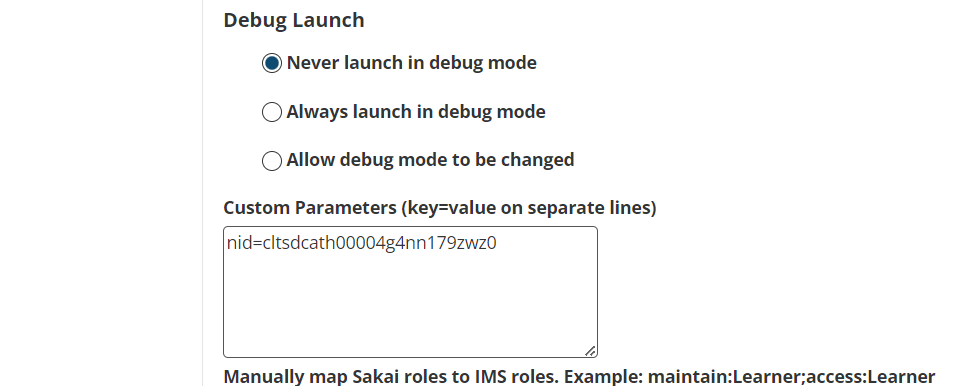
-
Save the tool.
Note: nid is the App Identifier configured in Apporto. Ask the Apporto support team for the nid of the desktop you want to deep link to.
Troubleshooting
Launch fails
-
Confirm the Client ID, LTI Base URL, Auth Login URL, and Auth Token URL in Apporto match the values shown in the Sakai tool configuration.
-
Verify the OIDC Login Initiation, Launch, and Keyset URLs registered in Sakai exactly match the Apporto environment.
-
Make sure you are not using
localhost.
Course launch does not open Apporto
-
Confirm the tool is available in the Sakai site.
-
Validate that the user has access to an assigned desktop after provisioning.
Deep linking does not open the expected desktop
-
Confirm the App Identifier in Apporto is set to
nid. -
Verify the custom parameter is
nid=<desktop id>with the correct desktop ID.