

This guide explains how to configure an ILIAS LTI 1.3 integration with Apporto NextGen and complete the first launch that provisions the user in Apporto.
Overview
The configuration requires work in two systems:
-
ILIAS to add an LTI Consumer object to a course and configure Apporto as a custom LTI 1.3 provider
-
Apporto NextGen to create the LTI configuration using the platform values ILIAS generates
Once setup is complete, users launch Apporto from the LTI Consumer object in the ILIAS course. The first launch creates the user in Apporto.
Prerequisites
-
Administrator access to the ILIAS instance
-
Administrator access to the Apporto NextGen environment
-
A publicly reachable Apporto instance URL (do not use
localhost)
Step 1: Sign in to both platforms
-
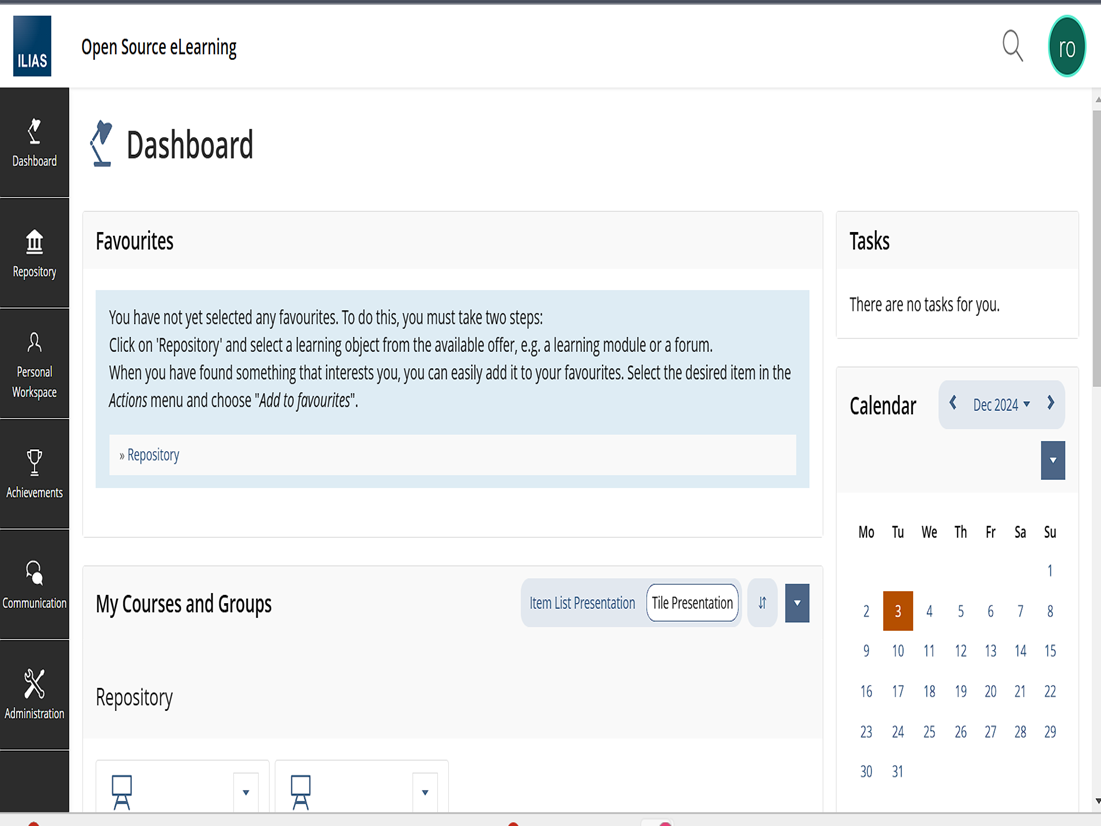
Log in to ILIAS using administrator credentials. Example: https://ilias.apporto.com/
-
Log in to Apporto NextGen as an administrator. Example:
https://{instancename}.apporto.com
Step 2: Create or open a course in ILIAS
-
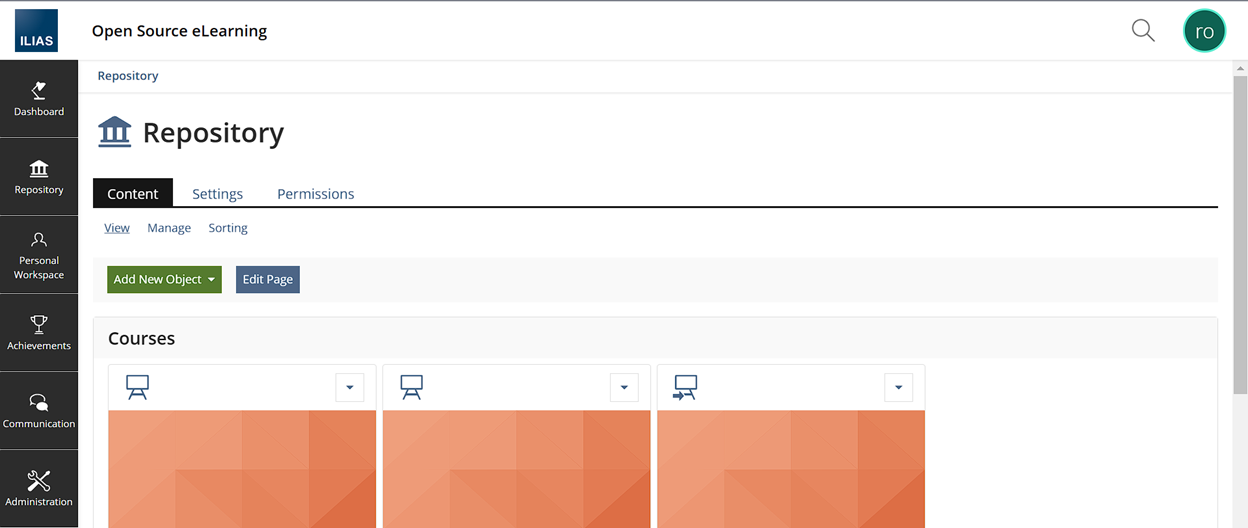
From the main dashboard, click Repository.
-
Click Add New Object and select Course.
-
Enter the course Title (and optional Description), configure visibility, availability, and access control as required, then click Save.
If you already have a course for testing (for example, Apporto LTI Himanshu Course), open it and continue with Step 3.
Step 3: Add an LTI Consumer object to the course
-
Open the course and go to its Content tab.
-
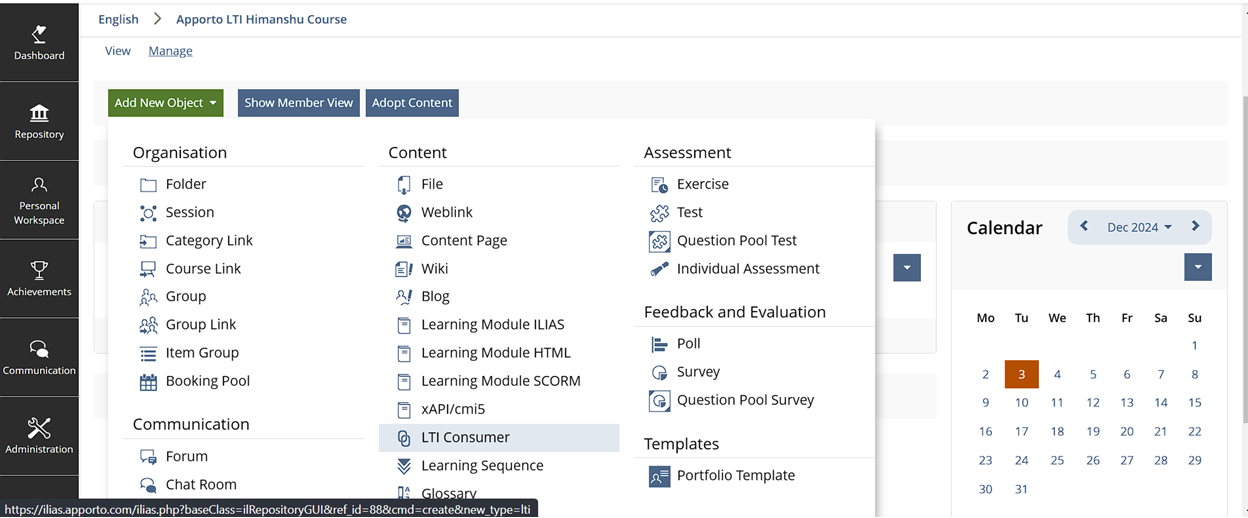
Click Add New Object and select LTI Consumer.
-
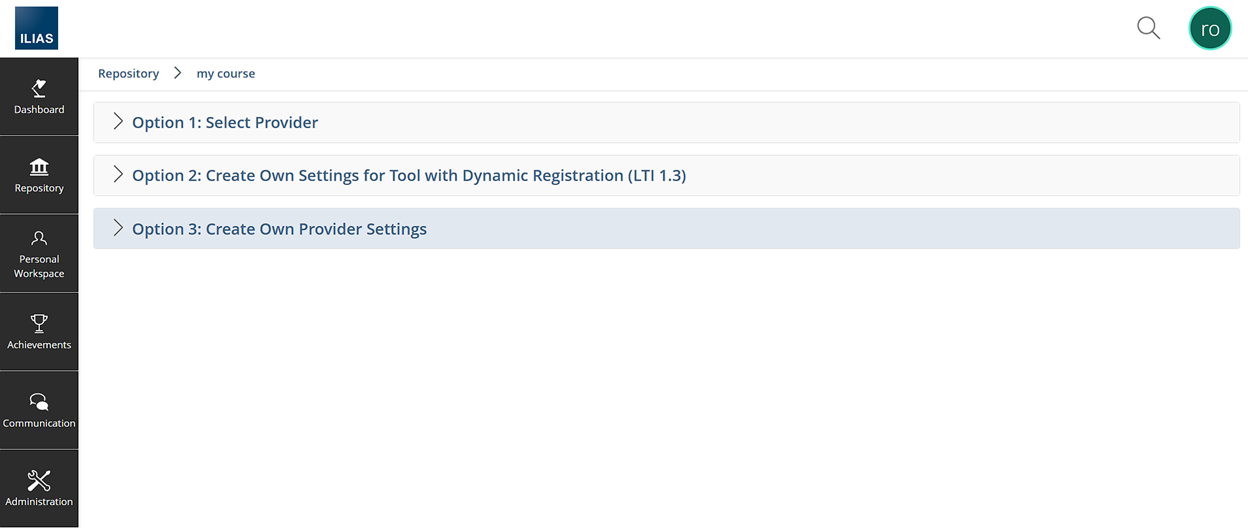
When prompted to choose a provider, select Option 3: Create Own Provider Settings. This sets up a custom LTI 1.3 integration.
Step 4: Configure the Apporto provider settings
-
Enter the basic provider information (title and description).
-
Set the authentication version to LTI 1.3 (Version 1.3).
-
Enter the provider endpoints using the values below, then click Save.
|
Field |
Value / Guidance |
|---|---|
|
Login URL |
|
|
Initiate Login URL |
|
|
Redirection URI |
|
|
Public Key Type |
URL (Json Web Token) |
|
Public Keyset URL |
|
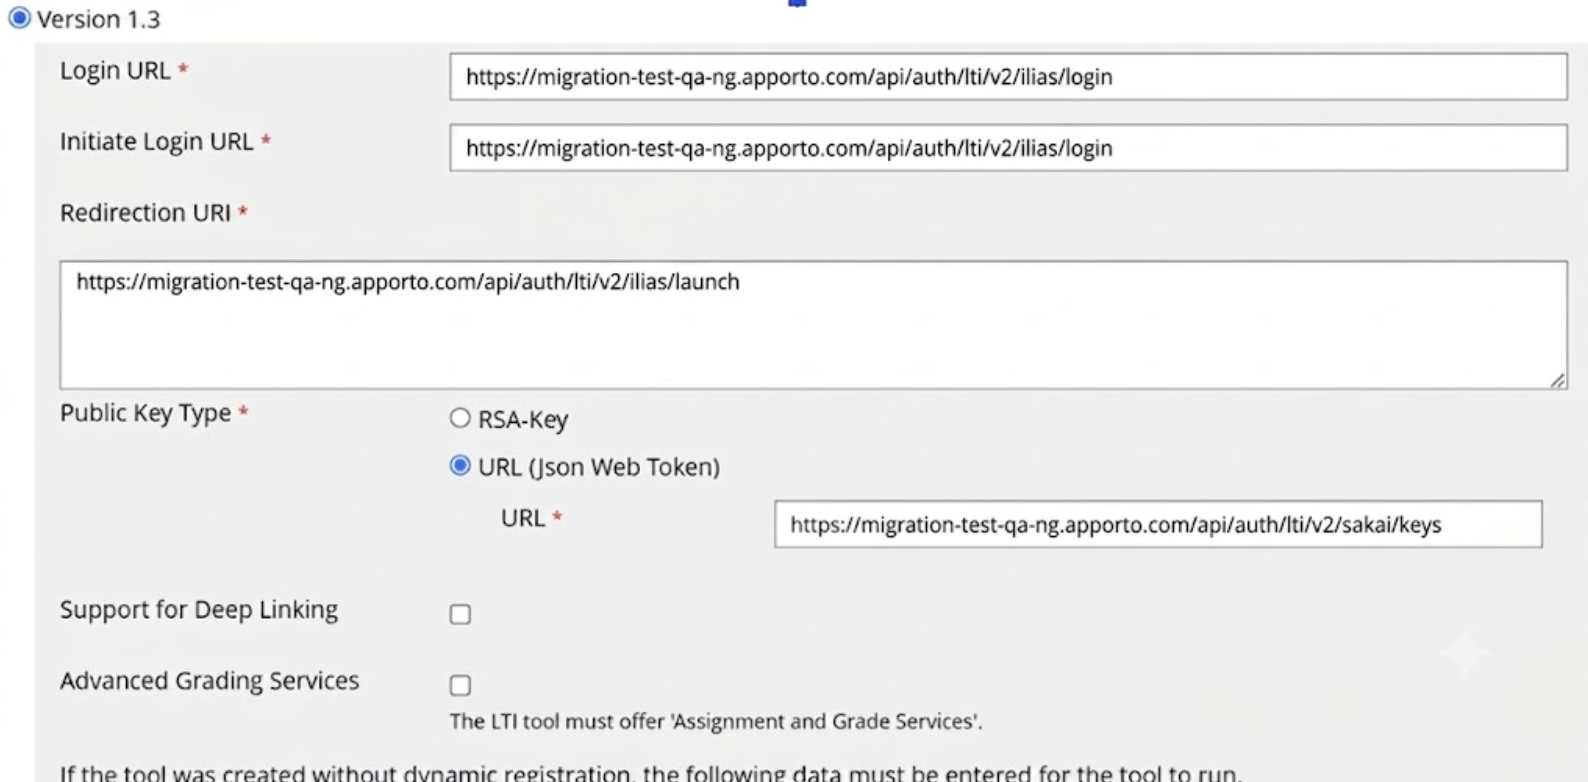
Caution: The keyset URL must end in /api/auth/lti/v2/ilias/keys. The example screenshot shows a /sakai/keys URL; do not copy that value.
Step 5: Copy the ILIAS platform values
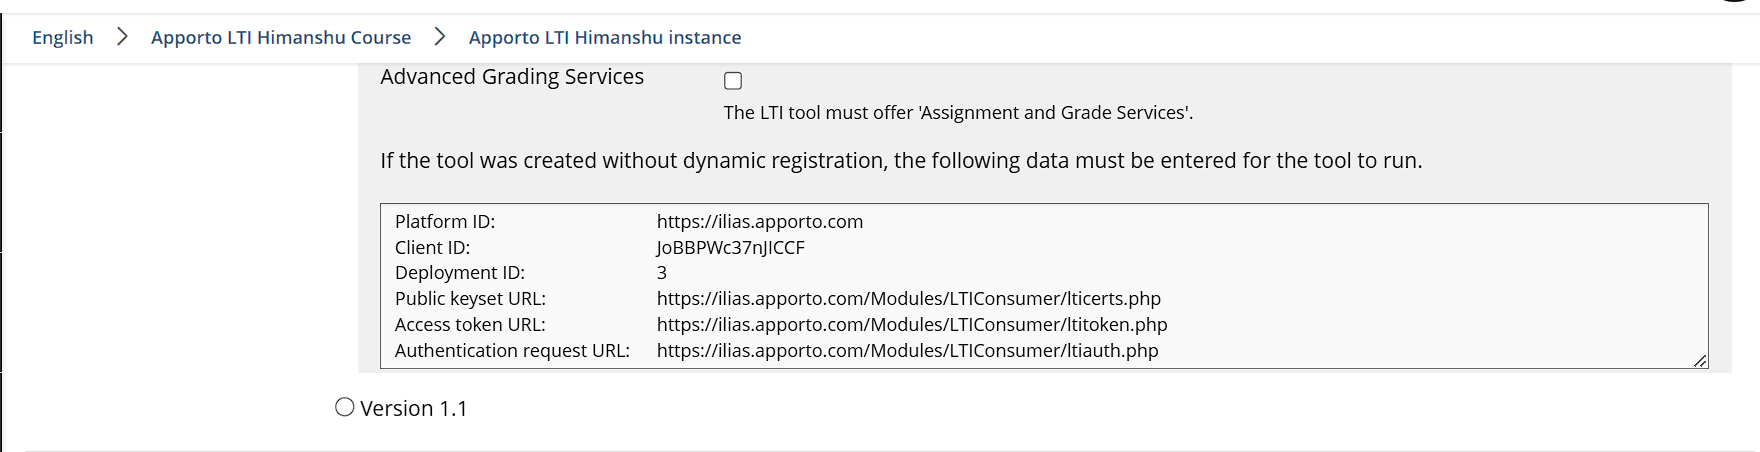
After saving, open the LTI provider settings. ILIAS shows the values the tool needs for the final integration. Copy them for Step 6.

|
Field |
Value / Guidance |
|---|---|
|
Platform ID |
Used as the Apporto LTI Base URL.
|
|
Client ID |
Used as the Apporto Client ID. |
|
Authentication request URL |
Used as the Apporto Auth Login URL.
|
|
Access token URL |
Used as the Apporto Auth Token URL.
|
Step 6: Create the LTI configuration in Apporto NextGen
-
In NextGen, go to
{Base URL}/system-config. -
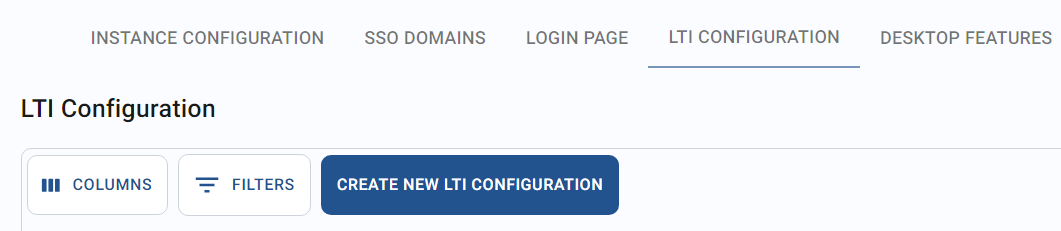
Select the LTI CONFIGURATION tab.
-
Click Create New LTI Configuration.
-
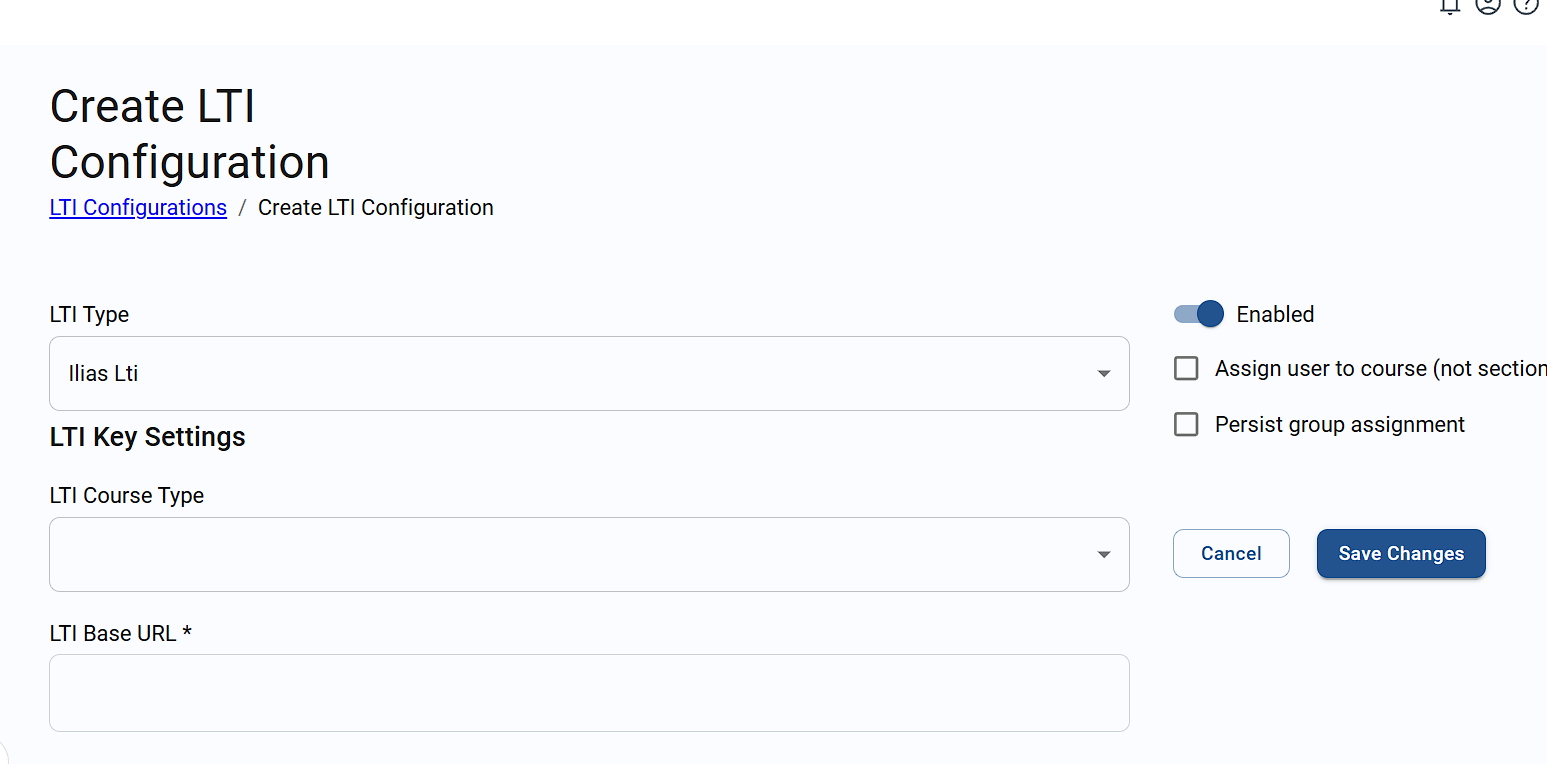
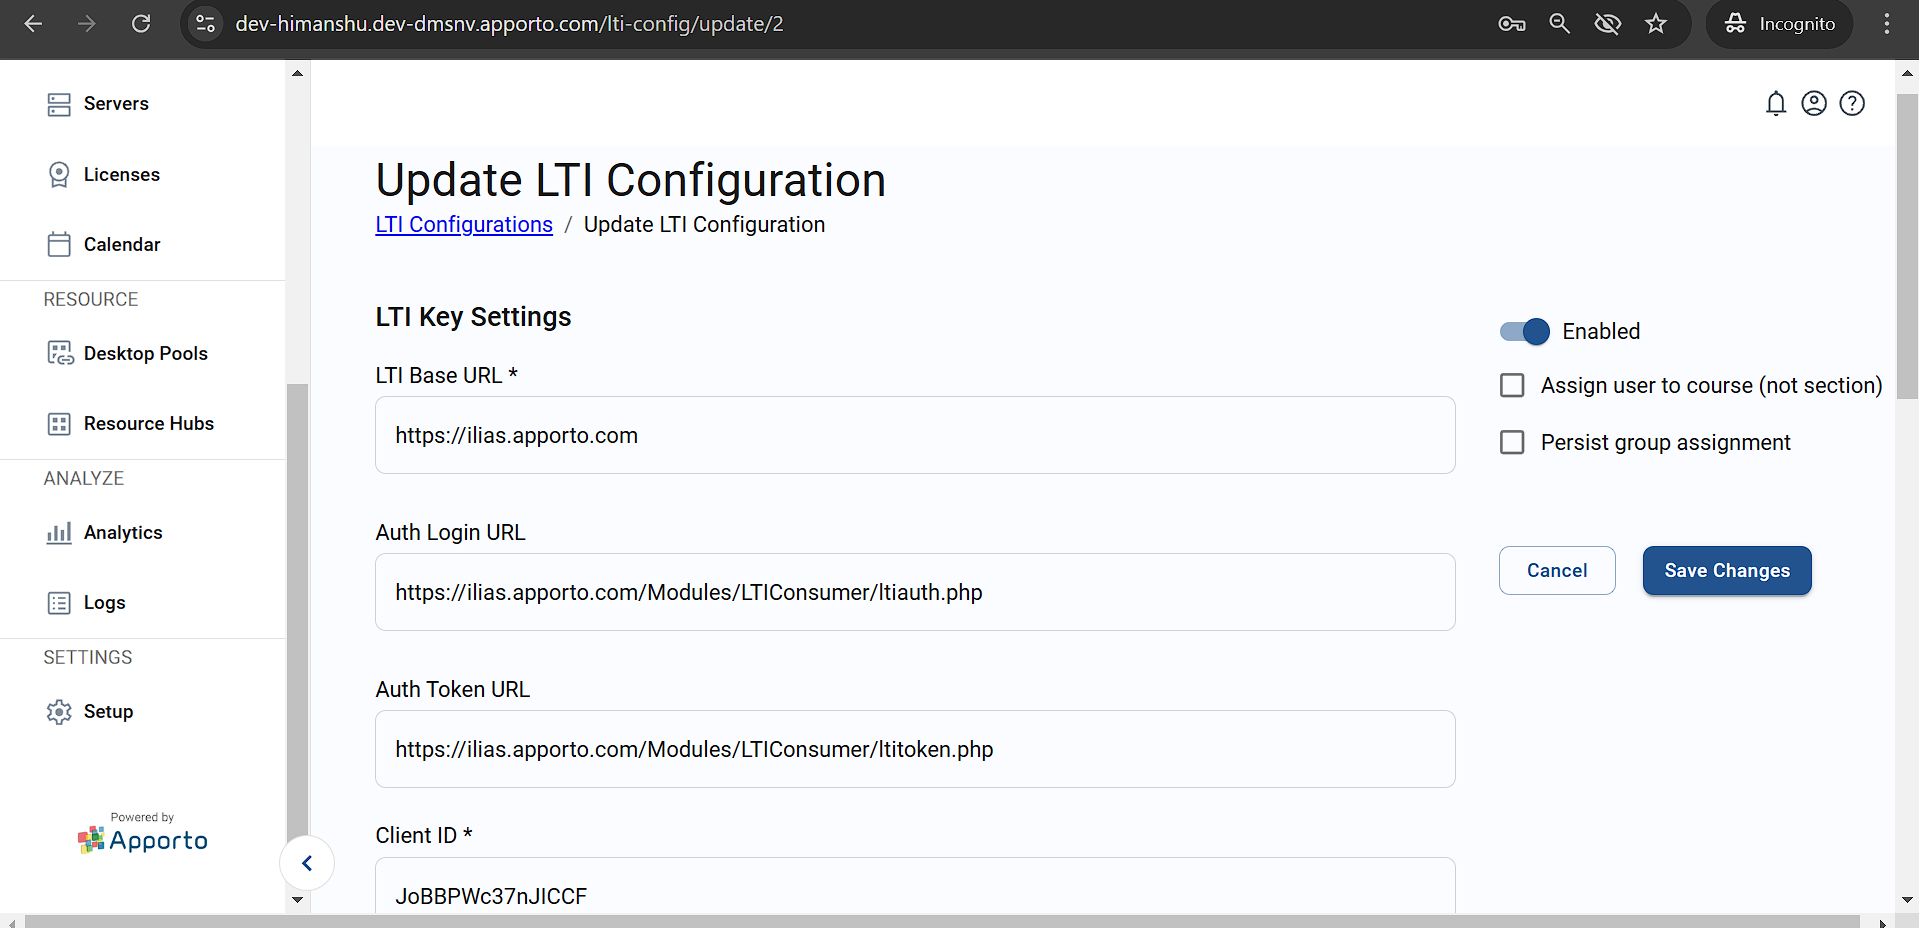
Complete the LTI configuration form using the values below.
|
Field |
Value / Guidance |
|---|---|
|
LTI Type |
ILIAS LTI |
|
LTI Course Type |
Set as per need:
|
|
LTI Base URL |
Platform ID from Step 5.
|
|
Auth Login URL |
Authentication request URL from Step 5.
|
|
Auth Token URL |
Access token URL from Step 5.
|
|
Client ID |
Client ID from Step 5. |
|
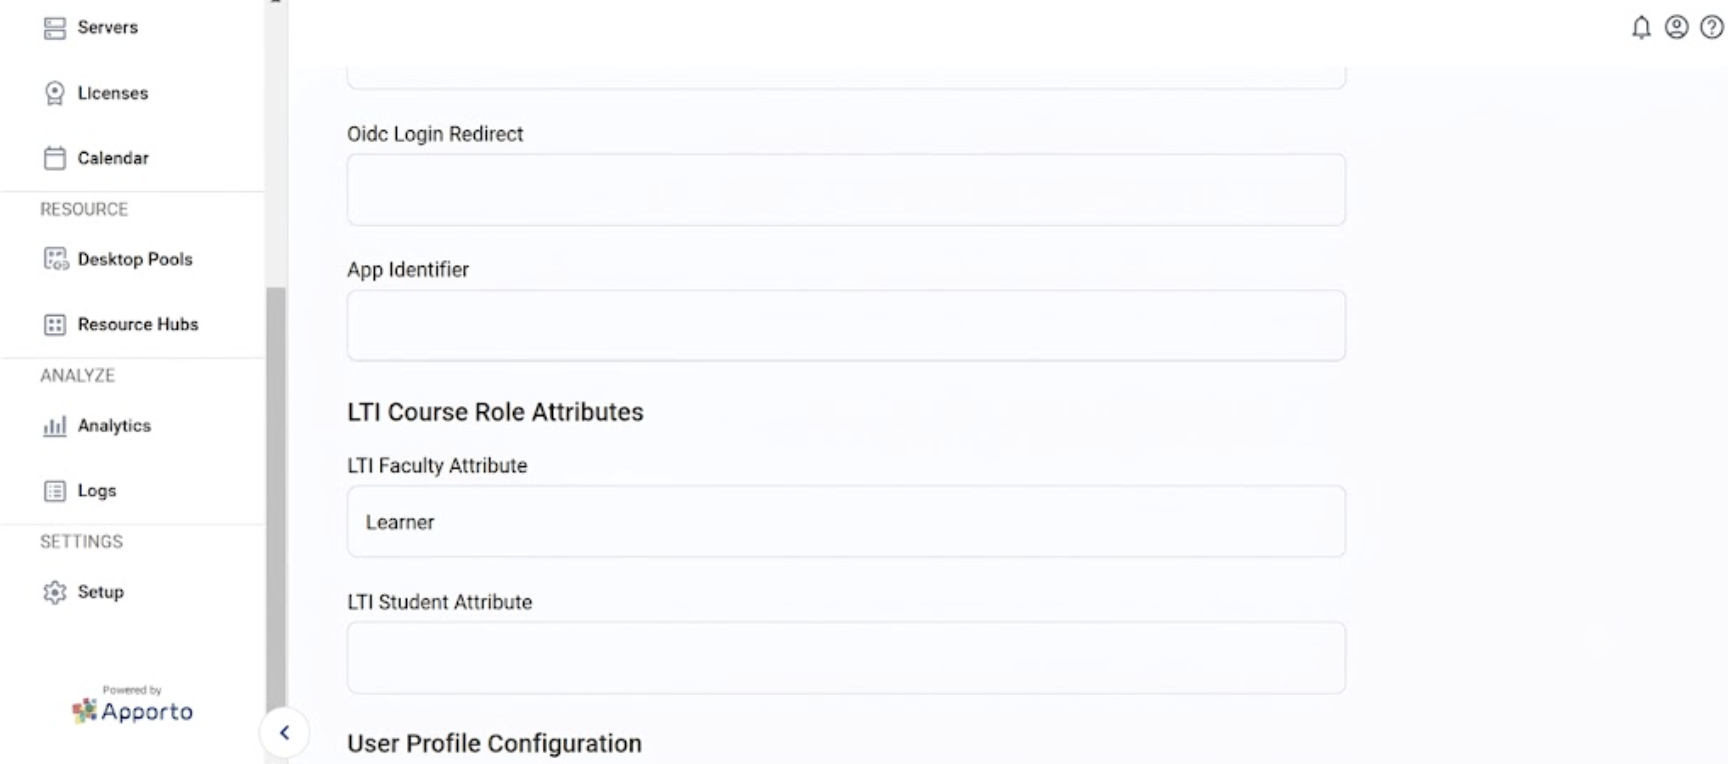
OIDC Login Redirect |
Leave blank. The field is optional and is not used for ILIAS v2 configurations. |
|
App Identifier |
|
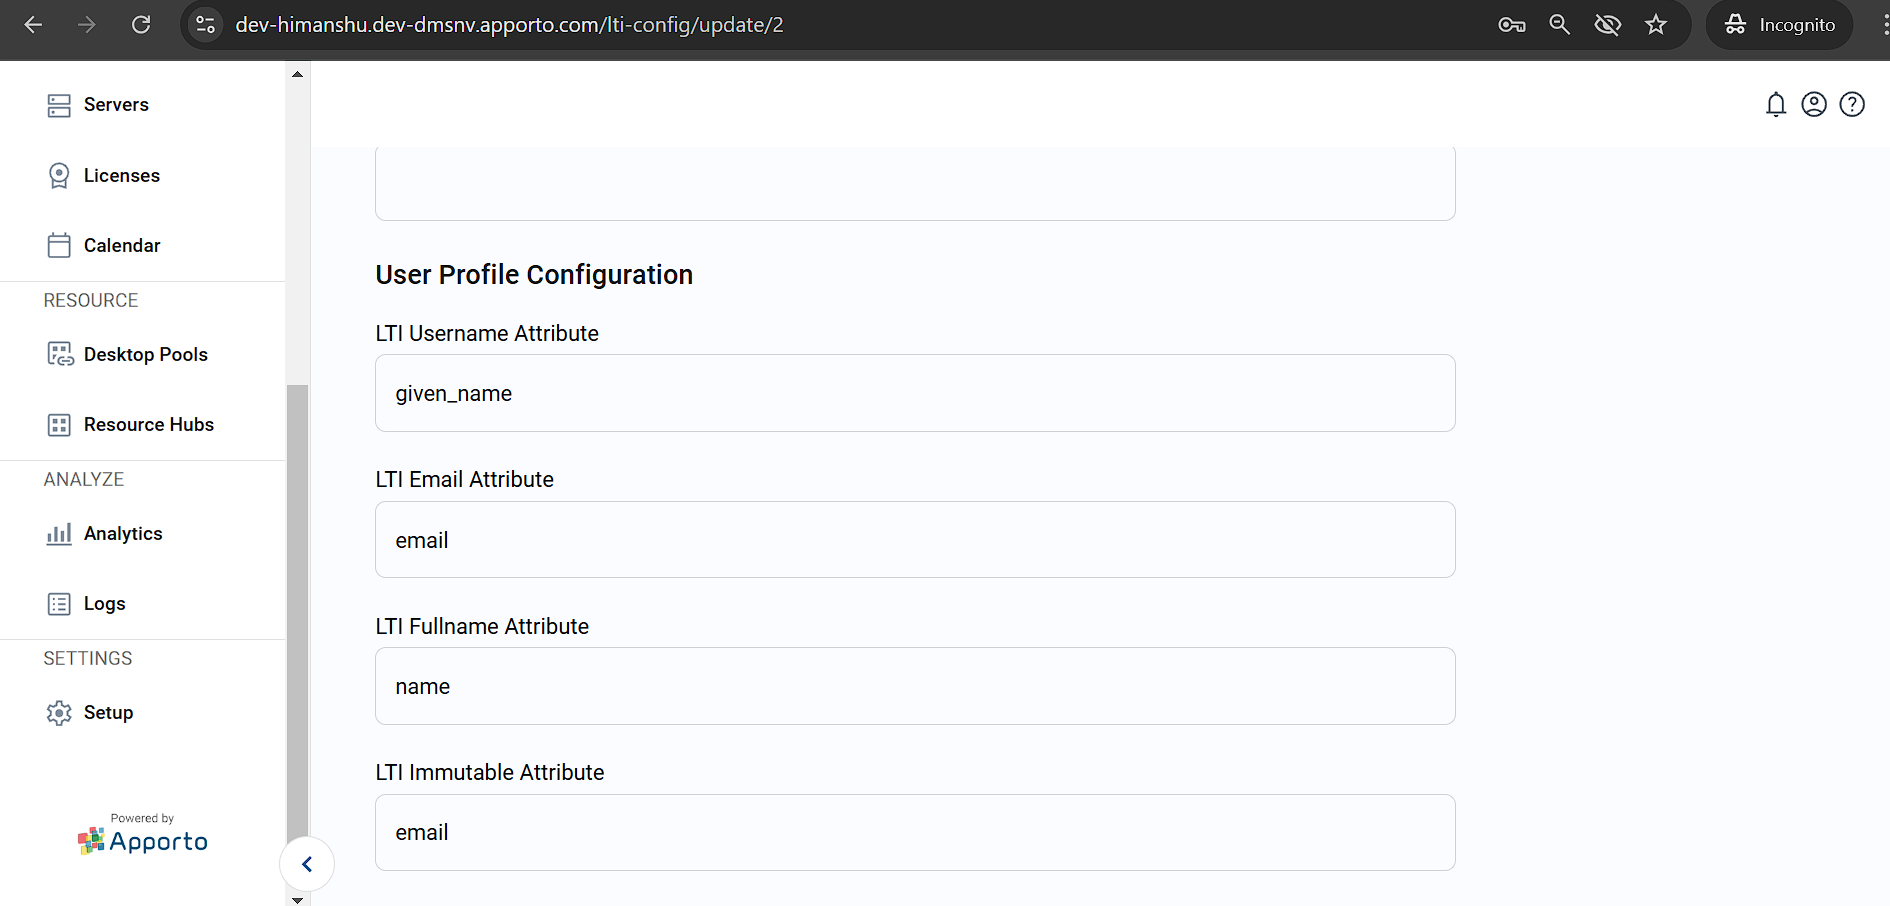
Example of a completed ILIAS LTI configuration, including the LTI Course Role Attributes and User Profile Configuration sections:
Caution: Ensure all URLs exactly match the Apporto and ILIAS environments being used. Do not use localhost.
Step 7: Save the configuration
-
Click Save Changes.
-
After successful submission, NextGen redirects to
{Base URL}/system-config?tabIndex=5, where the new ILIAS configuration is listed.
Expected result: The ILIAS LTI configuration is saved and ready to be used from ILIAS courses.
Step 8: Launch Apporto from ILIAS
-
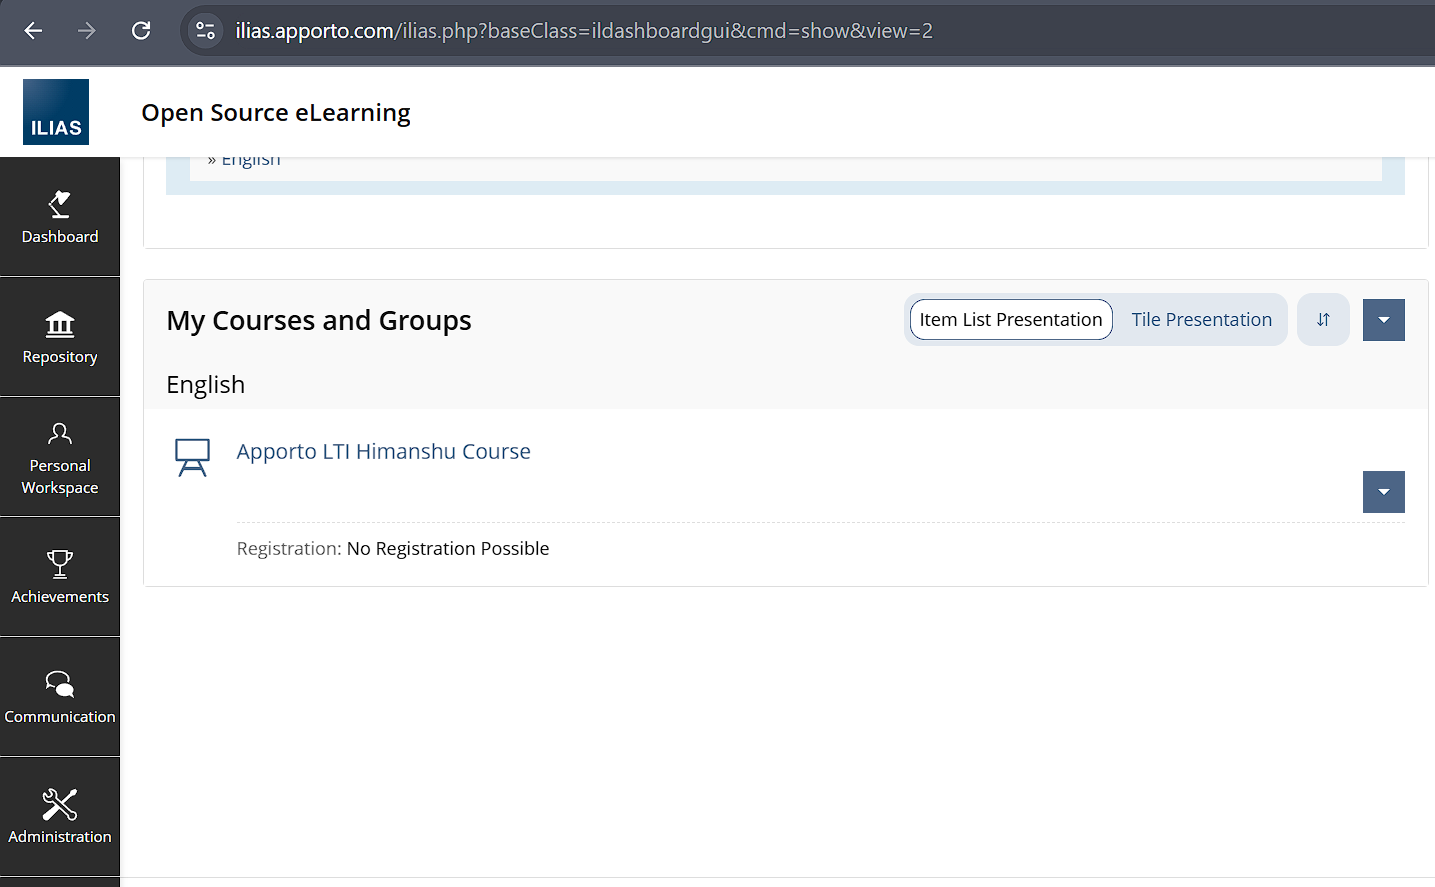
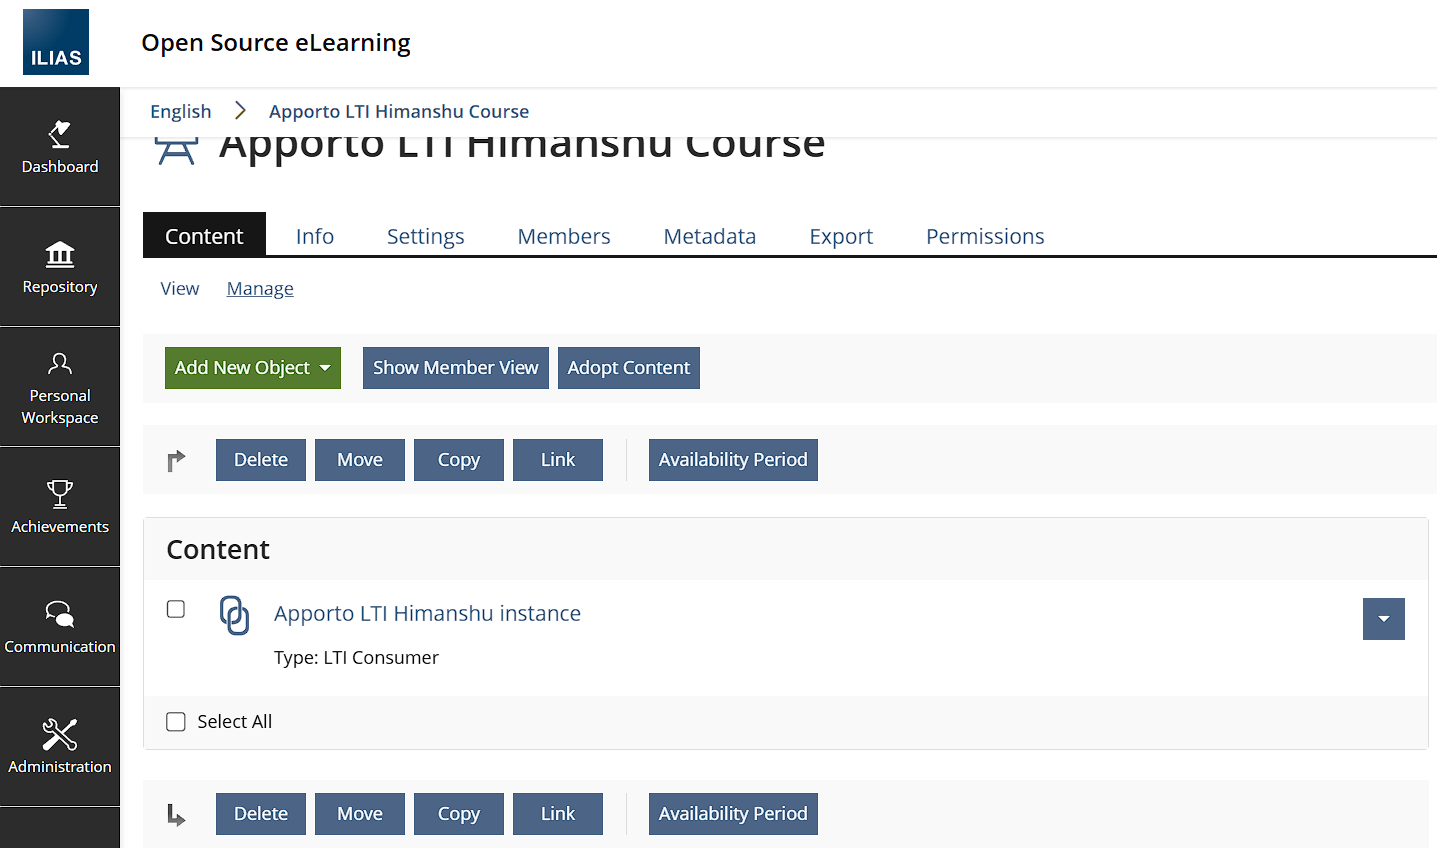
In ILIAS, open the course from which you want to launch Apporto. Example: Apporto LTI Himanshu Course.
-
Open the LTI Consumer object in the course content.
-
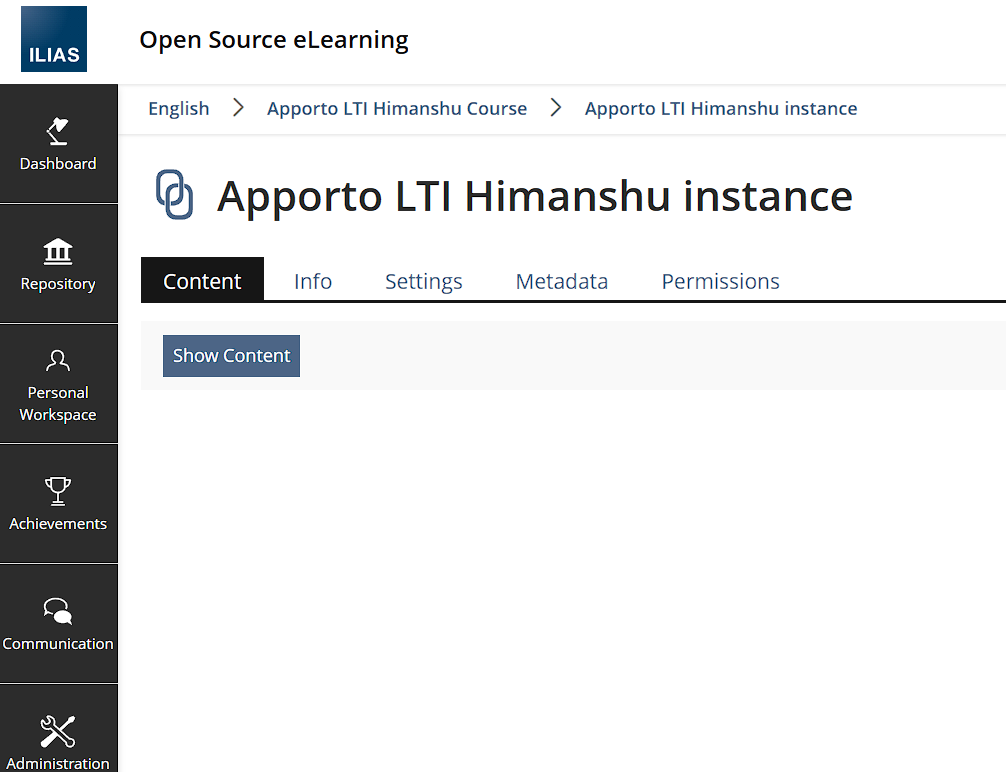
Click Show Content to get the launch link.
-
This redirects to your Apporto instance and creates the user. You can now launch the desktops assigned to you.
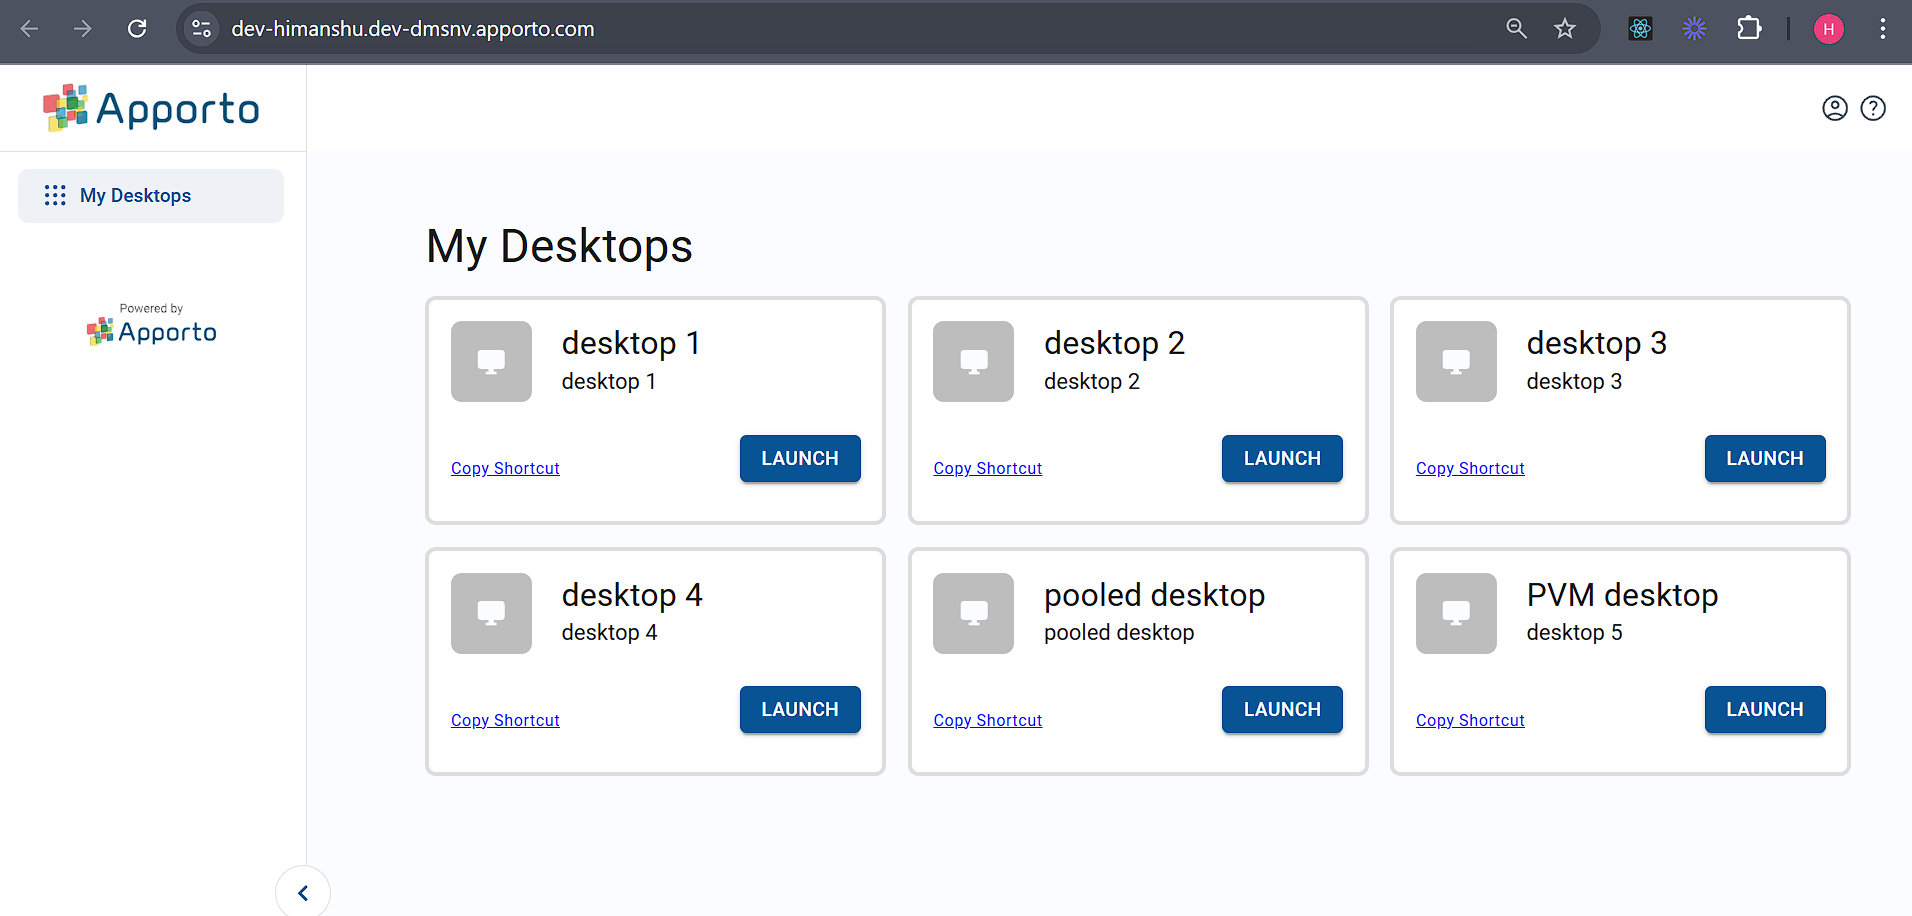
Expected result: The user is provisioned in Apporto NextGen and can launch their assigned desktops.
Troubleshooting
Launch fails
-
Confirm the LTI Base URL, Auth Login URL, Auth Token URL, and Client ID in Apporto match the values shown in the ILIAS provider settings.
-
Verify the Login, Initiate Login, Redirection, and Keyset URLs in ILIAS point to
/api/auth/lti/v2/ilias/...on the correct Apporto instance. -
Make sure the authentication version in ILIAS is LTI 1.3.
Course launch does not open Apporto
-
Confirm the LTI Consumer object is online and visible to course members.
-
Validate that the user has access to an assigned desktop after provisioning.
Deep linking does not open the expected desktop
-
Confirm the App Identifier in Apporto is set to
nid. -
Verify that the correct desktop ID is being passed in the custom fields.