

This guide explains how to configure a Canvas LTI integration with Apporto NextGen and complete the authorization flow required for course launch and user provisioning.
Overview
The configuration requires work in two systems:
-
Apporto NextGen to create the LTI configuration
-
Canvas to generate the Developer Key, Client ID, API Key, and API Client Secret used for authentication and API access
Once setup is complete, the integration can be authorized, added to a Canvas course, and used to launch Apporto from within Canvas.
Prerequisites
-
Administrator access to the Canvas instance
-
Administrator access to the Apporto Portal / NextGen environment
-
An Apporto instance URL
-
A Canvas course available for launch testing
Step 1: Sign in to both platforms
-
Log in to Canvas using administrator credentials. Example: https://apporto.instructure.com
-
Log in to the Apporto Portal as an administrator. Example: https://{instancename}.apporto.com
Step 2: Create the LTI configuration in Apporto NextGen
-
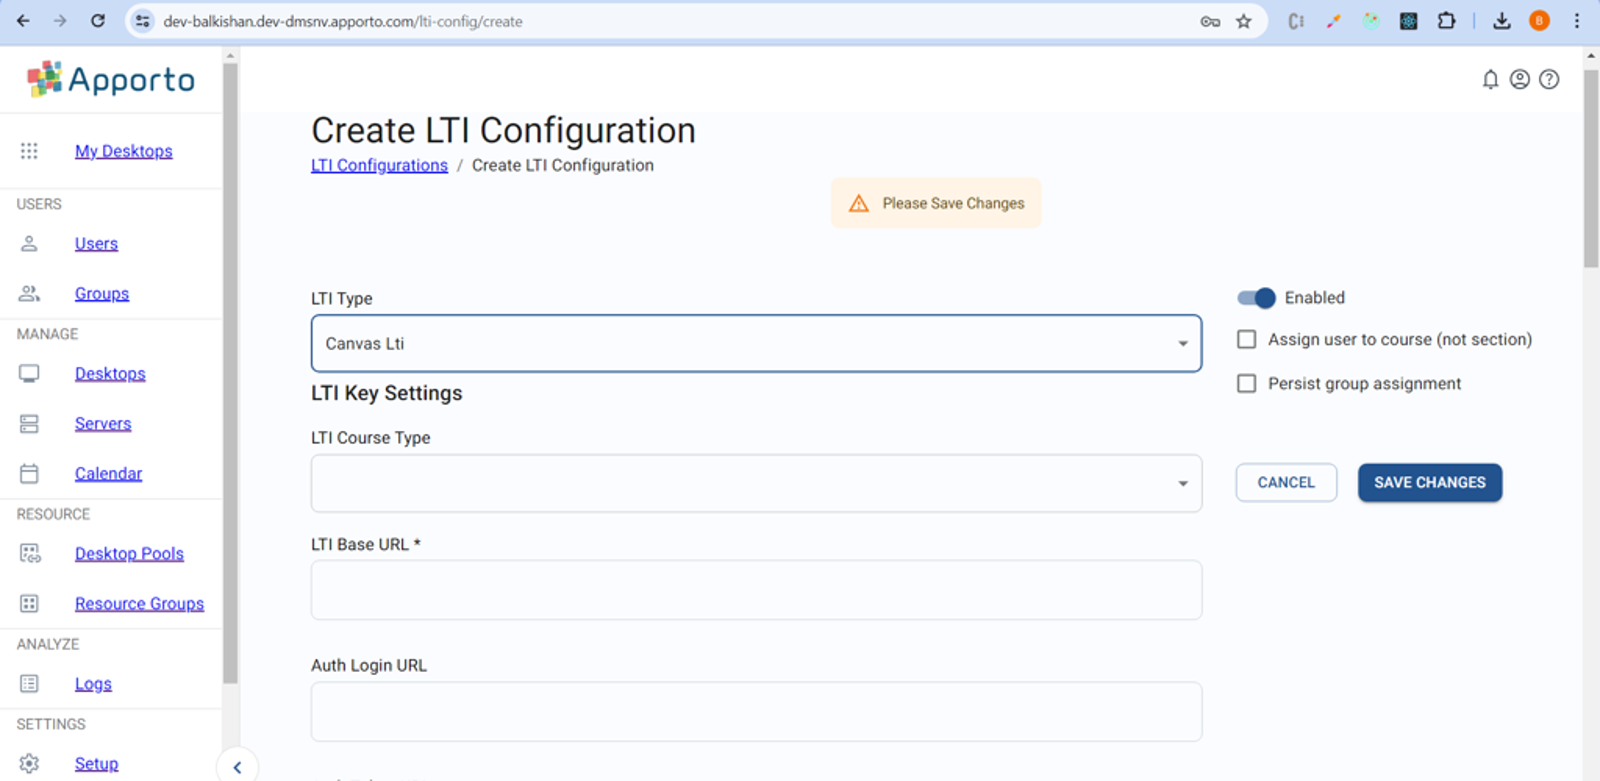
In NextGen, go to Setup > LTI Configuration.
-
Select Create New LTI Configuration.
-
Complete the LTI configuration form using the values below.
|
Field |
Value / Guidance |
|---|---|
|
LTI Type |
Canvas |
|
LTI Course Type |
Choose how Apporto maps your LMS course structure:
|
|
LTI Base URL |
Example: https://apporto.instructure.com/ |
|
Auth Login URL |
Example: https://apporto.instructure.com/api/lti/authorize_redirect |
|
Auth Token URL |
Keep this page open. You will need to return to it after generating the required keys in Canvas.
Step 3: Generate credentials in Canvas
-
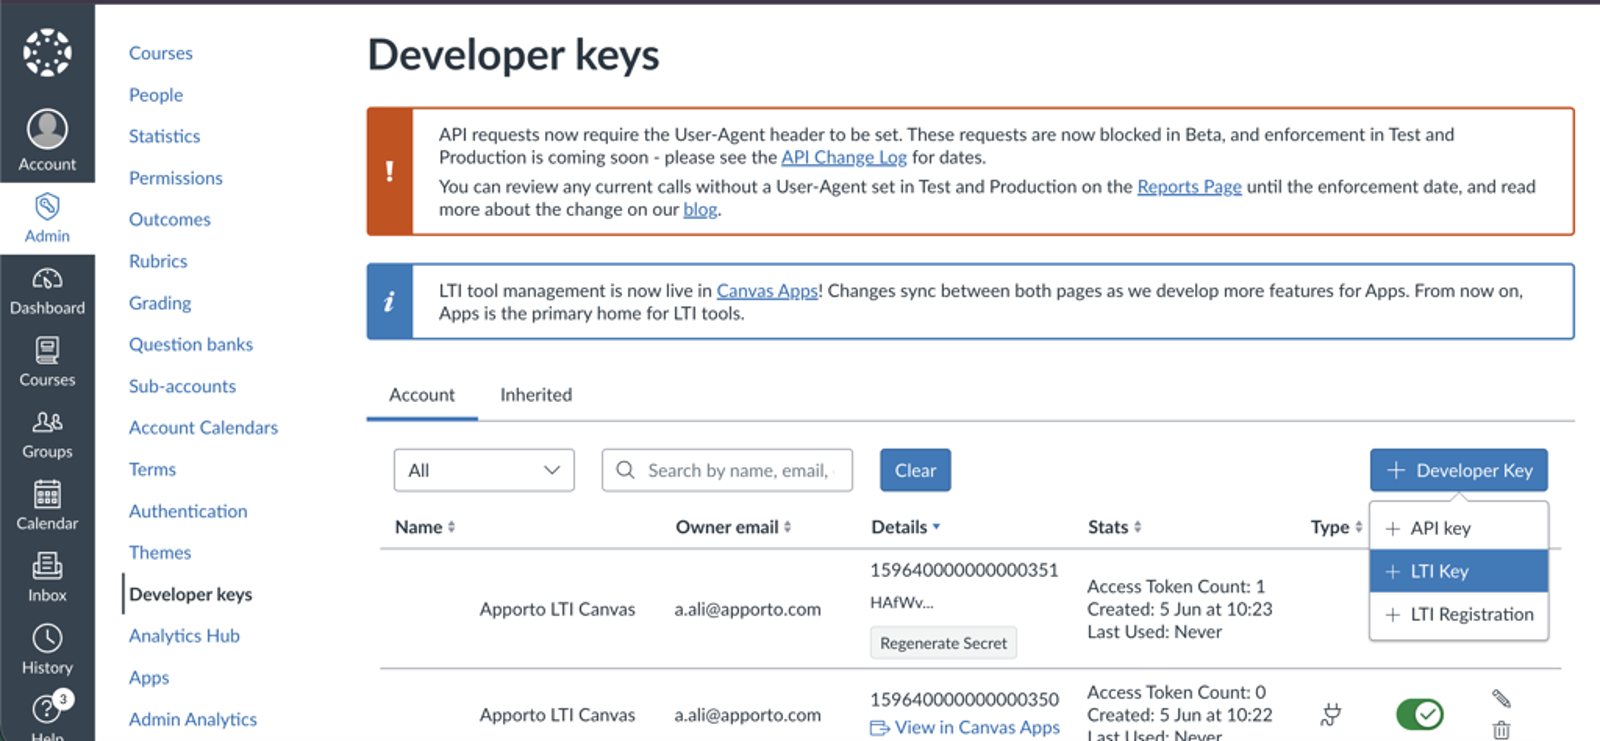
In Canvas, go to Admin.
-
Select Developer Keys.
-
From the + Developer Key menu, select LTI Key.
-
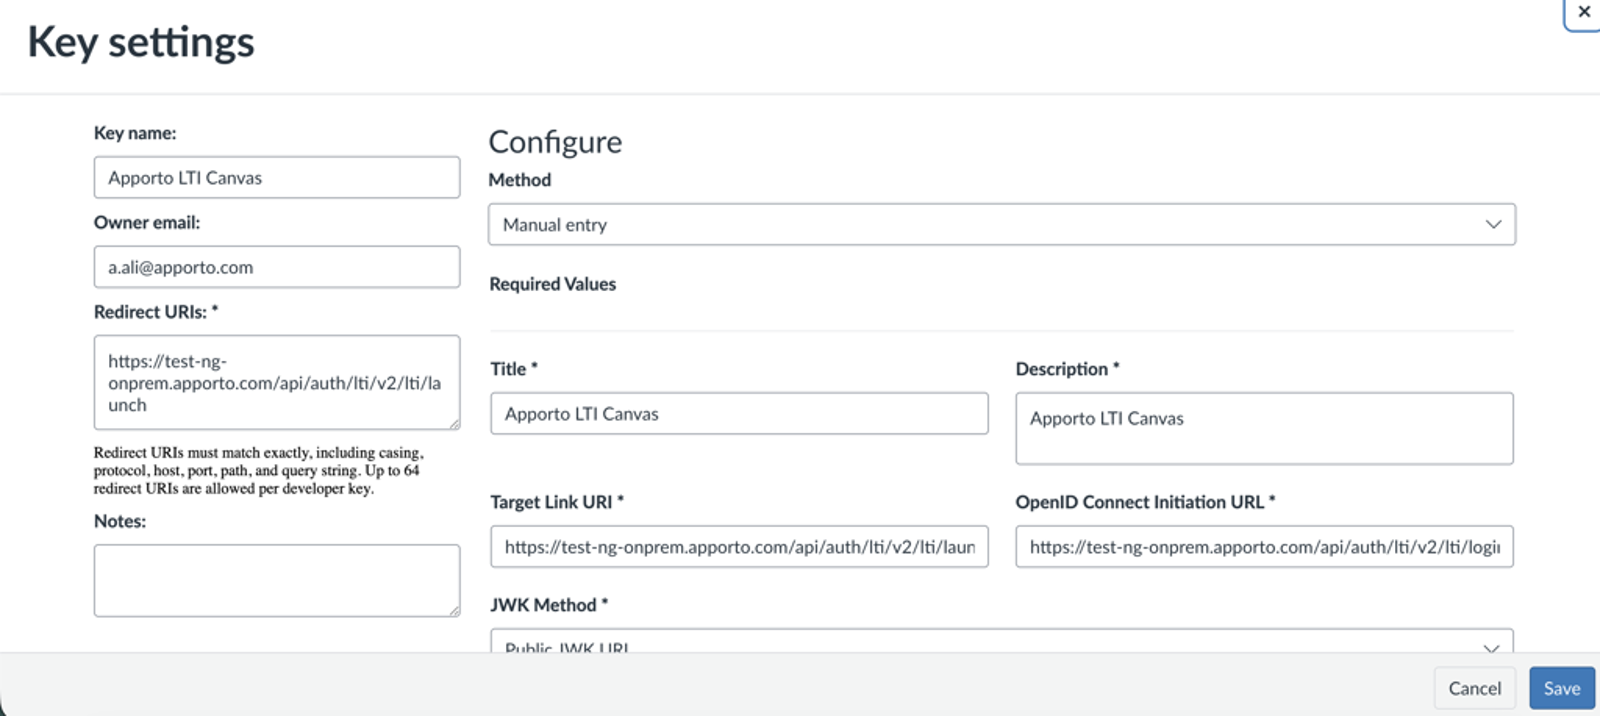
In the LTI 1.3 Configuration Field,
|
Field |
Value / Guidance |
|---|---|
|
Key Name: |
Example: Apporto LTI Canvas |
|
Owner Email |
Set this based on your institution or deployment requirement. |
|
Redirect URIs |
Example: https://{instancename}.apporto.com/api/auth/lti/v2/lti/launch |
|
Notes: |
|
|
Method: |
Manual entry |
|
Target Link URI |
Example: https://{instancename}.apporto.com/api/auth/lti/v2/lti/launch |
|
Title |
Example: Apporto LTI Canvas |
|
Description |
Example: Apporto LTI Canvas |
|
OpenID Connect Initiation URL |
Example: https://{instancename}.apporto.com/api/auth/lti/v2/lti/login |
|
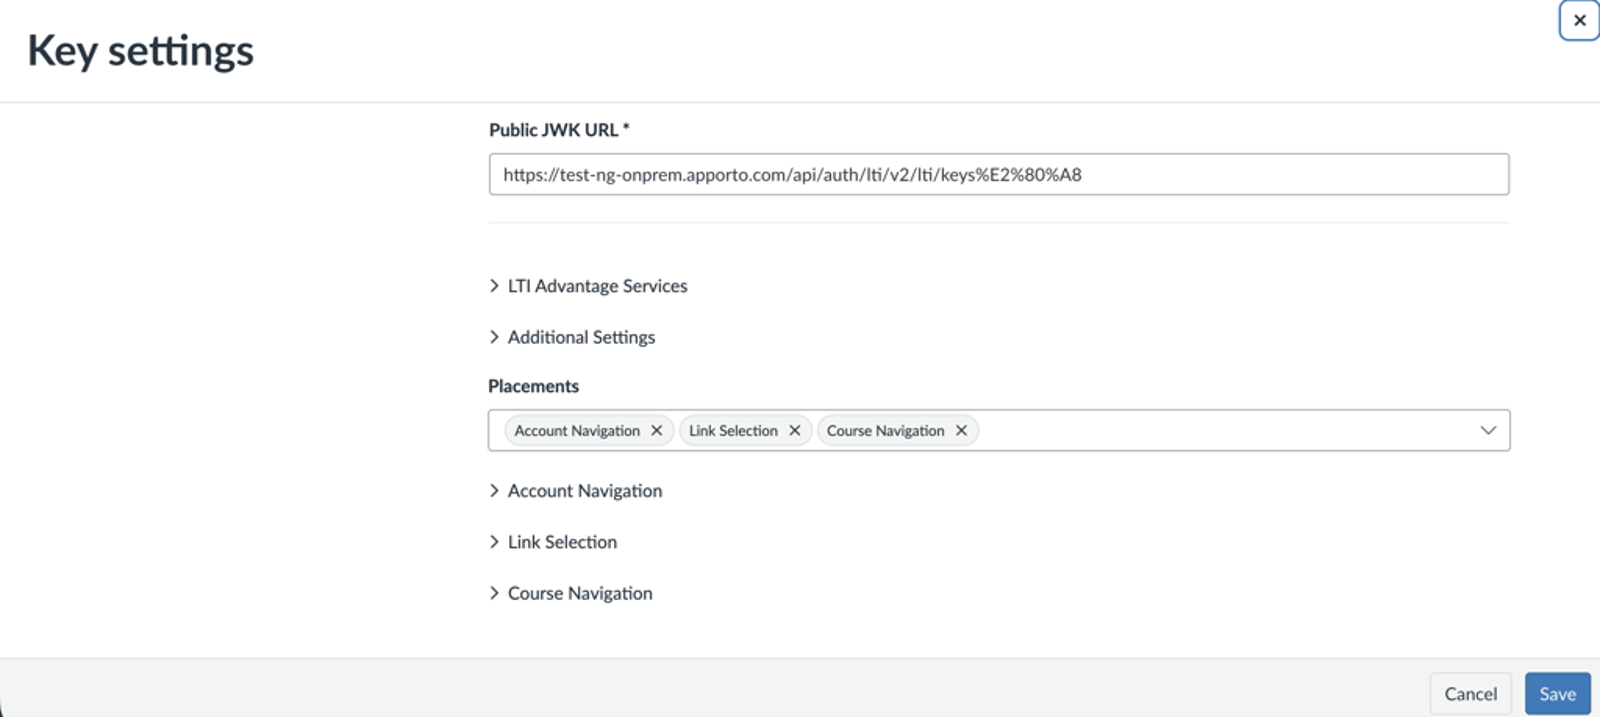
JWK Method |
Select the Public JWK URL. |
|
Public JWK URL |
Example: https://{instancename}.apporto.com/api/auth/lti/v2/lti/keys%E2%80%A8 |
-
Recommended Placements:
-
Link Selection (Allows the tool to be launched from the Rich Content Editor, assignment configuration, or other Canvas areas where users can select external tools to insert content or resources.)
-
Course Navigation (Adds the LTI tool as a navigation item in the Course menu (alongside Modules, Assignments, Grades, etc.) for every course where it is enabled.)
-
Account Navigation (Adds the LTI tool as a navigation item in the Account menu. Only Canvas administrators (or account-level admins) will typically see it. This is used for account-wide administration or configuration pages.)
-
-
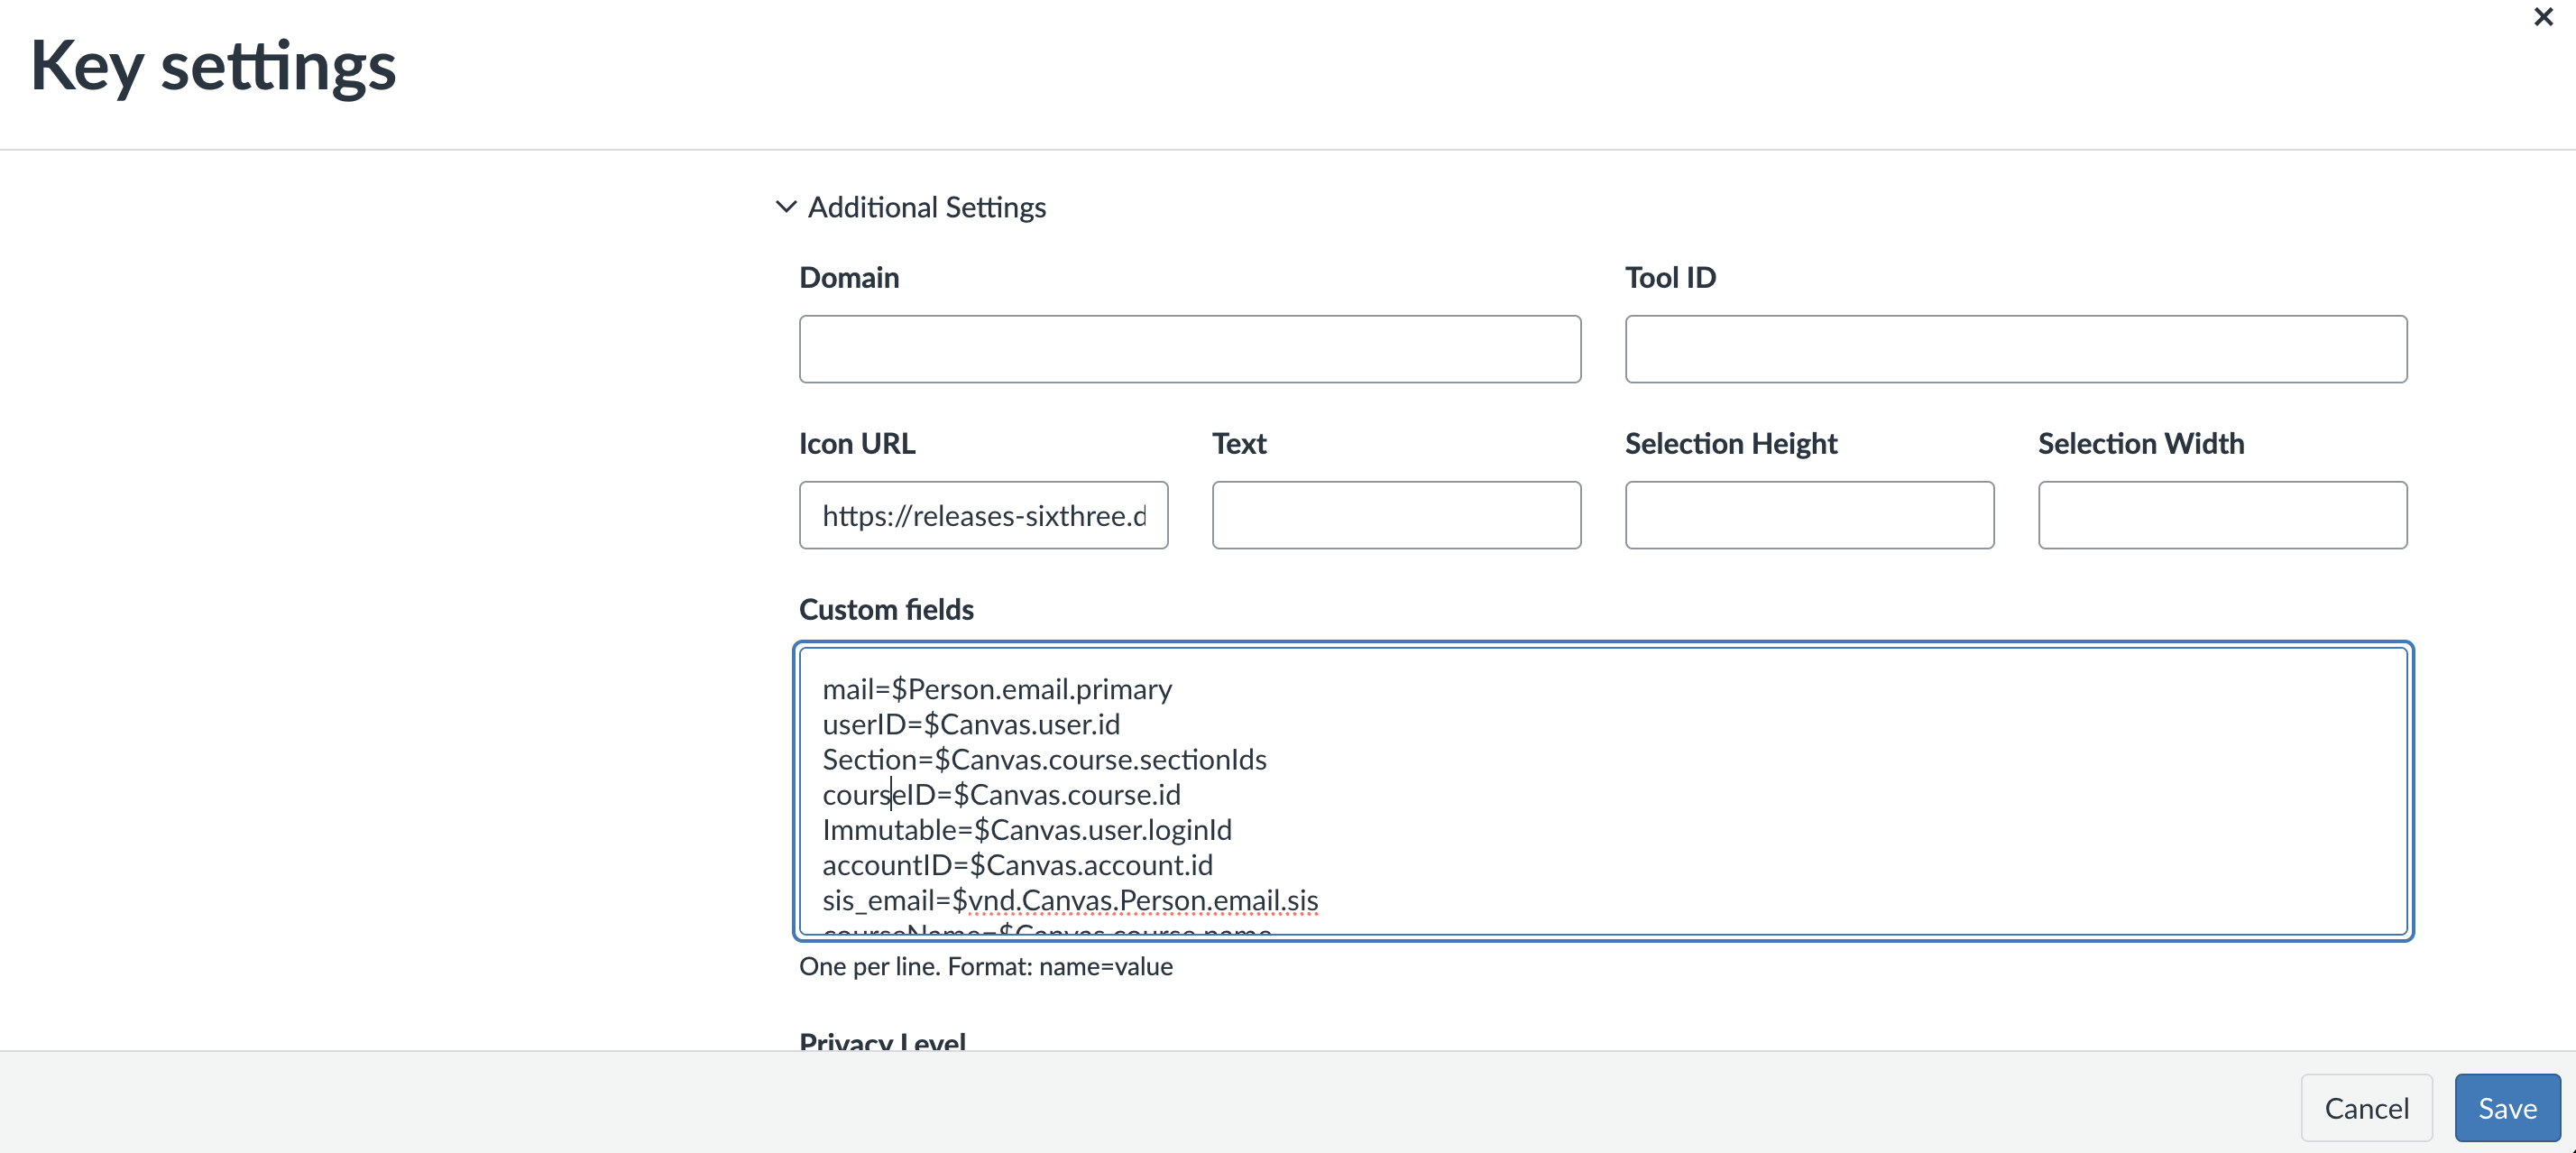
To add the custom fields, click on Additional Settings.
|
Field |
Value / Guidance |
|---|---|
|
Icon URL (Optional) |
In the Icon URL field, add the URL of the icon you want to display.
|
|
Custom fields |
|
-
Create the LTI key to generate the Client ID.
-
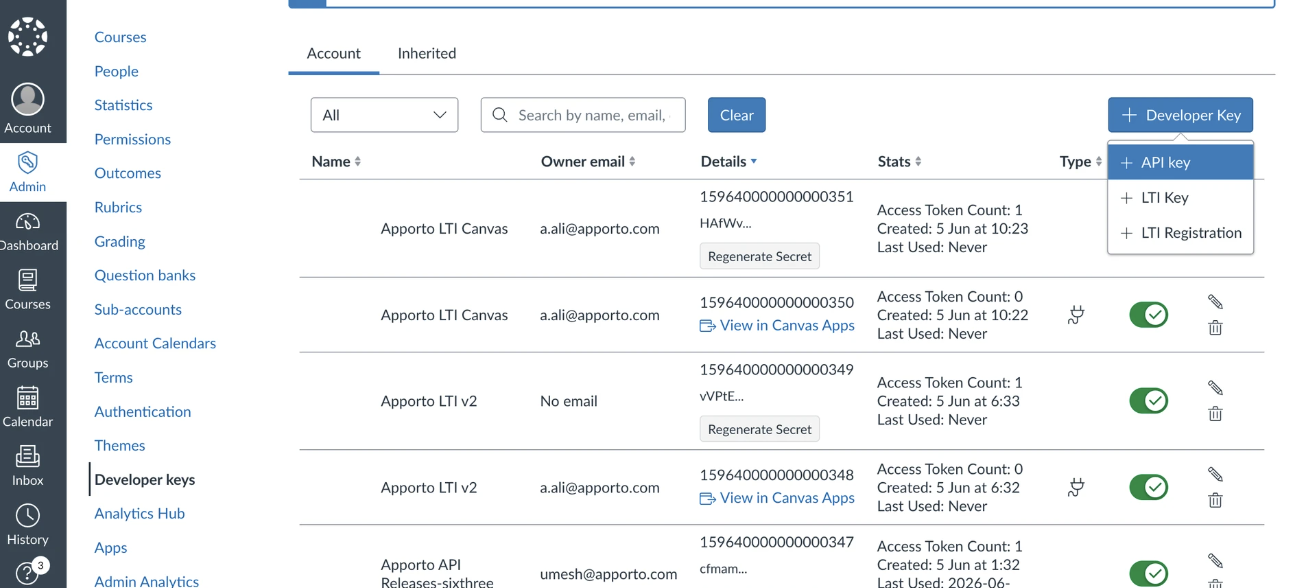
After the Client ID is created, return to + Developer Key and select API Key.
-
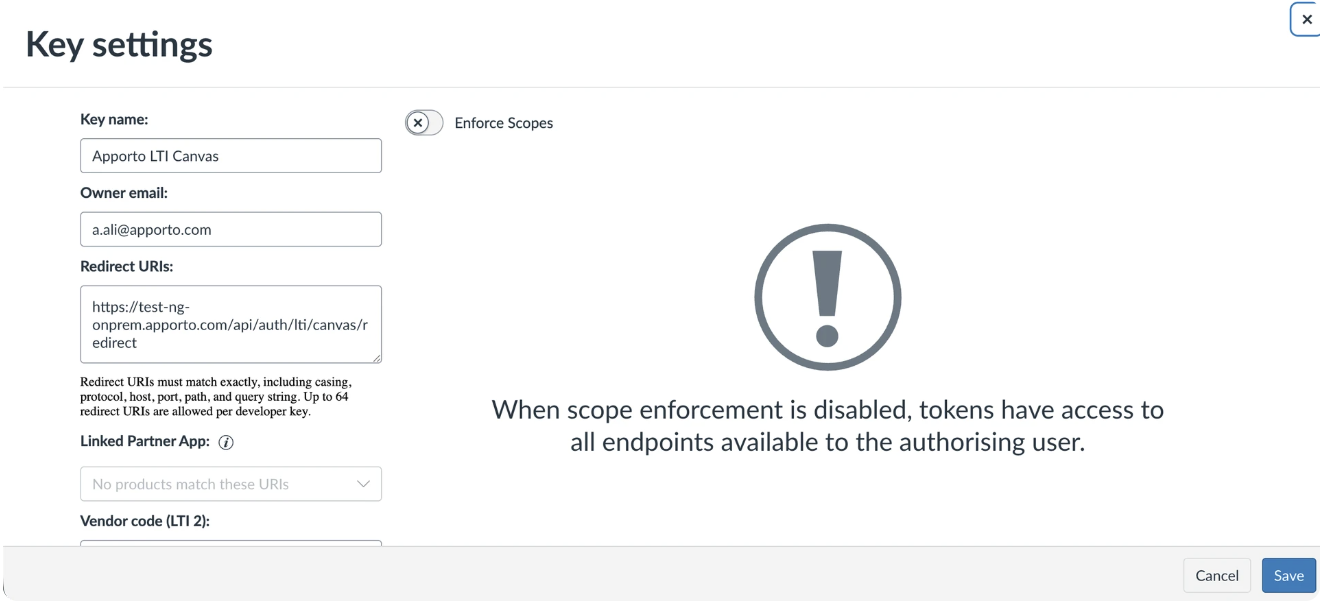
Enter the required details to generate the API Key and API Client Secret.
|
Field |
Value / Guidance |
|---|---|
|
Key Name: |
Example: Apporto LTI Canvas |
|
Owner Email |
Set this based on your institution or deployment requirement. |
|
Redirect URIs |
Example: https://{instancename}.apporto.com/api/auth/lti/canvas/redirect |
|
Enforce Scopes |
Turn off the Enforce Scopes toggle. |
At the end of this step, Canvas provides the values needed to complete the Apporto configuration: Client ID, Client Secret, API Key, and API Client Secret.
Step 4: Complete the Apporto LTI configuration
Return to the LTI configuration form in Apporto and populate the Canvas-generated values along with the Apporto redirect endpoints.
|
Field |
Value / Guidance |
|---|---|
|
Client ID |
Use the Canvas LTI Client ID generated from the Developer Key. |
|
Client Secret |
Use the Client Secret associated with the Canvas LTI key. |
|
OIDC Login Redirect |
|
|
API Key / API Client ID |
Use the API Key generated in Canvas. |
|
App Identifier |
|
|
API Client Secret |
Use the API Client Secret generated in Canvas. |
|
API Redirect URI |
|
Caution: Ensure the configured redirect URLs exactly match the environment being used. Mismatched URLs are a common cause of authorization failure.
Step 5: Save and authorize the integration
-
Save the configuration in Apporto.
-
Select the Authorize link.
-
In Canvas, click Authorize to approve the integration.
-
After successful authorization, the browser redirects back to the Apporto configuration area, typically to the system configuration page.
Example redirect pattern: https://{instancename}.apporto.com/system-config?tabIndex=6
Expected result: If authorization succeeds, the LTI configuration is now connected and ready to be used in Canvas courses.
Step 6: Testing the integration - Create the Canvas app
-
In Canvas, click Admin in the Canvas menu.
-
Select your Canvas instance.
-
Click Settings in the left side menu.
-
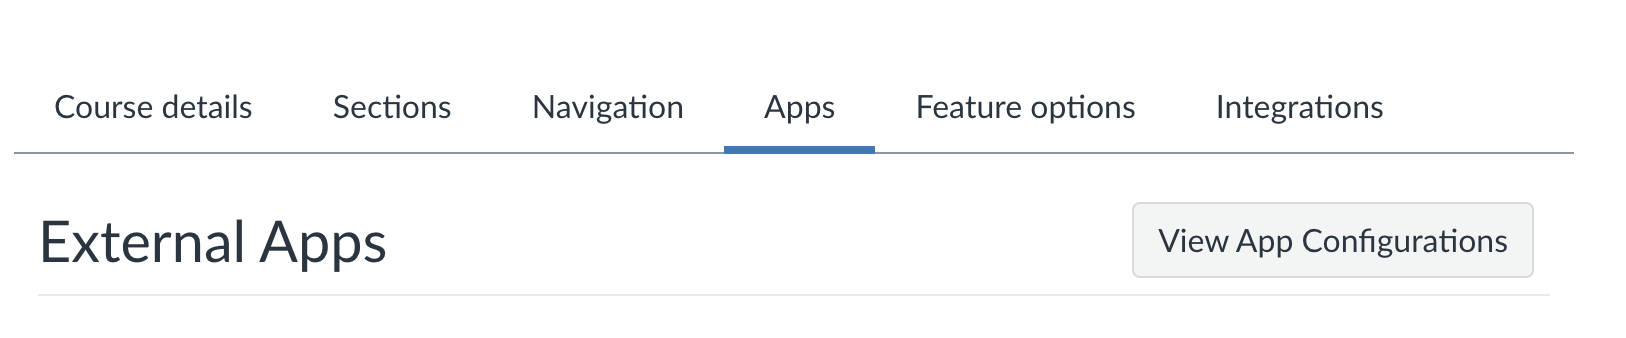
Select the Apps tab.
-
Click View App Configurations.
-
Click + App.
-

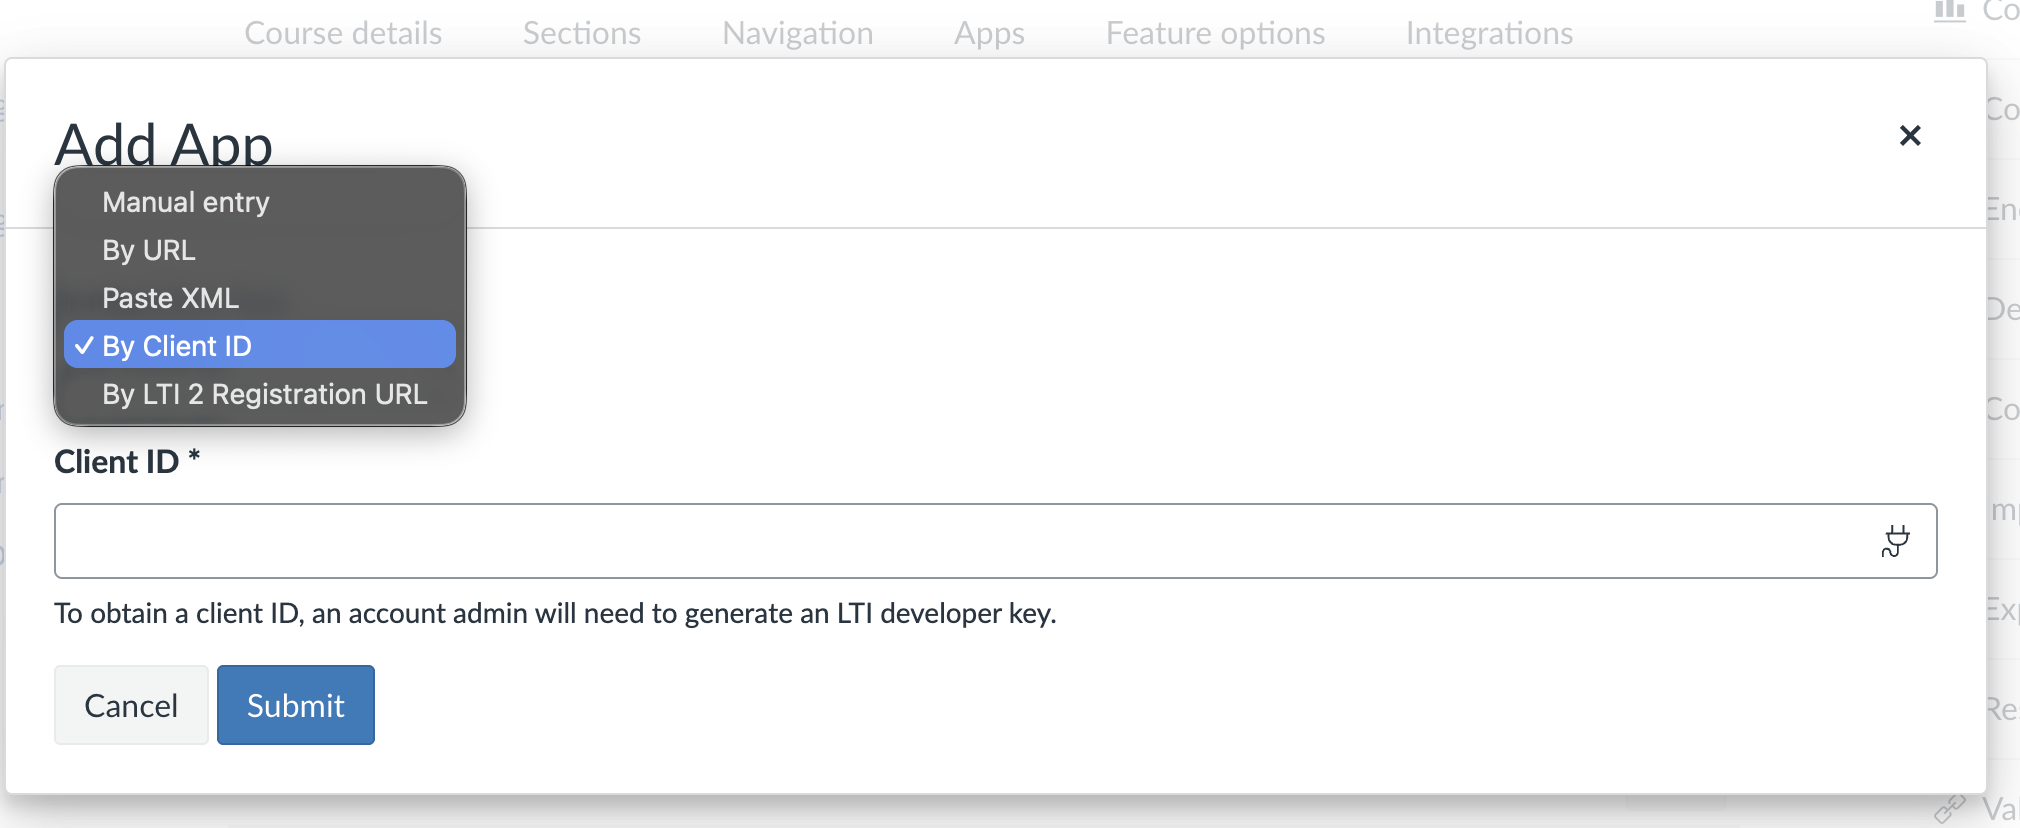
In the Add App form, set Configuration Type to By Client ID.
-
Enter the Client ID copied from the LTI Key ID. In the example below, the Client ID is 159640000000000348.

-
Create the app.
Step 8: Add the app to a course
Once an app has been created, you can add it to a course. You may add it to the course navigation, such as the left menu, or embed it within course content, such as a module.
Add the app to course navigation
-
Click Courses in the Canvas menu.
-
Select the course you want.
-
Click Settings in the left side menu.
-
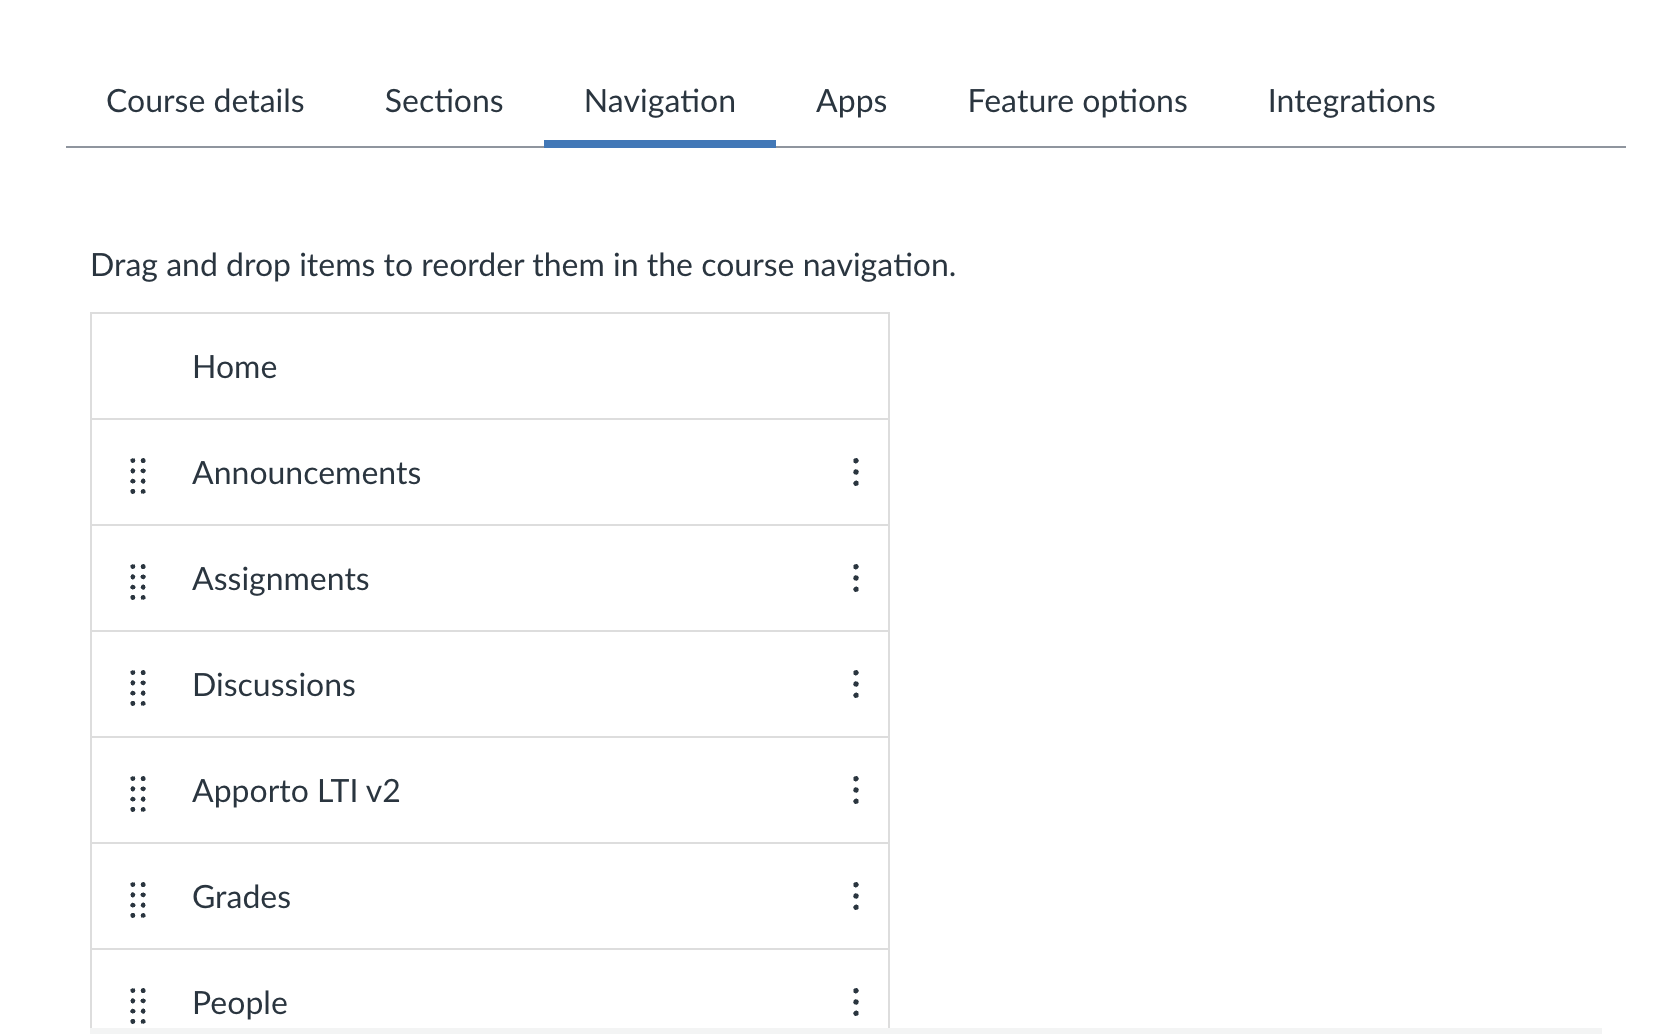
Select the Navigation tab.
-
Find the app you created, such as Apporto LTI V2, and drag it into the Course Navigation area.
Add the app to course content
-
Select the course in which you want to add the app.
-
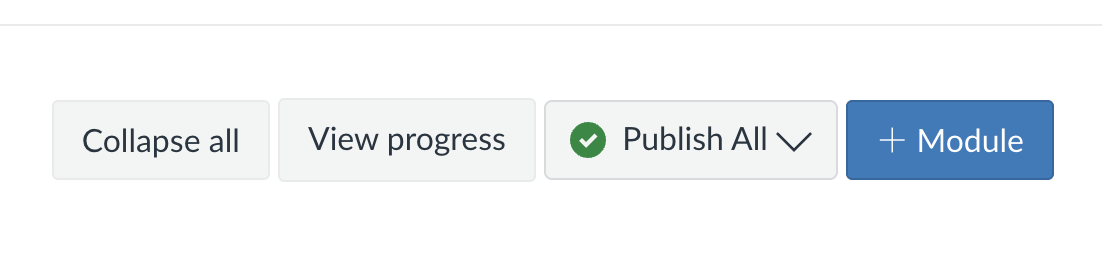
Click + Module.
-
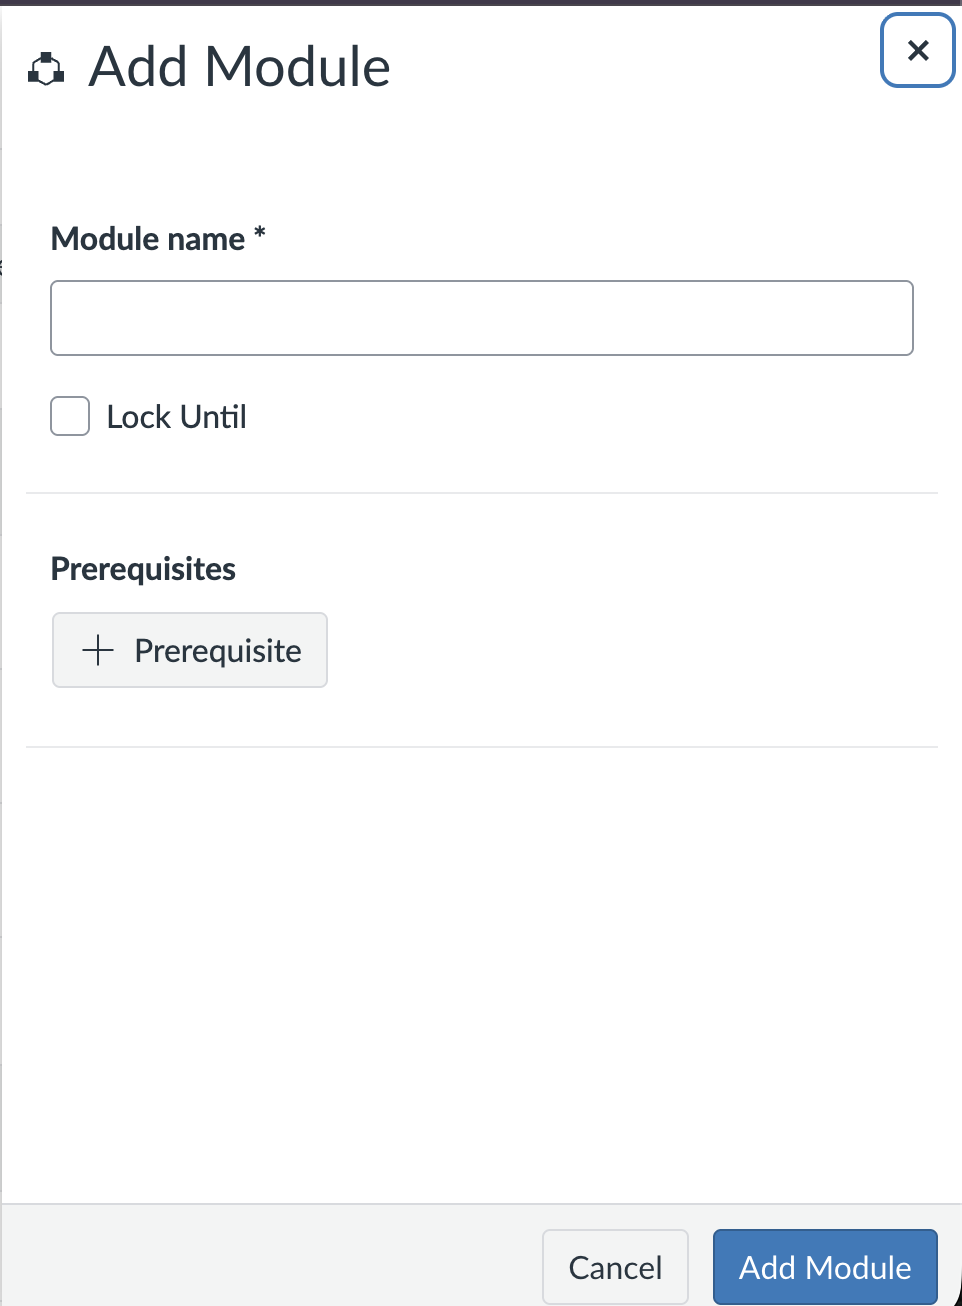
Create the module and give it a descriptive name, such as Apporto LTI V2.
-
Click the + sign in the upper-right corner of the module bar.
-
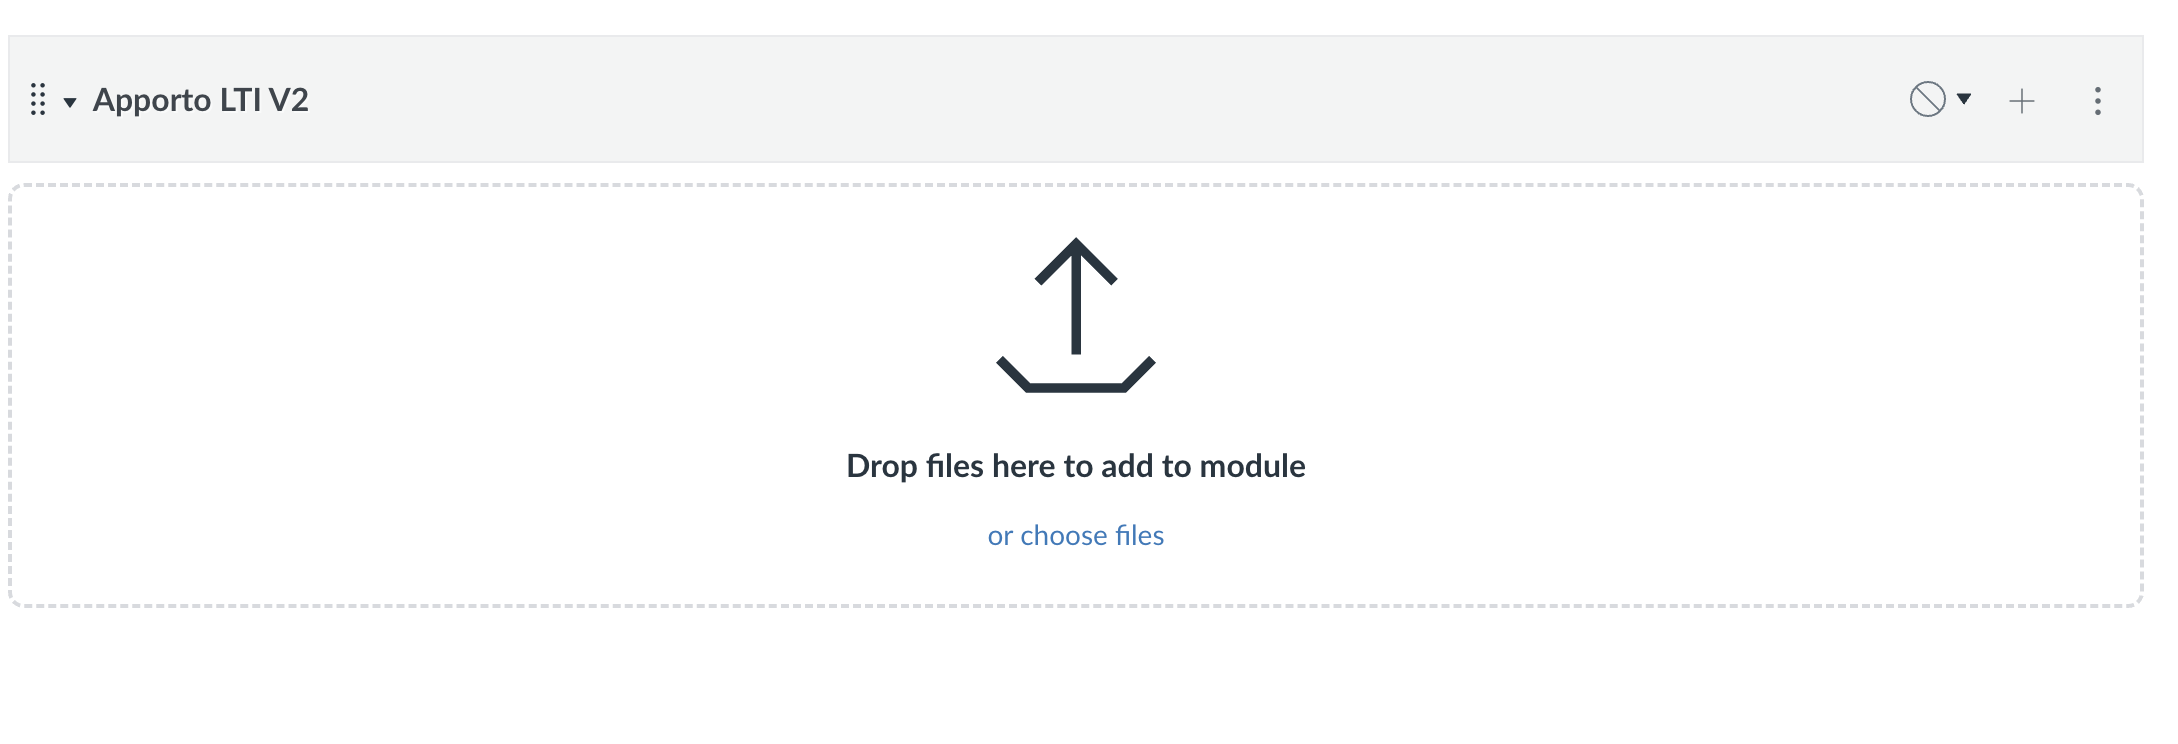
Select the External Tool dropdown.
-
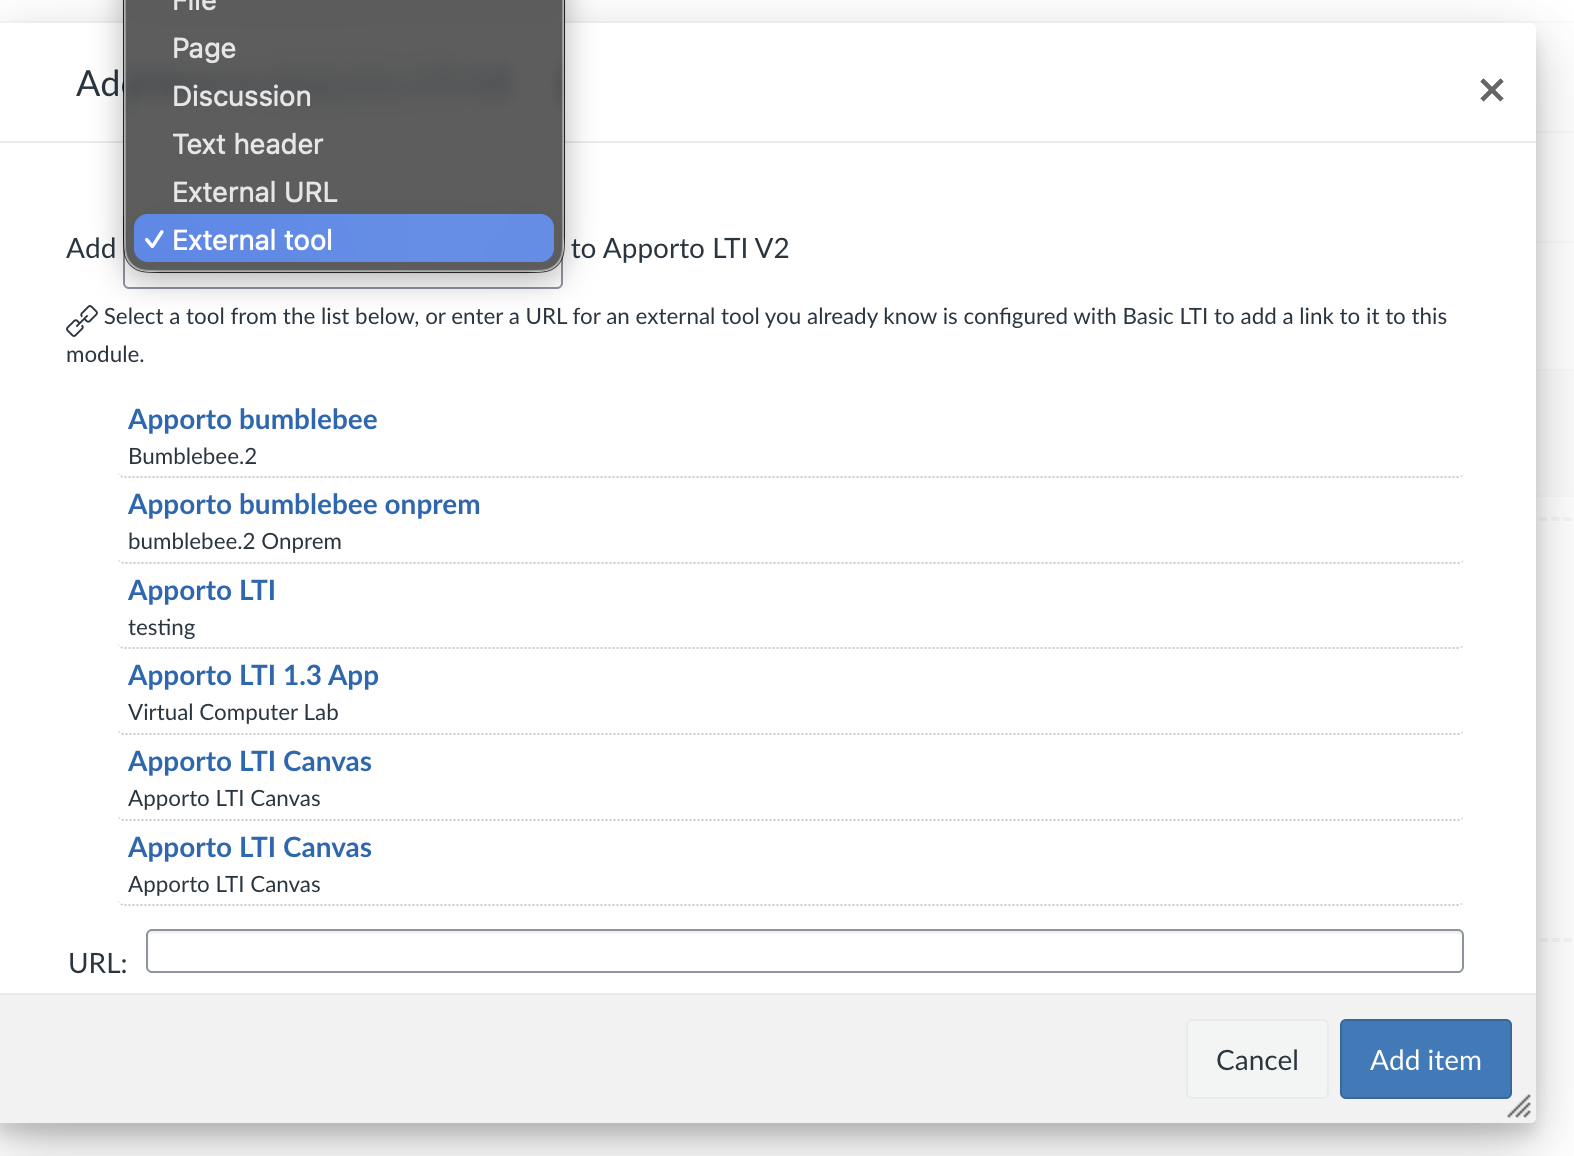
Select the external tool you created, such as Apporto LTI V2.
-
Check the Load in a new tab checkbox to launch Apporto in a new browser tab.
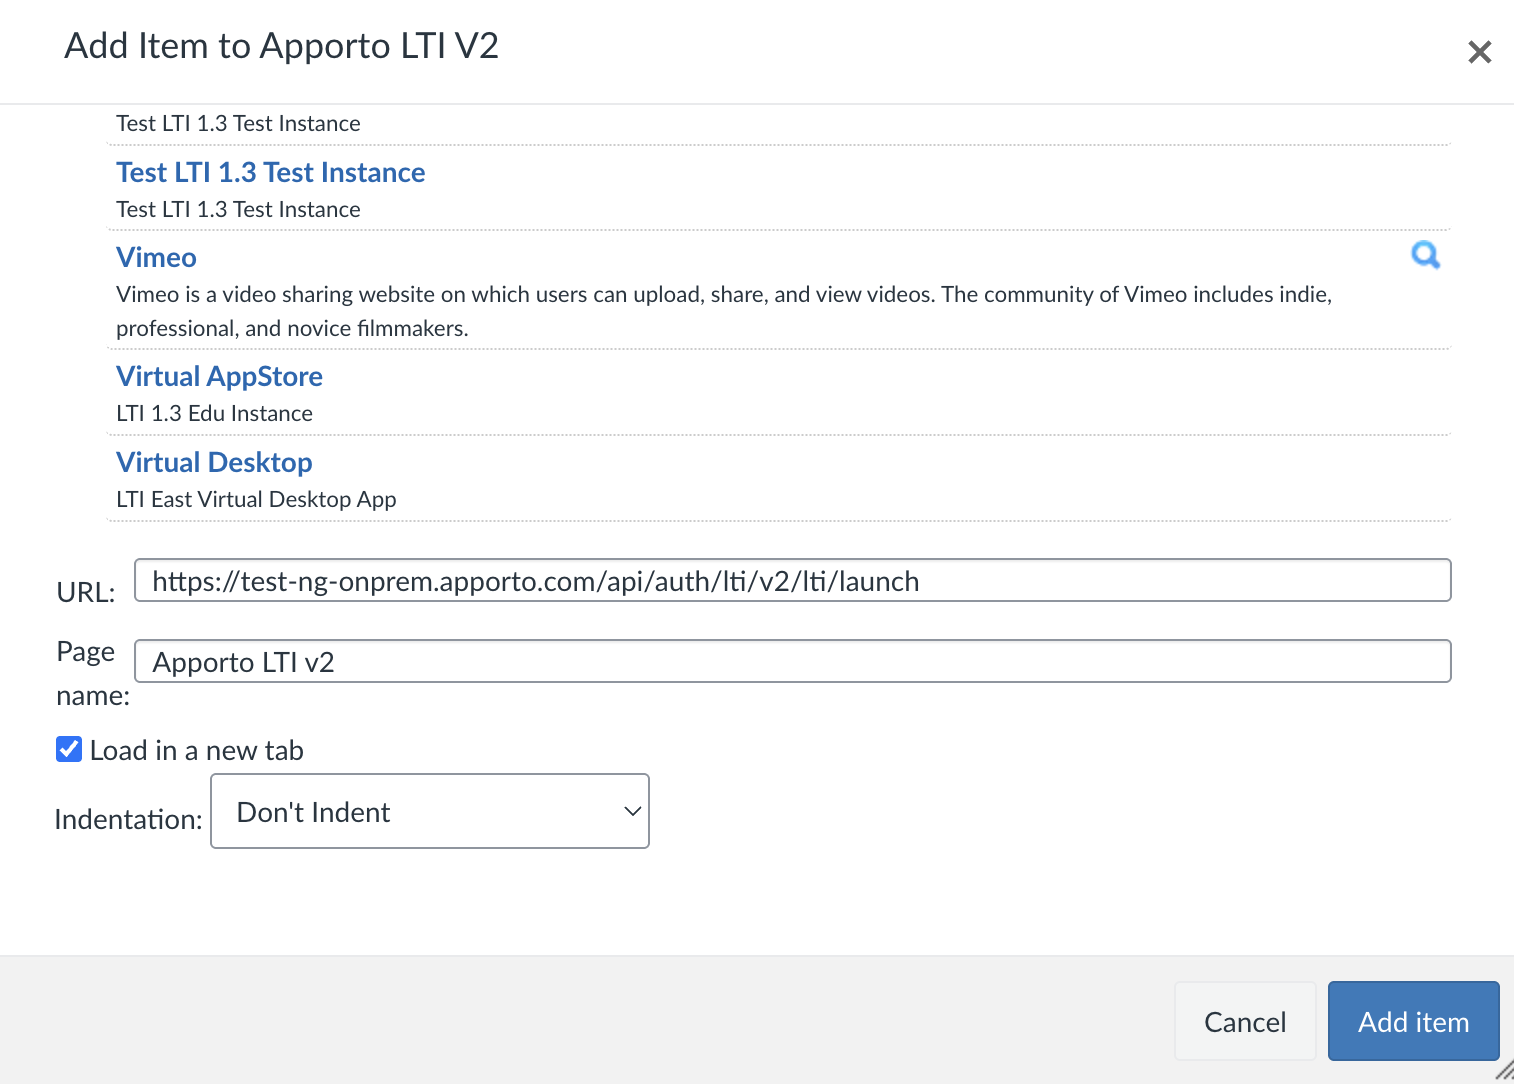
Note: If you forget to check Load in a new tab when setting up the external tool, you can enable it later. Click the three dots menu for the app, select Edit App, and check Load in a new tab.
Troubleshooting
Authorization fails
-
Confirm that the Client ID, Client Secret, API Key, and API Client Secret were copied from the correct Canvas entries.
-
Verify that the redirect URLs exactly match the configured Apporto environment.
-
Make sure you are not using
localhost.
Course launch does not open Apporto
-
Confirm the LTI tool has been correctly added to the course.
-
Check that the integration was fully authorized before launch testing.
-
Validate that the user has access to an assigned desktop after provisioning.
Deep linking does not open the expected desktop
-
Confirm the App Identifier is set to
nid. -
Verify that the correct desktop ID is being passed in the custom fields.