

Configuring Active Directory (AD) synchronization
Apporto supports integration with customers’ own Active Directory (AD) systems. This allows users to authenticate into Apporto with their existing account credentials.
Use the information in this guide to learn how to:
For additional information on how AD is used within Apporto, visit the related articles section at the bottom of this page.
Configure a new Active Directory (AD) connection
The table below shows the values that are used for AD configuration.
|
Field |
Datatype |
Required? |
Notes |
|---|---|---|---|
|
AD domain |
String |
No |
Default sign-in domain |
|
Sign-in name (format) |
Lookup value |
Yes |
|
|
Require second sign-in |
Boolean |
No |
Option to require users to sign in again to access the remote computer |
|
Root certificate |
File |
Conditional |
Cert file upload This is required if using LDAPS. |
|
Primary server |
String |
Yes |
Primary LDAP server address and port number |
|
Secondary server |
String |
No |
Secondary LDAP server address and port number |
|
Login distinguished name |
String |
No |
Binding string may include the following elements:
All necessary values should be separated by commas without spaces. |
|
Login password |
String |
No |
Can be masked or visible |
|
Starting search directory |
String |
No |
DC values, comma-separated without spaces |
|
Excluded directory(s) |
String |
No |
Multiple values may be added |
|
Sync frequency type |
Lookup value |
Yes |
|
|
Sync frequency hours |
Integer |
Conditional |
Number of hours between syncs This setting is visible if the selected sync frequency type is hours. |
|
Sync time |
Time |
Conditional |
Hour and minute selection in 24-hour format This setting is visible if the selected sync frequency type is time. |
|
Sync enabled |
Boolean |
Yes |
Enables regular syncing of AD security groups to Apporto |
Follow the steps below to customize the AD settings.
-
Click setup or the
 icon in the navigation panel to view the Setup screen.
-
Click on the “AD sync” tab in the lower part of the page.
-
Enter your desired values into the “configuration” section.
-
Click save to submit the information that was entered. You may also click test connection to verify that the settings are correct.
Update AD sync settings
To change any current configuration values, repeat the steps listed above and click update to submit.

View AD sync summary
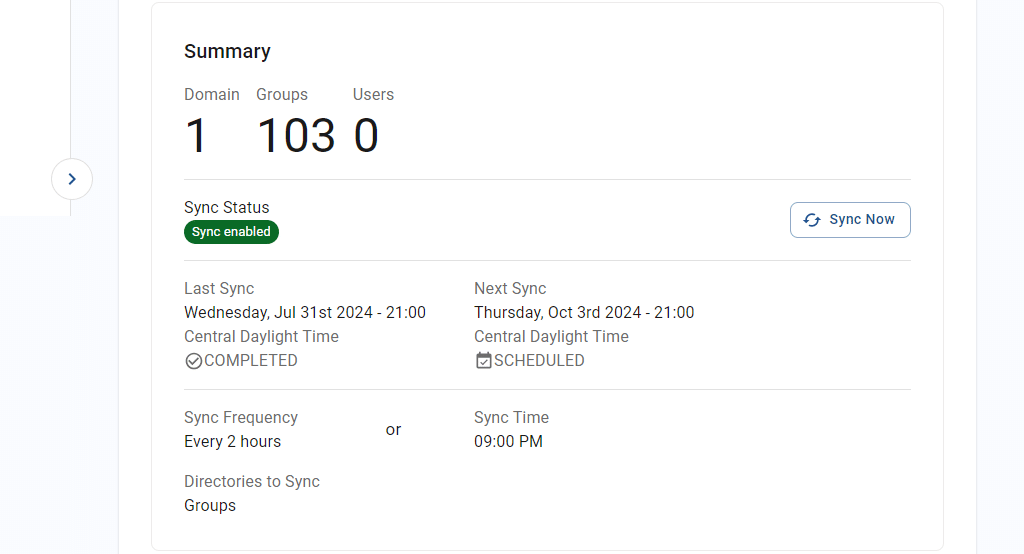
After AD configuration is complete, the following summary information will display:
-
Count of connected domains
-
Count of synced groups
-
Count of users – this count will be the same as the number of users on the Users list screen
-
Sync status – dependent on the “sync enabled” toggle
-
Last sync – date/time and status of last sync
-
Next sync – date/time of next scheduled sync
-
Sync frequency or sync time
-
Directories to sync
Trigger an ad hoc sync

Most syncs occur on a scheduled basis, using the hour or time frequency setting. However, an administrator may run an ad hoc sync by clicking the sync now button within the “summary” section. This may be especially useful if significant changes have been made to the customer’s AD setup or if an outage has occurred and been resolved.
Related articles
Migrated from the Apporto Help Center: https://www.apporto.com/help-center/configuring-active-directory-ad-synchronization