

Available in Q4 2026
(This includes Updates going into the .OVA Cluster Nodes to support this Feature.)
https://www.apporto.com/help-center/creating_and_organizing_files
https://www.apporto.com/help-center/uploading_and_downloading_files
FileBrowser + DFS Namespace Share for On‑Premises Deployments
NFS is not used in this current scope.
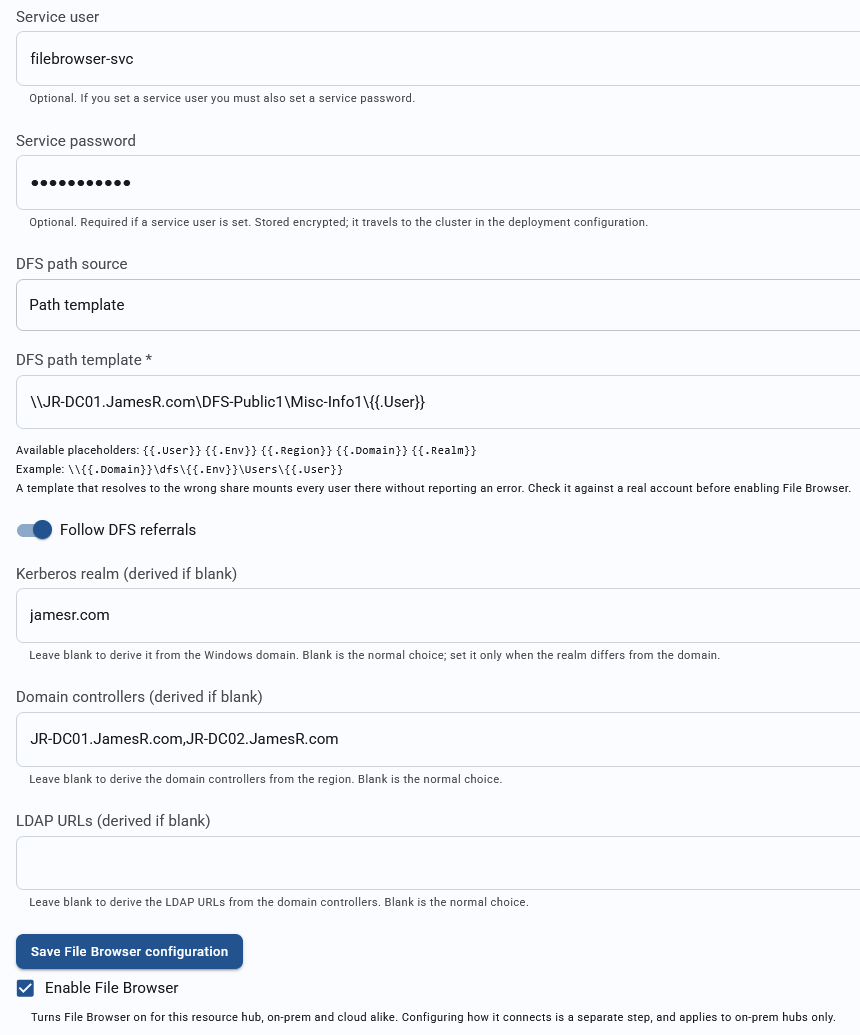
Create an AD Domain User account that will be utilized for the FileBrowser Service.
Suggested name as "filebrowser-svc".
General Microsoft DFS\Namespace Info:
https://learn.microsoft.com/en-us/windows-server/storage/dfs-namespaces/dfs-overview?tabs=server-manager
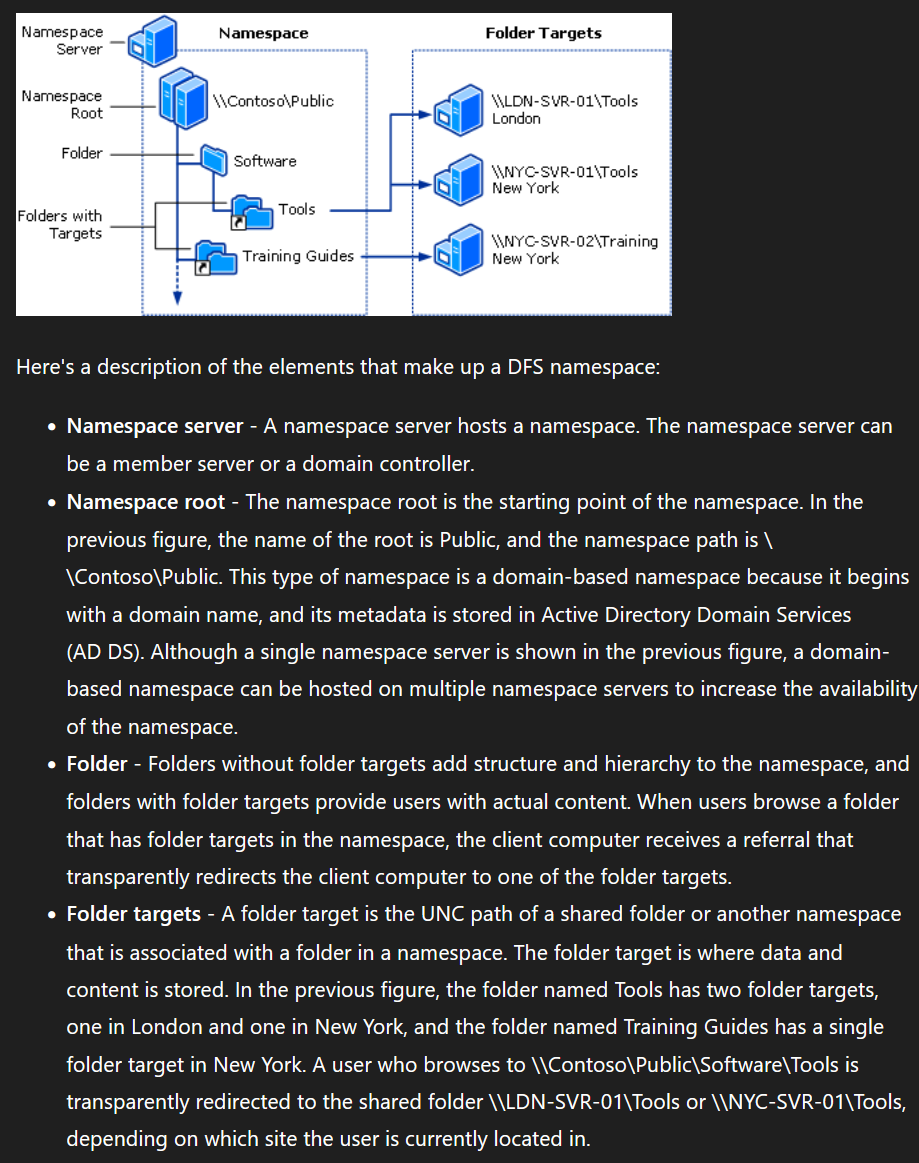
Add Shared Folders and Targets
Create your actual physical shared folders on your backend file servers (e.g., \\FileServer01\Finance) and configure standard NTFS and Share permissions.
Back in DFS Management, expand your new namespace, right-click it, and select New Folder.
Name the folder to match the resource (e.g., Finance).
Click Add under Folder Targets and browse to or type the UNC path of the physical share (e.g., \\FileServer01\Finance).
Example DFS Namespace settings:
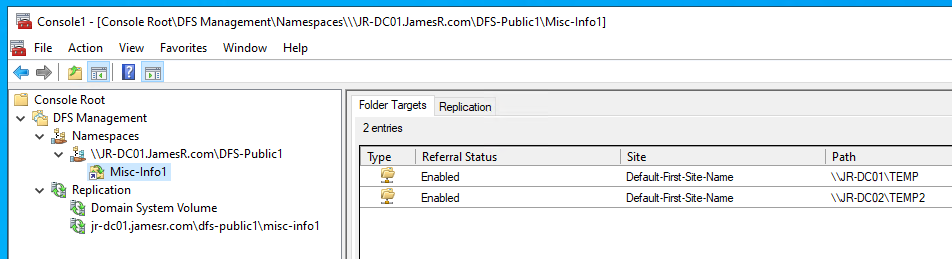
Enable Access-Based Enumeration (Recommended)
In DFS Management, select your namespace folder.
Right-click the folder or namespace and open Properties.
Go to the Advanced tab (or look for Access-based enumeration settings depending on the specific folder level) and check Enable access-based enumeration so users only see files and folders they have permission to access.
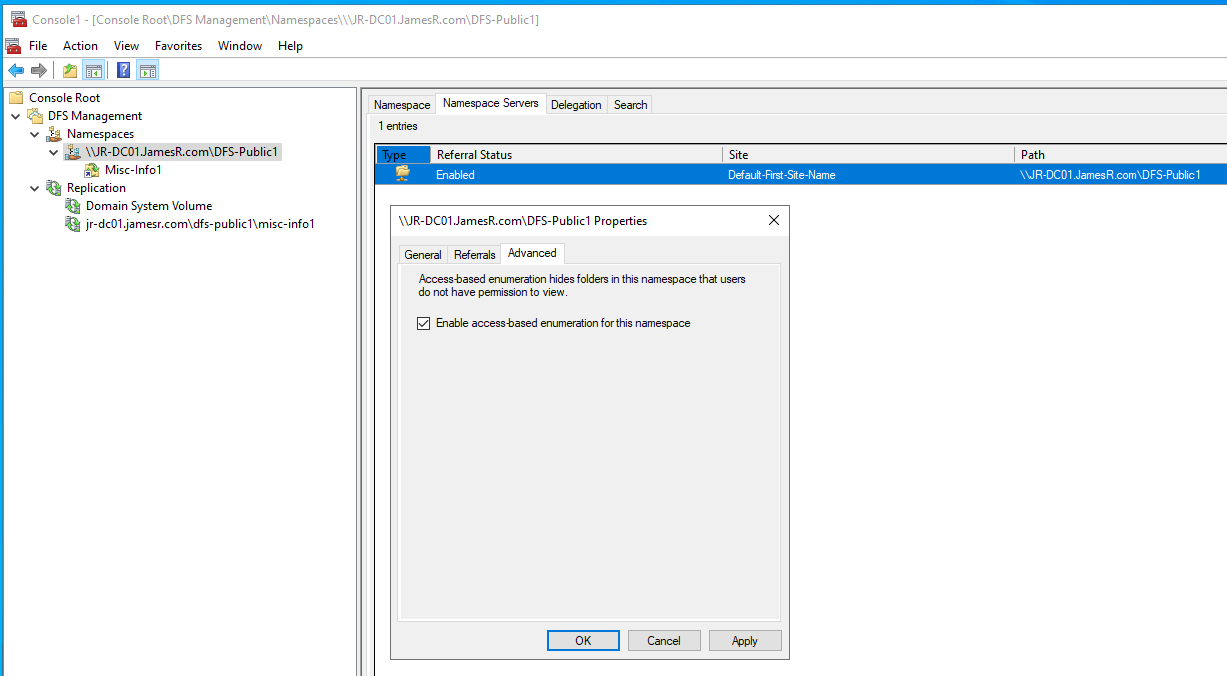
Adding "filebrowser-svc" account for DFS Namespace Permission:
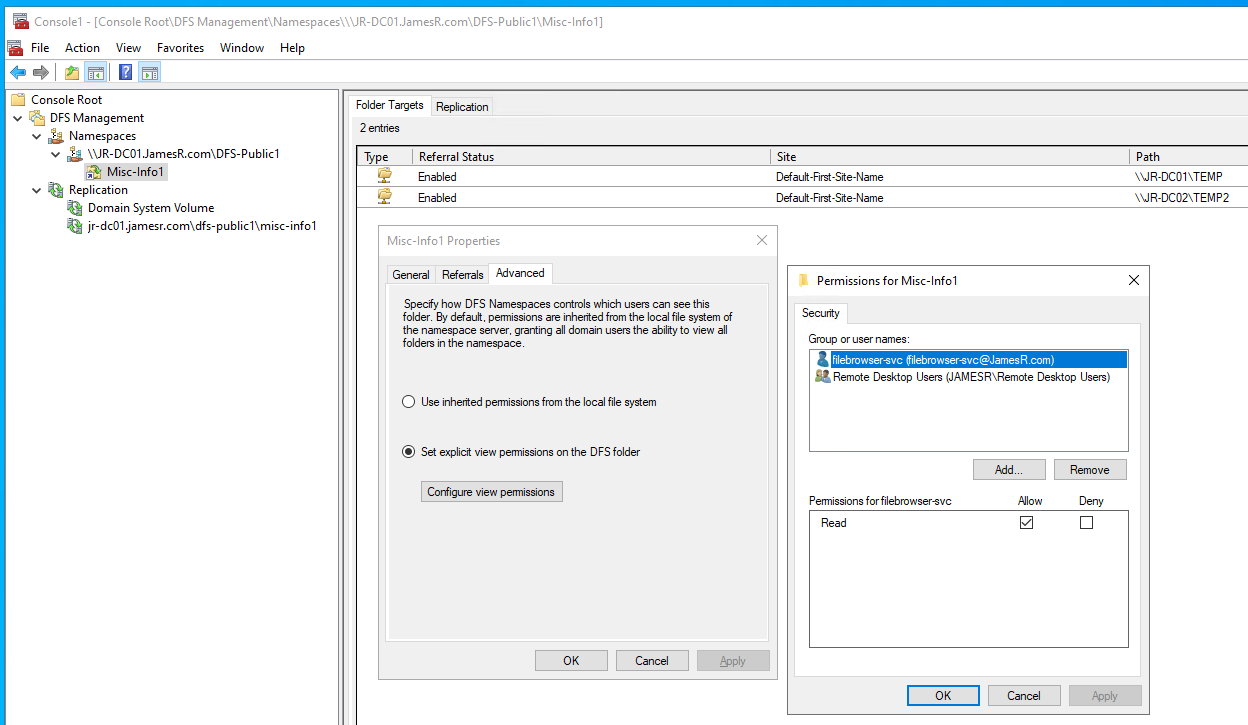
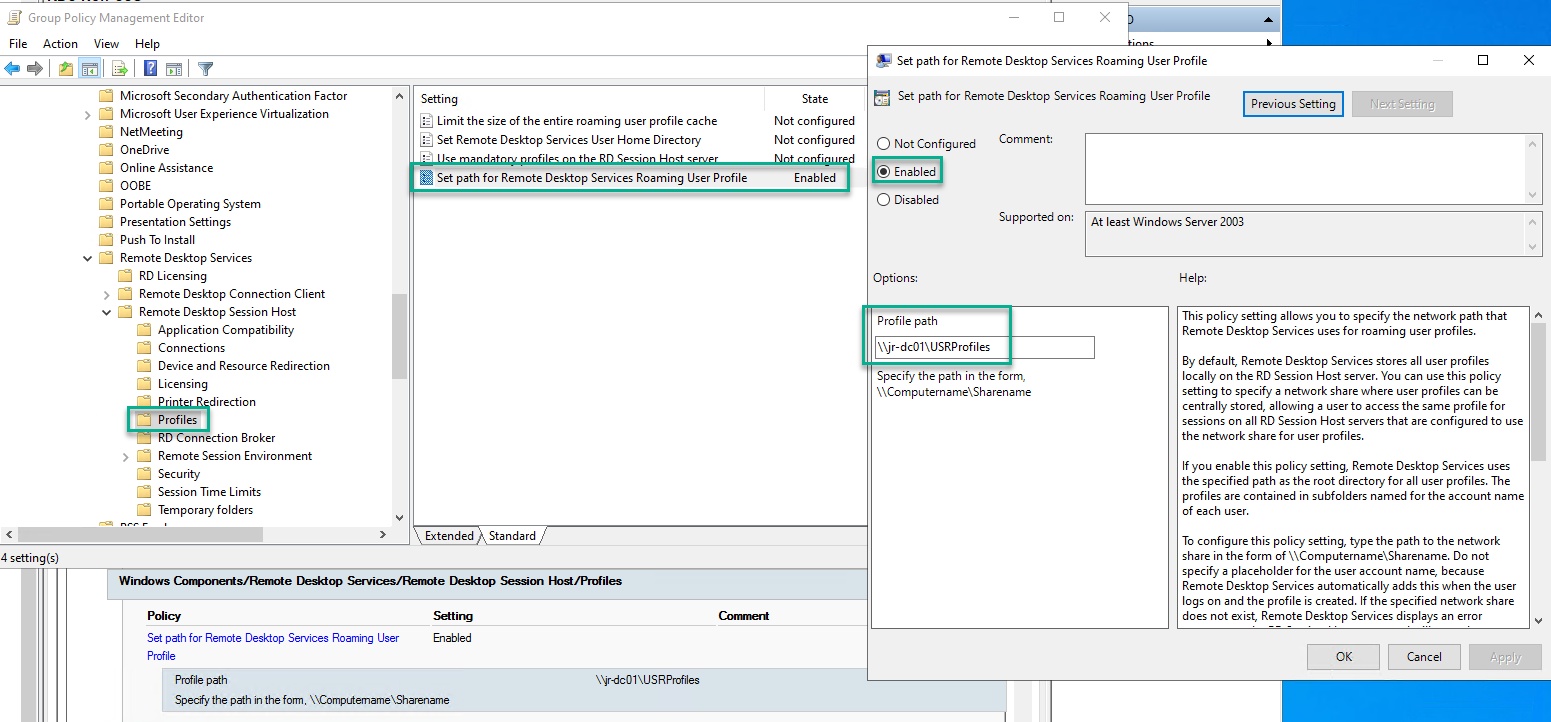
Settings RDS Roaming User Profiles Path via AD GPO:
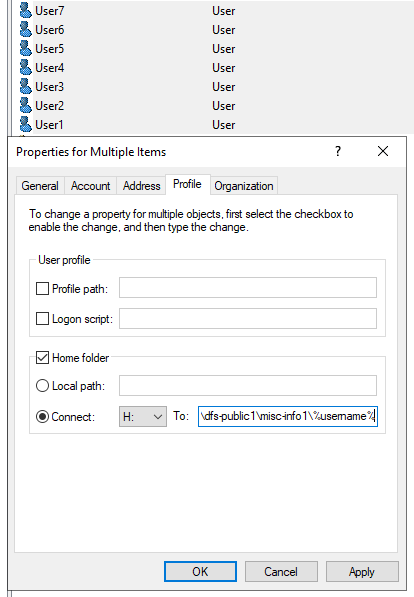
Multi-Select the Apporto Users to provide a path to the DFS Namespace Share, this is done as a one time operation to create each Users Folders in the top level Share. This process is also for New Users, any existing Users separate Folders will need to manually be added and then set NTFS Permissions.
If AD Users already exist then Manually add the Username of each user that will utilize FileBrowser into the above DFS Share folders TEMP\TEMP2.
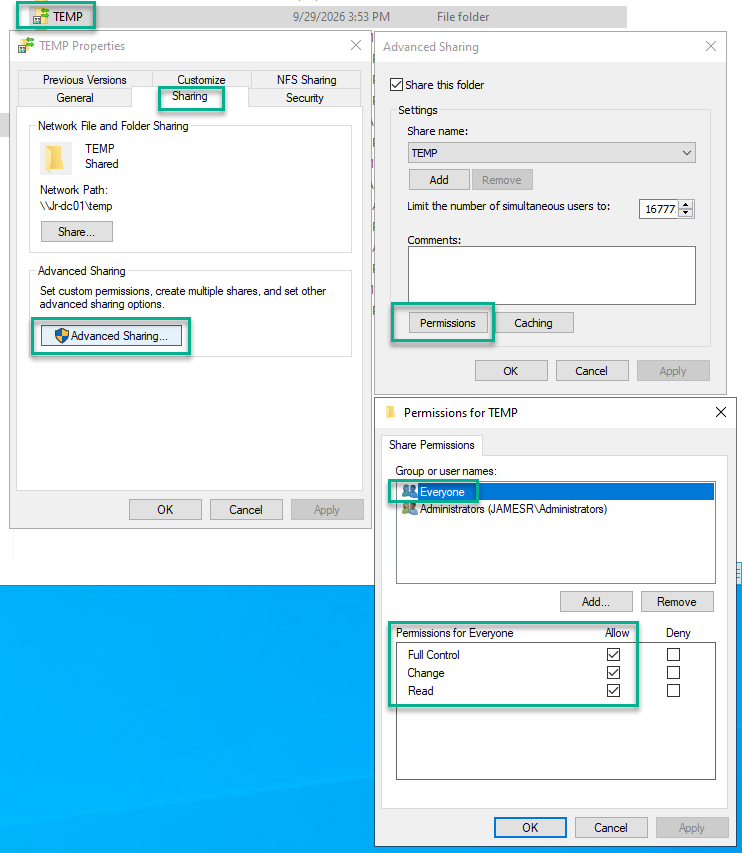
NTFS Share Level Permissions on TEMP folder:
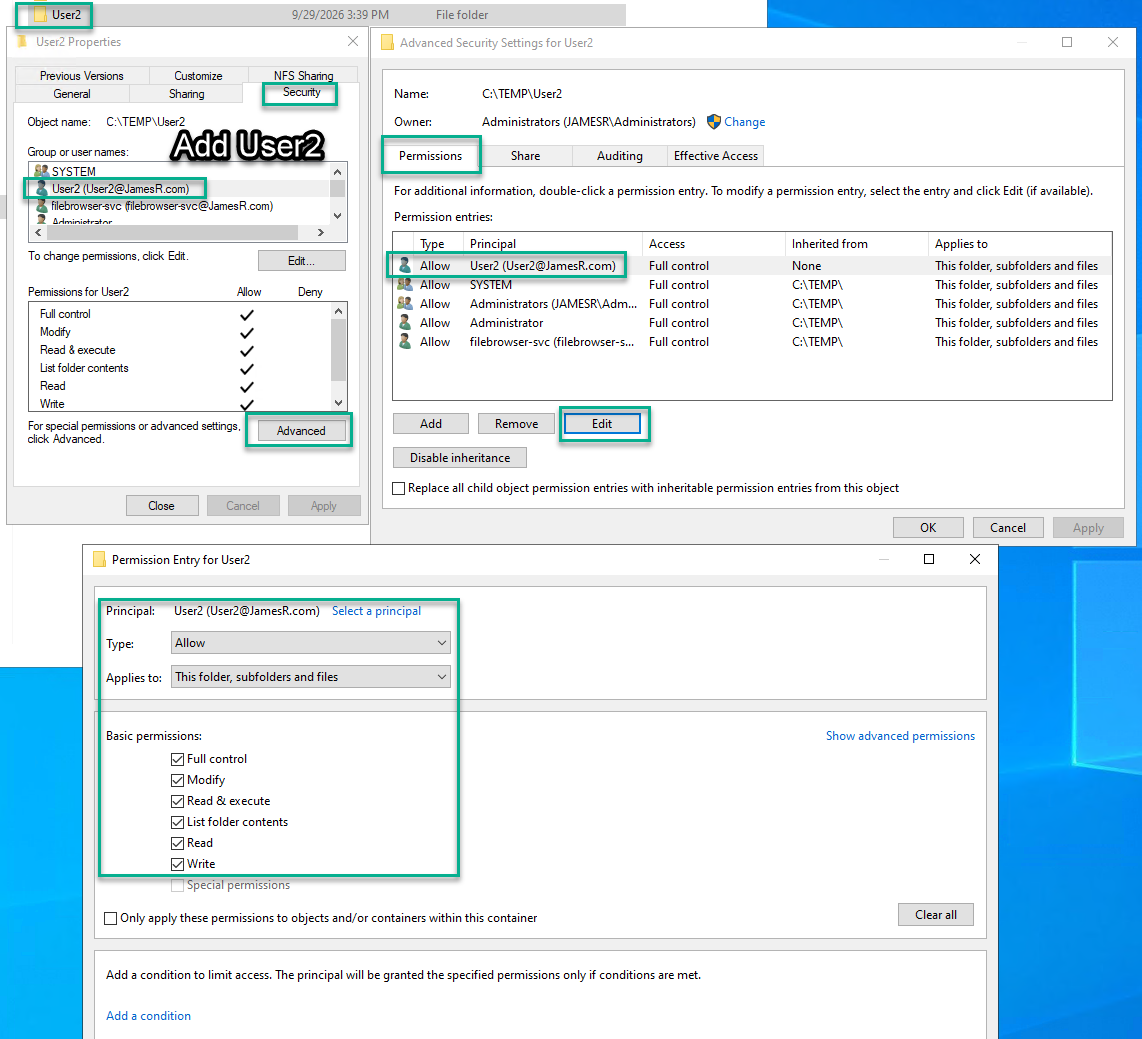
Now the caveat is that each Users Folder that resides in TEMP will have to be modified for additional NTFS permissions:
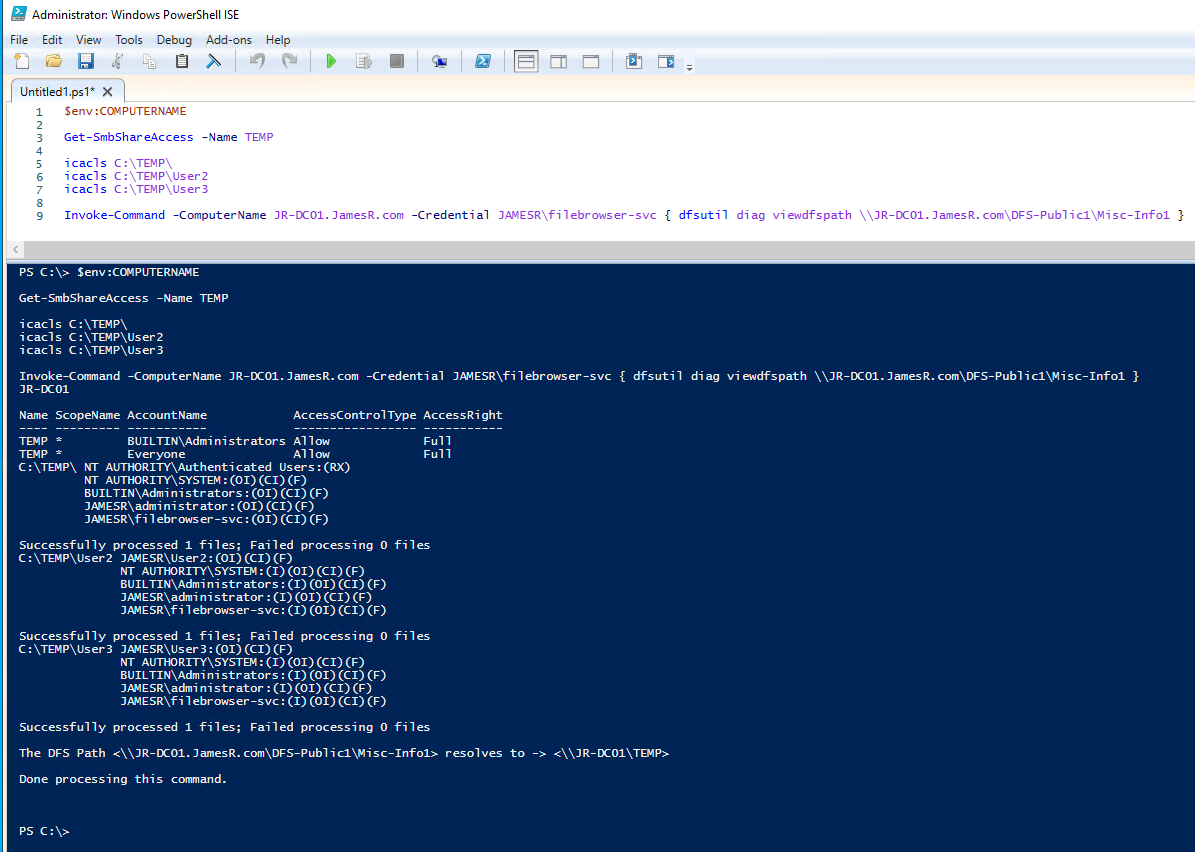
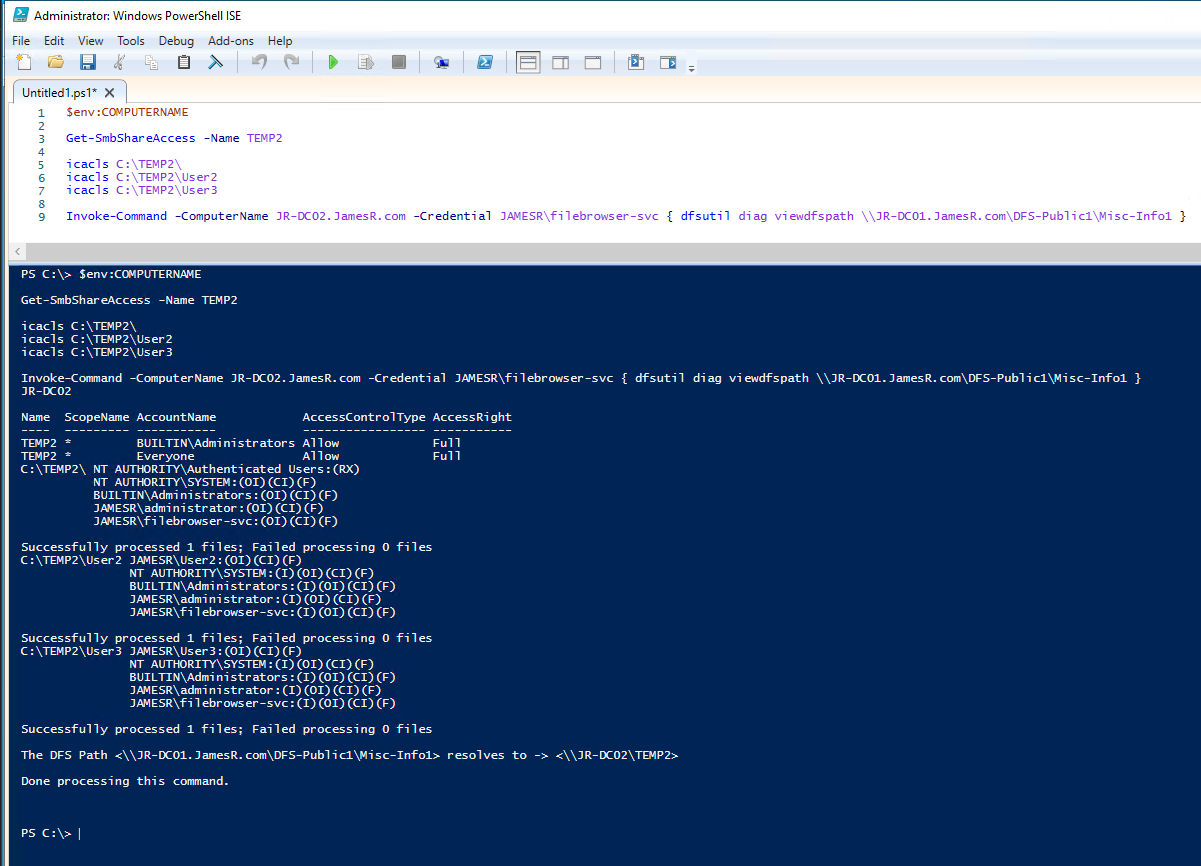
Verify access to Namespace and Share:
From Powershell prompt:
DC1:
#################
$env:COMPUTERNAME
Get-SmbShareAccess -Name TEMP
icacls C:\TEMP\
icacls C:\TEMP\User2
icacls C:\TEMP\User3
Invoke-Command -ComputerName JR-DC01.JamesR.com -Credential JAMESR\filebrowser-svc { dfsutil diag viewdfspath \\JR-DC01.JamesR.com\DFS-Public1\Misc-Info1 }
DC2:
##################
$env:COMPUTERNAME
Get-SmbShareAccess -Name TEMP2
icacls C:\TEMP2\
icacls C:\TEMP2\User2
icacls C:\TEMP2\User3
Invoke-Command -ComputerName JR-DC02.JamesR.com -Credential JAMESR\filebrowser-svc { dfsutil diag viewdfspath \\JR-DC01.JamesR.com\DFS-Public1\Misc-Info1 }
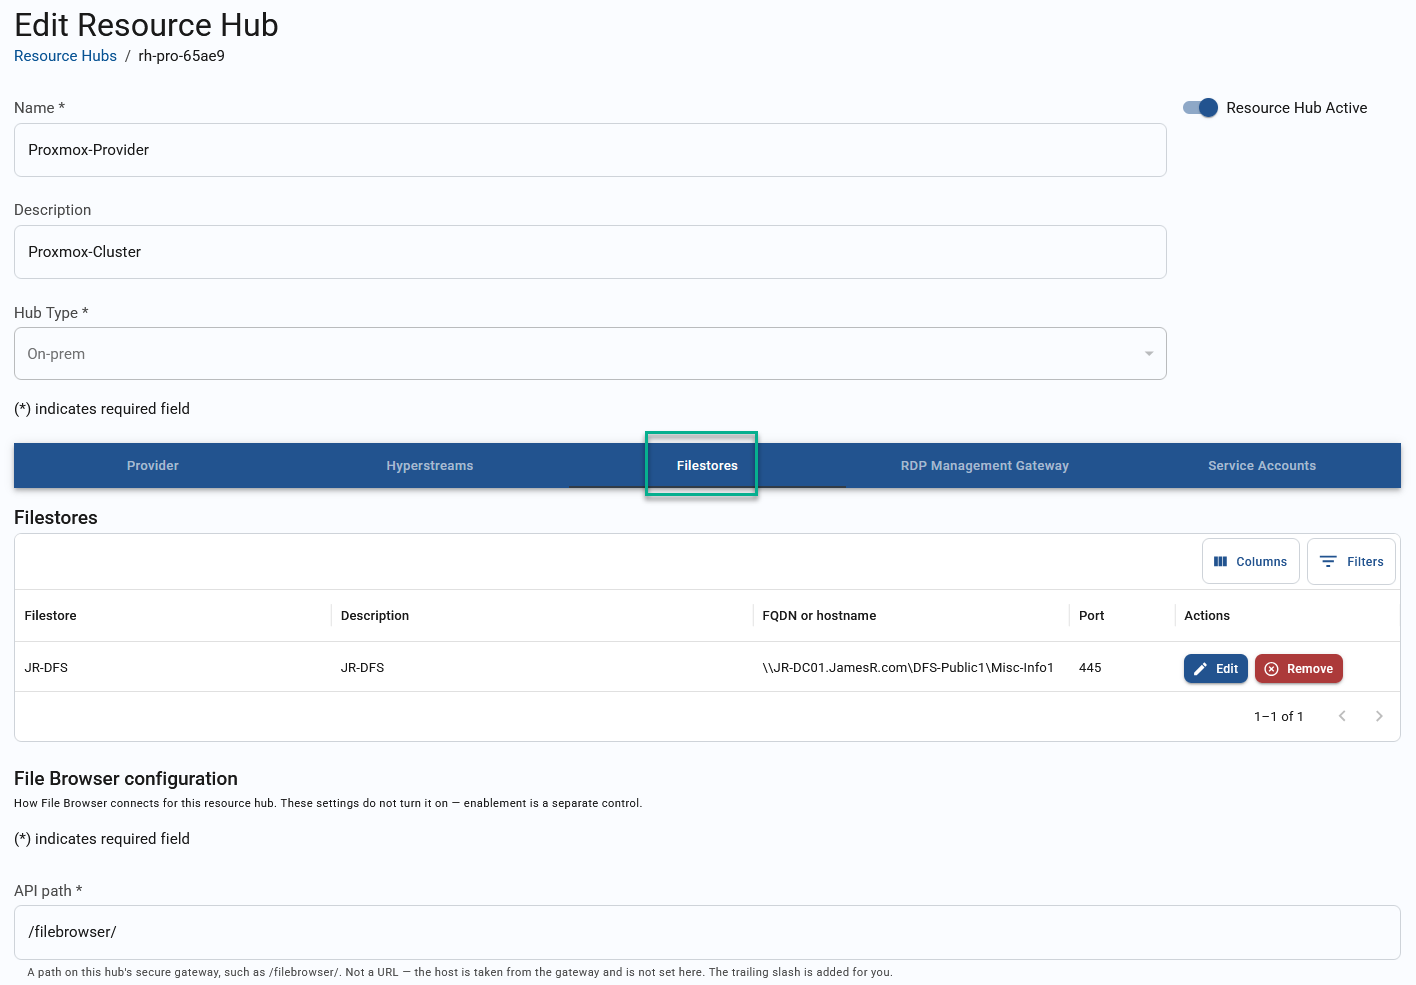
Resource Hub\Filestores:
FB-FileBrowser as seen by 2 separate Users:
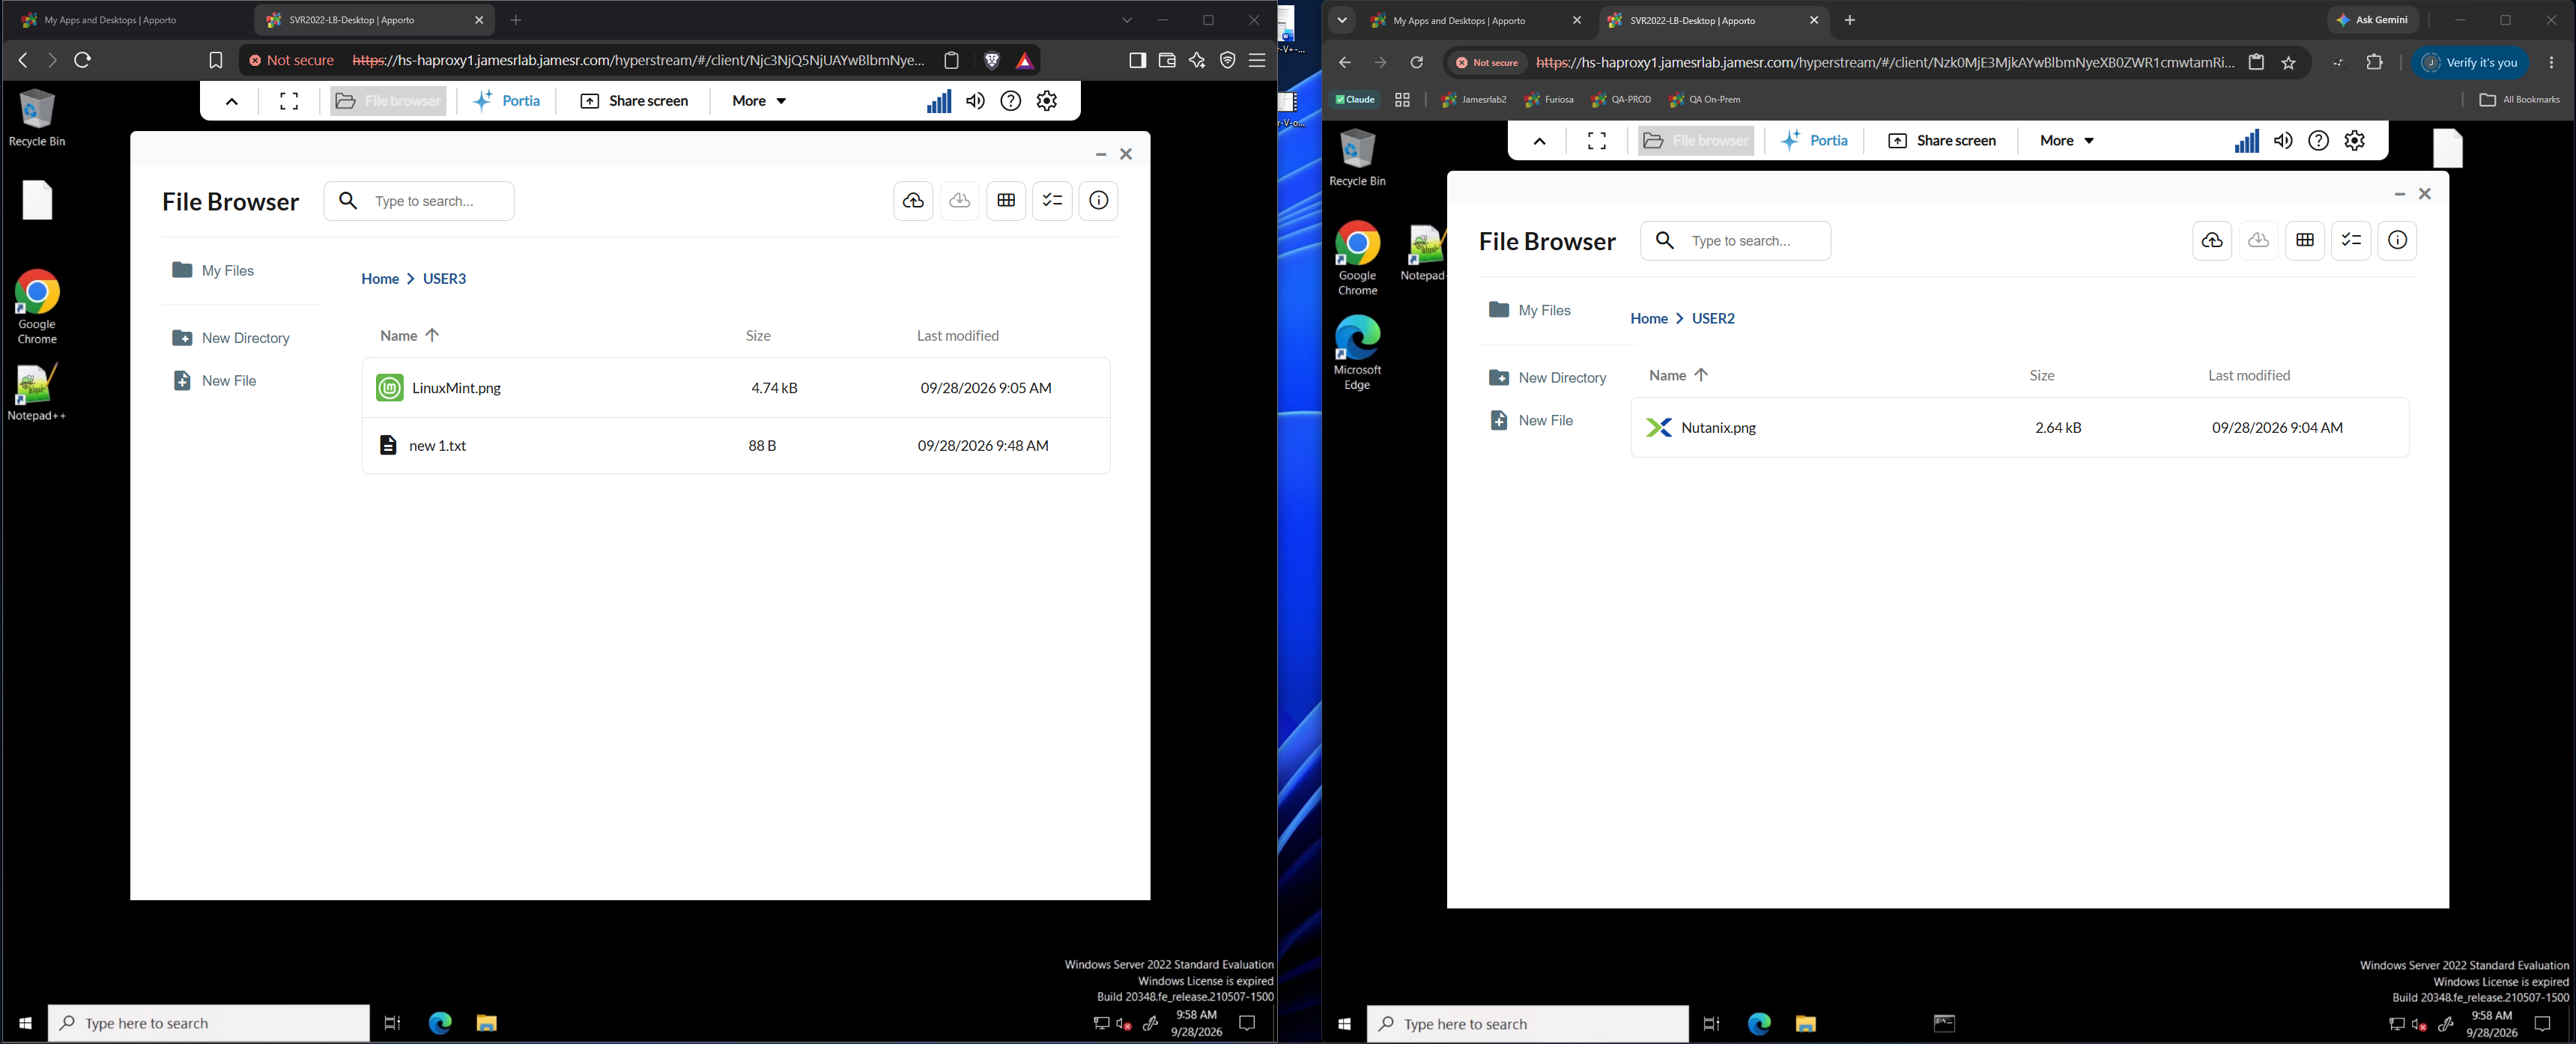
FB-FileBrowser - Drag & Drop, this remains a one way operation from local client OS and dragging into FileBrowser directly.
FB-FileBrowser-Two separate Users accessing FileBrowser and the DFS Share.