

User lists may be imported into Apporto to Adding a user , Editing a user , or Deprovisioning or deleting a user .
This page explains how to prepare a CSV import file, import users manually or automatically, and when to use single sign-on (SSO) instead.
Import users from a file
Prepare the import file
Import files must be in a comma-separated values (CSV) format.
Example:

The table below shows the values that are available for import.
|
Field |
Datatype |
Required? |
Notes |
|---|---|---|---|
|
|
String |
Yes |
User’s email must be unique in the system or an error will result during the import for that user. |
|
First name |
String |
No |
|
|
Last name |
String |
No |
|
|
Password |
String |
No |
User’s initial password in plain text format |
|
Status |
Boolean |
No |
|
|
Role |
Lookup value |
No |
|
|
Groups |
Lookup value(s) |
No |
|
Manually import users
The manual user import feature is available for use at any time.
Follow the steps below to manually import users.
-
Log in to the system using your credentials.
-
Click users or the

-
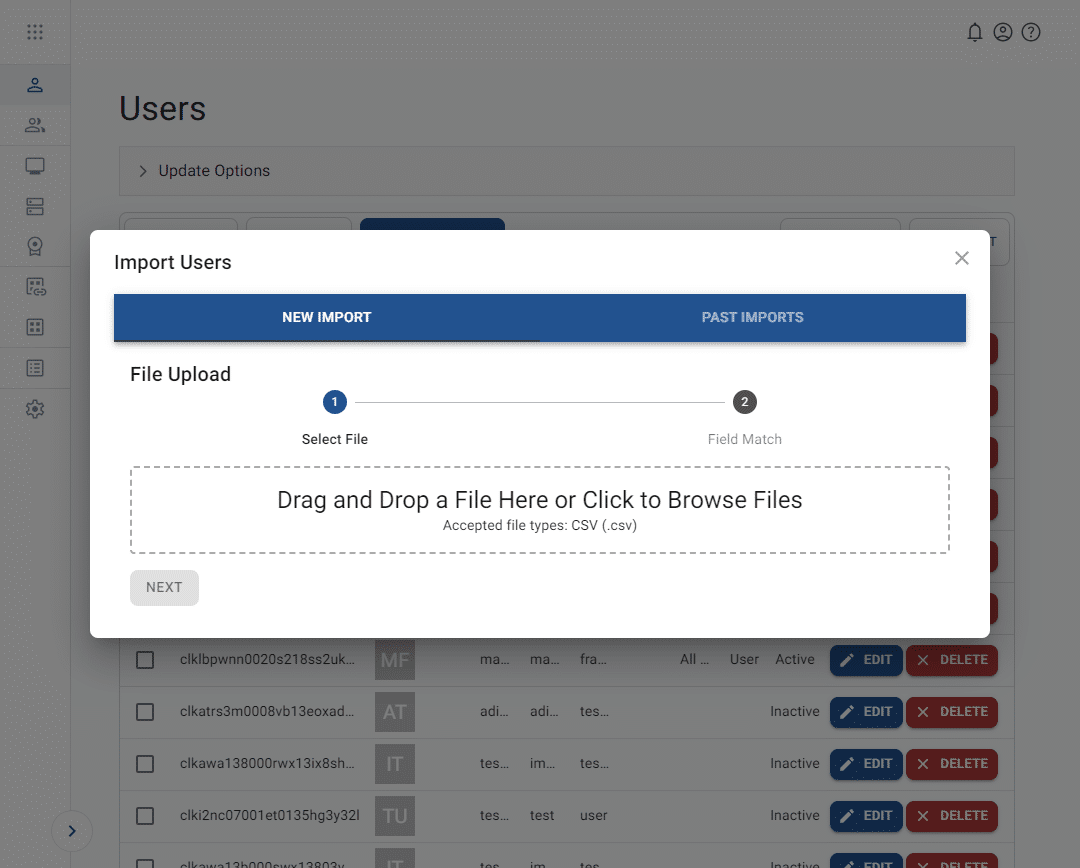
Click import users to trigger the import wizard.
-
Select a CSV file by dragging it onto the import box or clicking to trigger the file manager. The name of the selected file will display on the screen.
-
Click next to move on to step 2 of the import process.
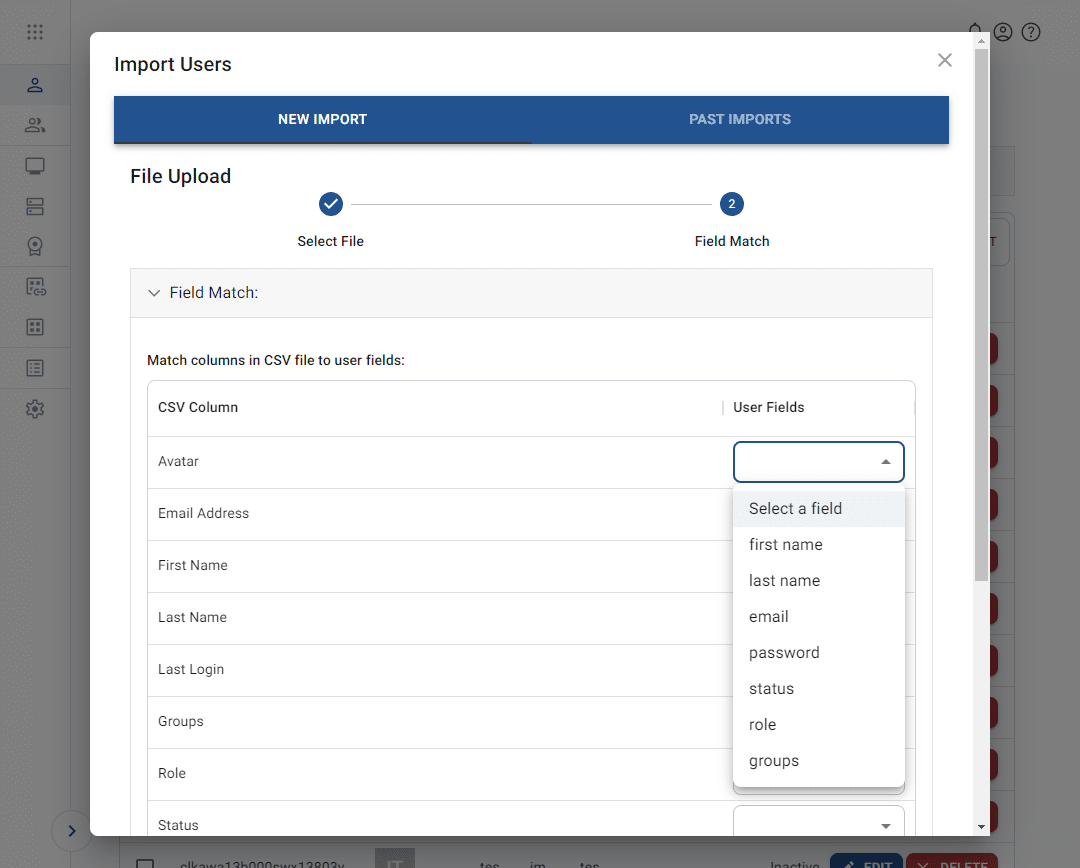
Note: You will only be able to import users with lower-level roles/permissions than your own.
-
The values in the first row of your file will appear in the “CSV column” section of the field match table. For each row, select the corresponding Apporto field from the “user fields” dropdown. If there is no matching value for the row, leave the dropdown blank.
-
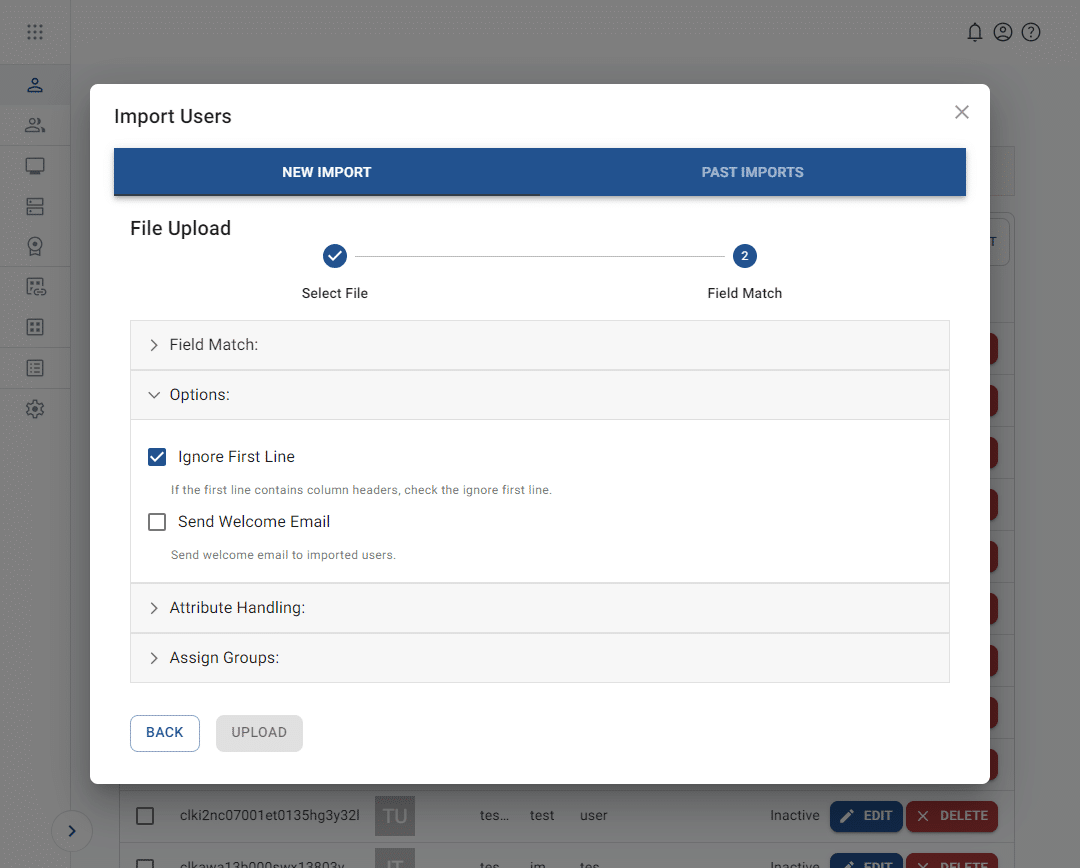
Click on the options header to expand the next section.
-
Check “ignore first line” if the first row of your CSV file contains header names.
-
Check “send welcome email” if you wish to send a welcome email with a single-use login link to all users in the CSV file.
-
-
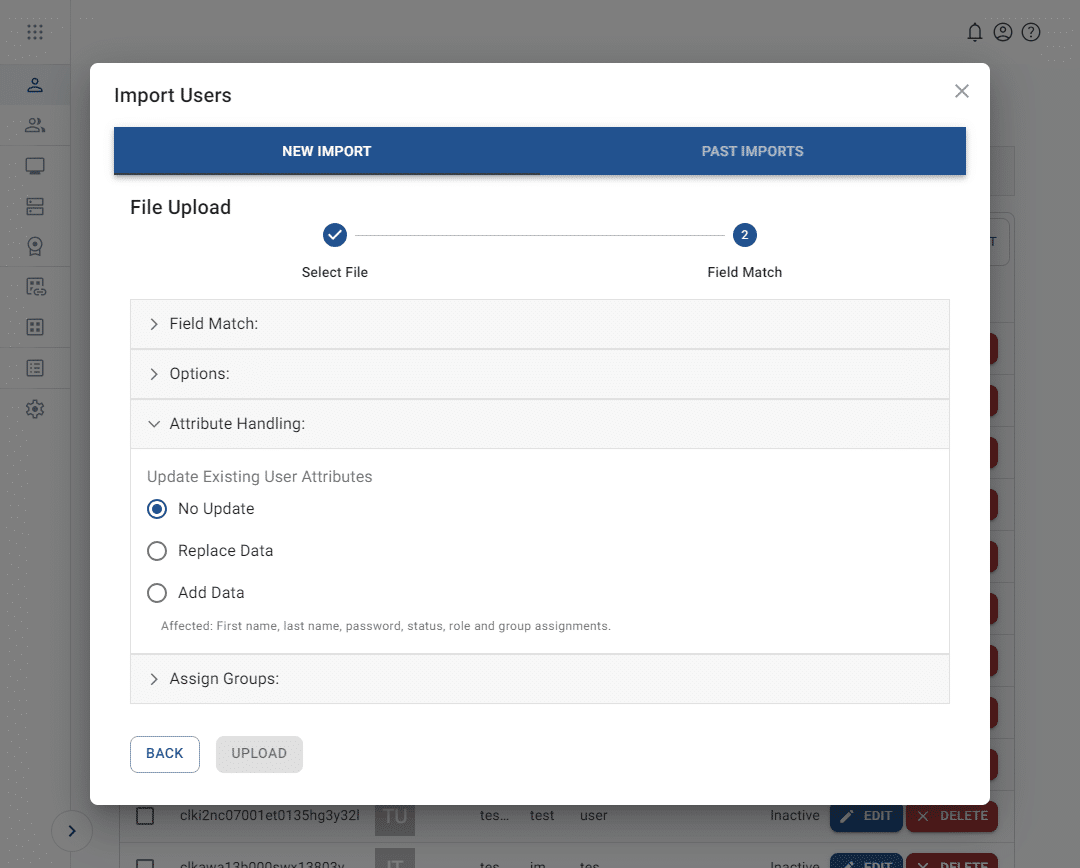
Click on the attribute handling header to expand the next section.
Note: You will only be able to select groups for which you are a member.
-
Select what should happen to existing users who are present in the CSV file:
-
No update – The user will be skipped in the import process.
-
Replace data – The user will have any values other than email address updated. This includes roles (other than Apporto admins) and groups.
Note: The user's existing values, including roles and groups, are replaced with the values in the CSV file.
-
Add data – The user’s existing data will remain unchanged, but the system will fill any null/blank values with CSV data. It will also append any new group assignments.
-
-
Click on the assign groups header to expand the last section.
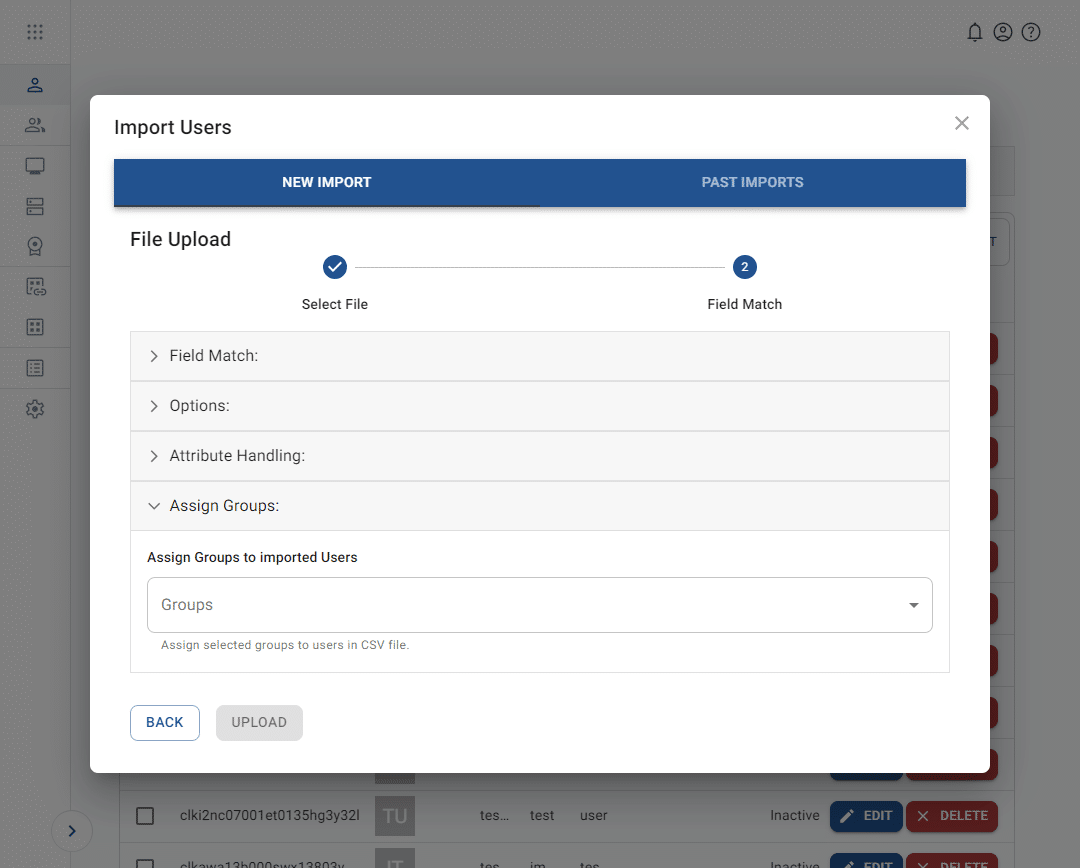
-
Any group that is selected at this step will be applied to all users in the CSV file.
-
-
Click upload to complete the import.
-
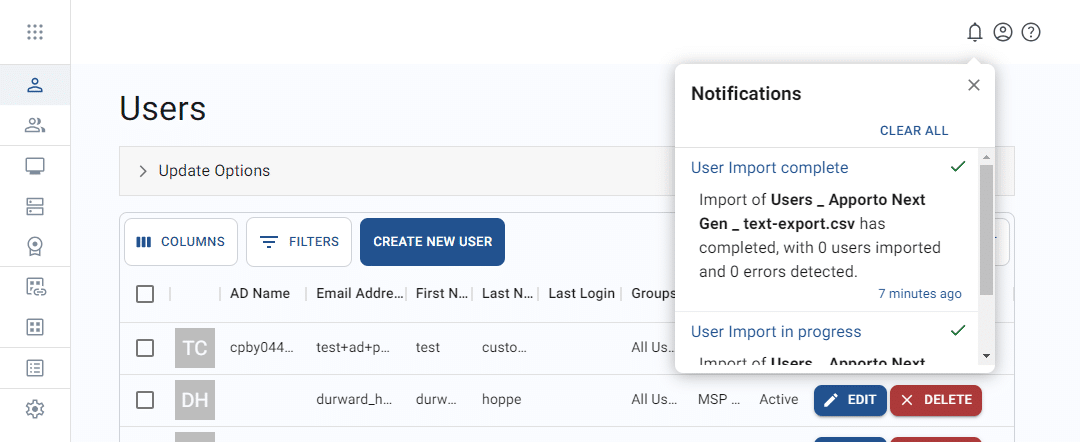
The system will provide the status of the import via the notifications tray.
Set up automated imports
Users may be automatically imported by placing the CSV file described above on an SFTP site. Contact support@apporto.com if you would like to set up an automated import.
Import users via single sign-on (SSO) integration
The CSV import feature is typically used to create or update a small batch of users (up to 500). Configuring single sign-on (SSO) domains is preferred for larger numbers of users. With an SSO integration, user accounts are automatically created when users log in and launch Apporto. Contact support@apporto.com if you would like to set up an SSO integration.