Apporto NextGen uses a new version of authentication for single sign-on (SSO). Instead of managing SSO directly in the control plane, we now take advantage of the industry-standard Keycloak server to do this for us. Each tenant gets its own isolated Keycloak realm that brokers authentication to the identity providers you already use, such as Microsoft Entra ID or a SAML provider.
This change applies to SSO users only. Local accounts (email address and password) and LDAP users sign in exactly as they did before, nothing about their experience changes.
This section explains what Keycloak is, how the sign-in experience works for SSO users, how to reach and configure your tenant's Keycloak server, and how to connect identity providers, map roles, and sync groups.
What is Keycloak?
Keycloak is an open-source identity and access management server. Apporto runs a Keycloak server on your behalf and gives each tenant its own isolated realm , a self-contained space that holds that tenant's identity providers, users, groups, roles, and login settings. When an SSO user signs in, Keycloak handles the exchange with your identity provider and returns the verified identity to Apporto.
A few Keycloak concepts you will see throughout this section:
-
Realm: the container for your tenant's authentication configuration. Each tenant has its own realm.
-
Identity provider (IdP): an external source of user identities that Keycloak brokers to (Entra ID, a SAML provider, etc.).
-
Client: an application that relies on Keycloak for authentication. Your Apporto tenant is a client of its realm.
-
Mapper: a rule that translates a value coming from your IdP (a claim or attribute) into something Keycloak understands, such as a username, an email address, a group, or a role.
For background on any of these concepts, see the official Keycloak documentation:
-
Keycloak Server Administration Guide: https://www.keycloak.org/docs/latest/server_admin/
-
Managing identity providers: https://www.keycloak.org/docs/latest/server_admin/#_identity_broker
-
Mappers and protocol mappers: https://www.keycloak.org/docs/latest/server_admin/#_mappers
You do not need to install or operate Keycloak yourself, Apporto provisions and maintains the server. Your work is limited to configuring the identity providers, roles, and groups described below through the Keycloak admin console.
How login works for SSO users
When an SSO user signs in, they are redirected to the Keycloak server to complete authentication, then returned to Apporto once authenticated. (Local and LDAP users are not redirected , they continue to sign in through the control plane as before.)
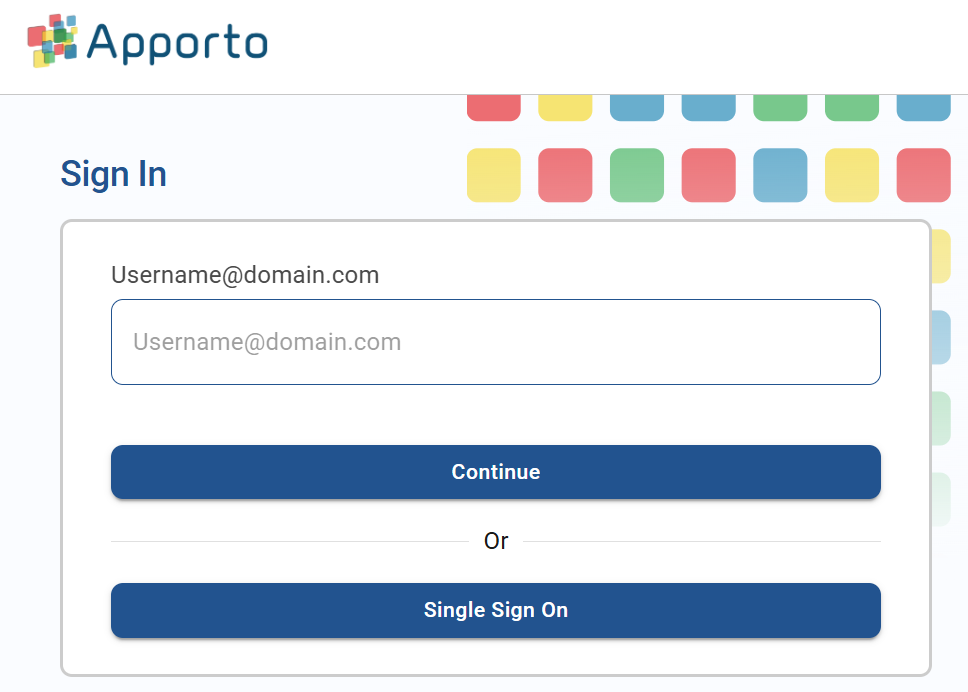
There are two ways an SSO user can start this flow from the Apporto login page:
-
By email address. The user enters their email address. If the address does not match a local account or an LDAP user in the system, Apporto redirects the user to the Keycloak server to finish signing in.
-
Single sign-on button. A sign-on button takes the user directly to the Keycloak server without entering an email first. This simply saves a step , entering an email on the login page reaches the same place.
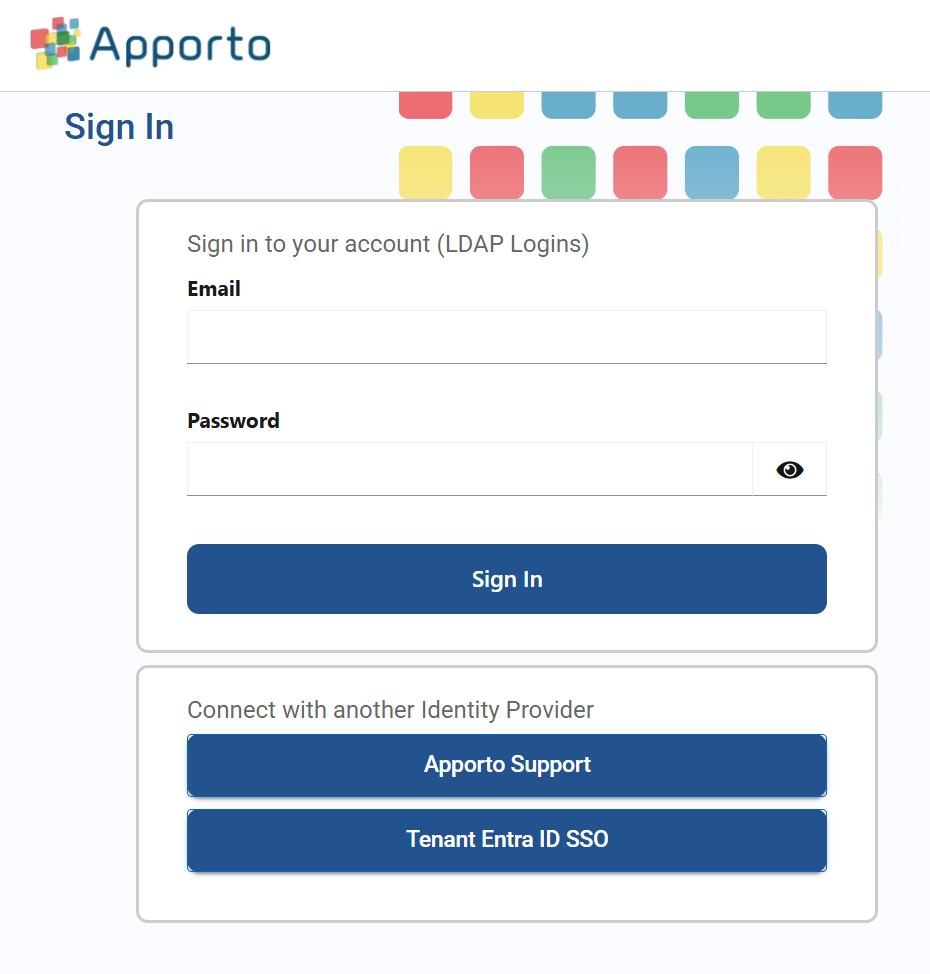
Once on the Keycloak server, the user selects the identity provider they want to sign in with. After they authenticate successfully with that provider, Keycloak redirects them back to Apporto and completes the login.
Note: The Keycloak sign-in screen can be themed to match your Apporto tenant's branding, so the redirect feels like a continuous experience. Theme changes made in your tenant are mirrored in Keycloak.
Identity management settings in the control plane
Your tenant's authentication settings live on the Setup → Identity Management tab, including the Keycloak information described below.
Keycloak settings
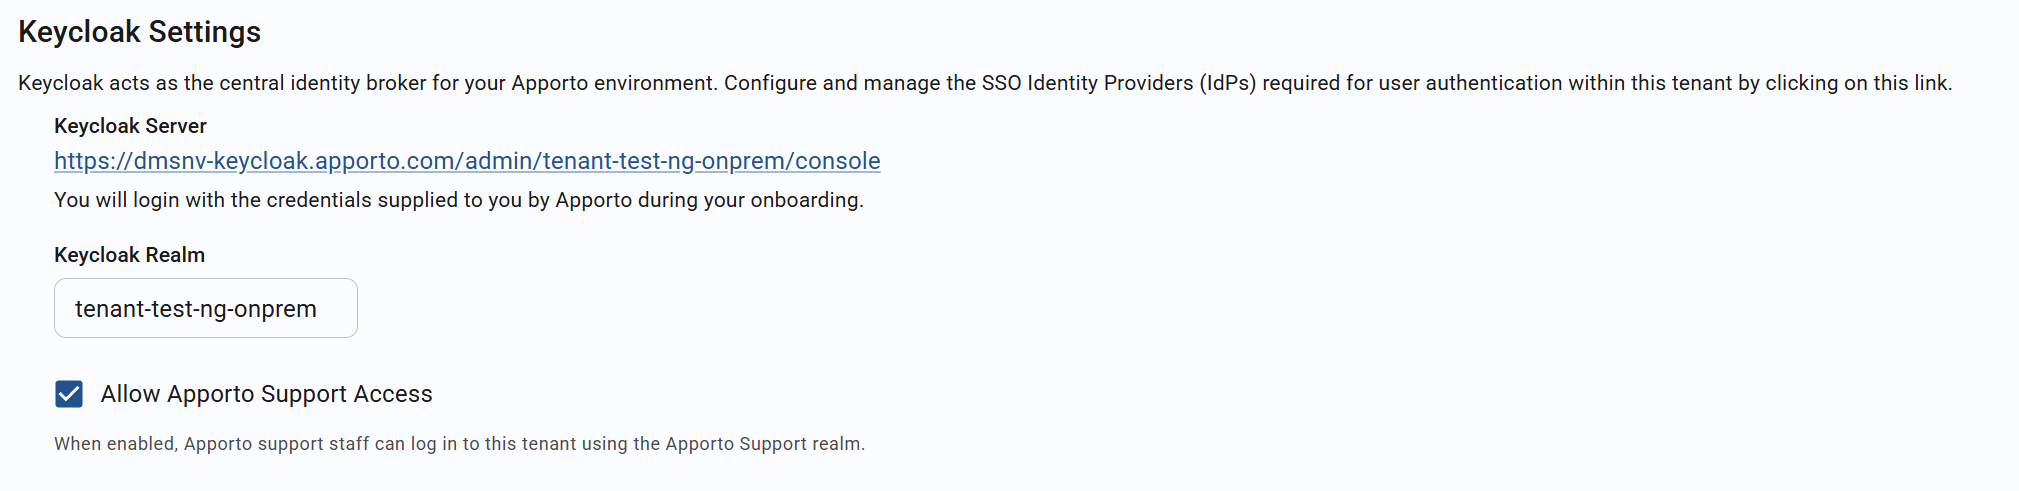
The control plane displays information about the Keycloak server your tenant uses, so administrators can quickly reach the Keycloak admin console to configure additional identity providers.
From here you can also control whether logins from the Apporto Support realm are allowed. This lets you decide whether Apporto support staff can be granted administrative access to your tenant , enable it when you want Apporto to assist, and disable it otherwise.
Configuring Identity Providers in Keycloak
You connect identity providers from the Keycloak admin console for your tenant's realm. Treat this page as the parent guide for Apporto NextGen SSO through Keycloak: start here to choose the right provider-specific setup document, then return here for shared guidance on roles, group syncing, and ongoing identity management.
Microsoft Entra ID OIDC SSO Setup
Use the Microsoft Entra ID guide when the customer authenticates through an Entra app registration using OpenID Connect. The guide covers the Keycloak OIDC broker, Entra redirect URI, client credentials, endpoint discovery or manual endpoint values, token claims, profile mappers, and optional group or role mapping.
Configuring Microsoft Entra ID as an OpenID Connect Provider in Keycloak
Okta OIDC SSO Setup
Use the Okta OIDC guide when the customer wants Okta to act as a confidential OIDC Web Application for Keycloak. The guide walks through creating the Okta OIDC app, registering the Keycloak redirect URI, collecting the client credentials and discovery endpoint, configuring Keycloak OIDC settings, mapping profile claims, assigning users or groups, and validating sign-in.
Configure Okta as an OpenID Connect Identity Provider in Keycloak
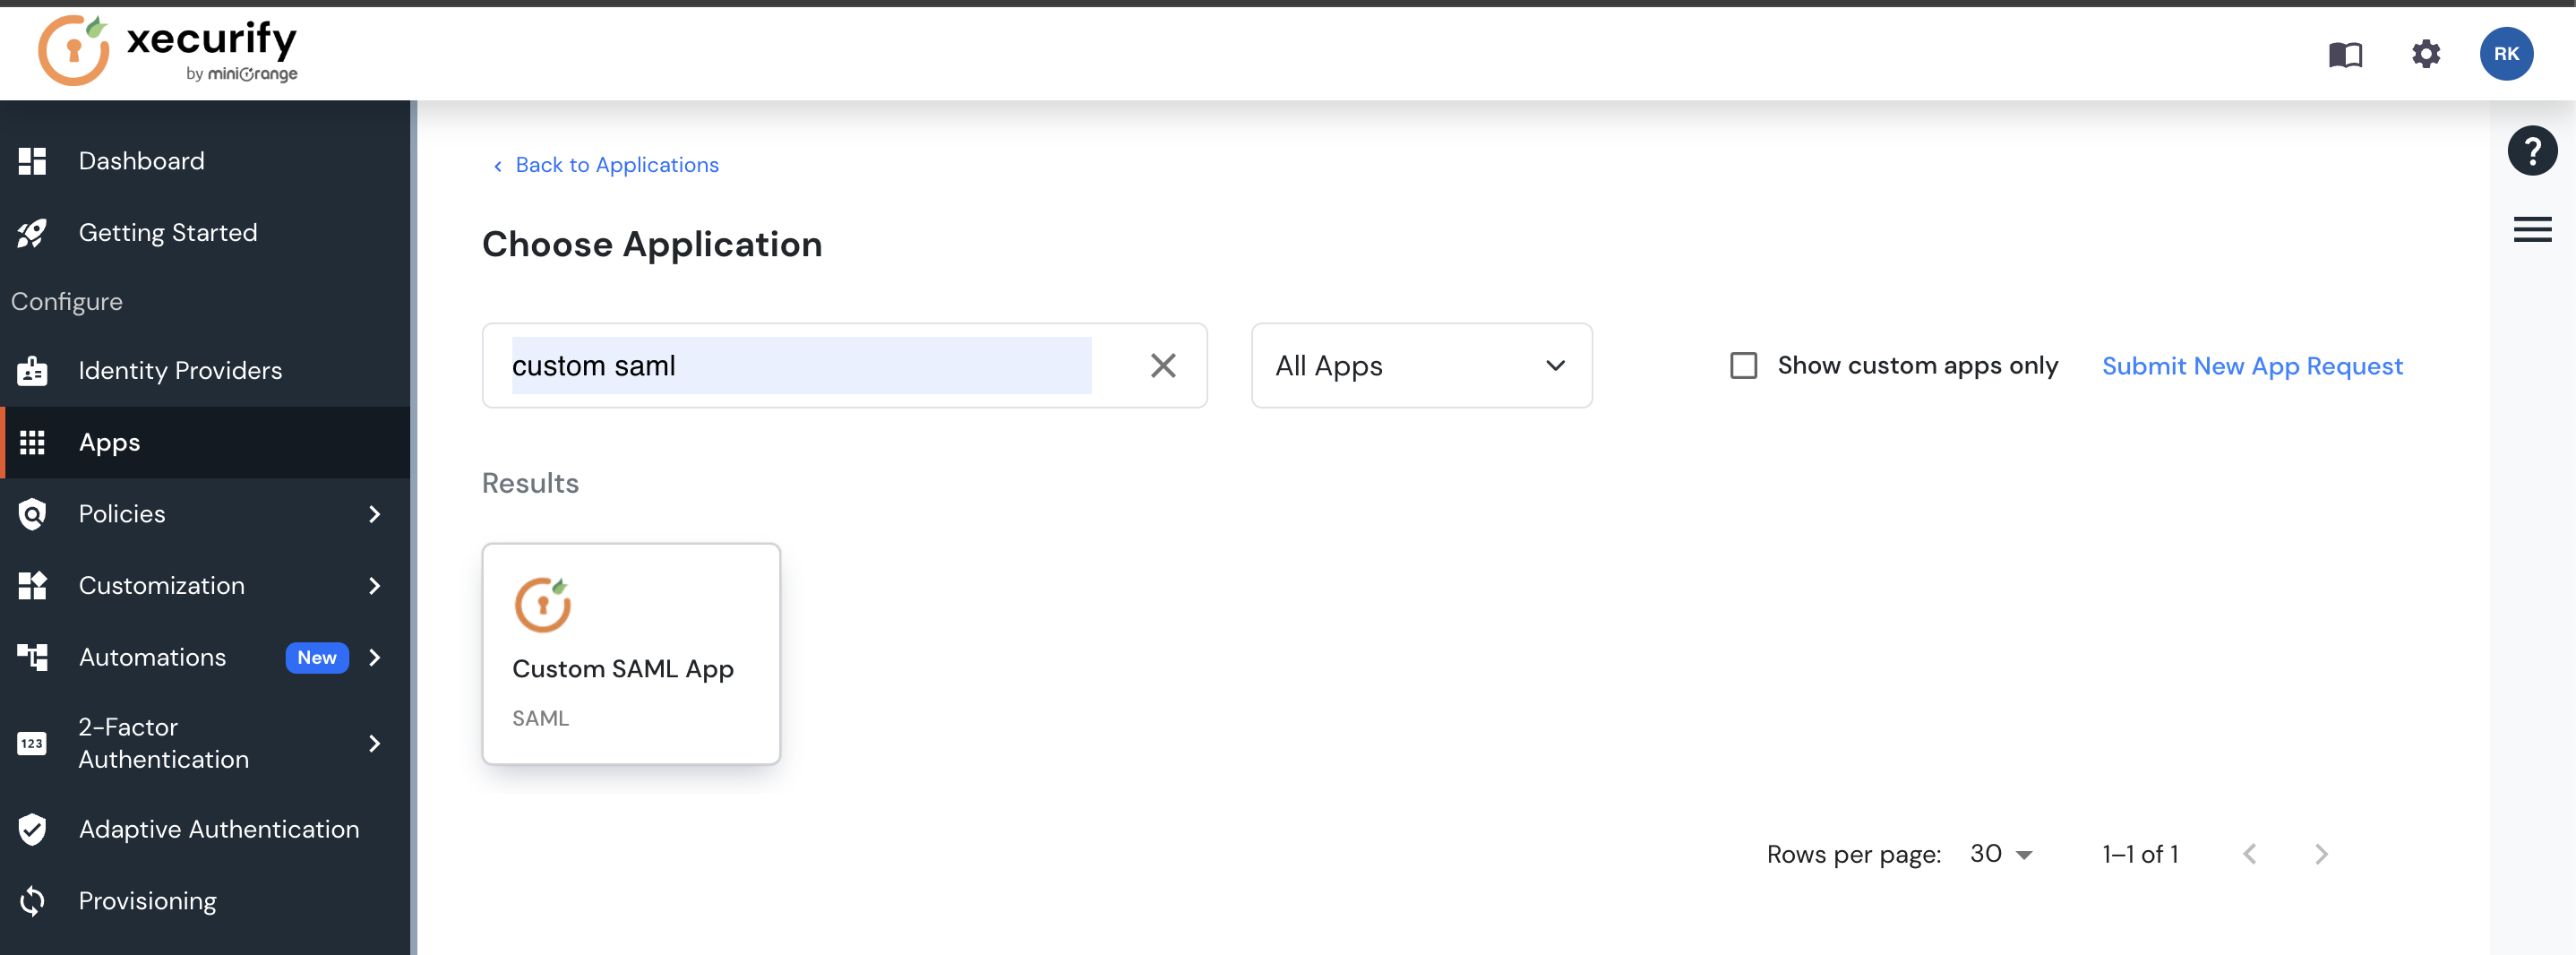
miniOrange SAML SSO Setup
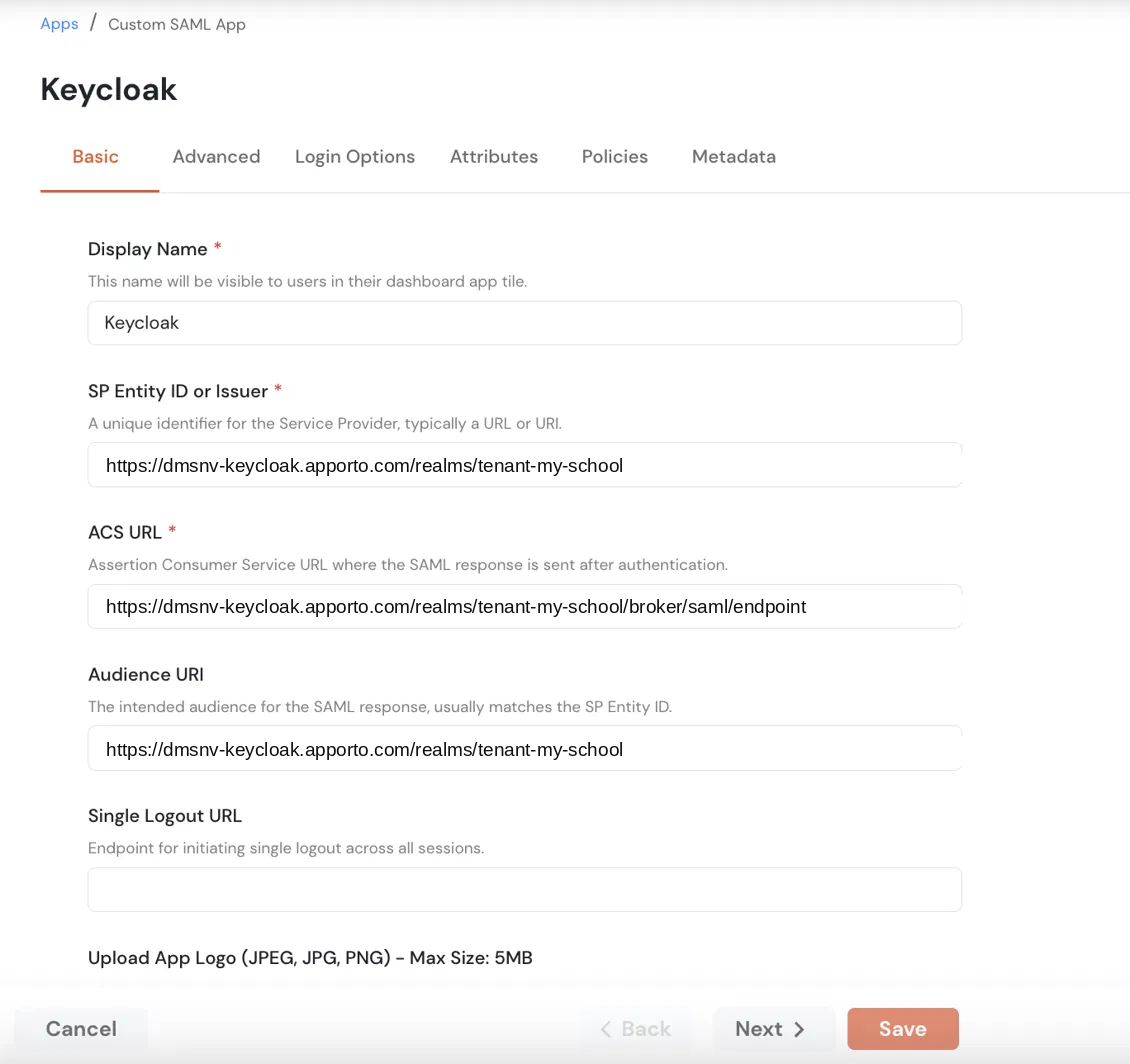
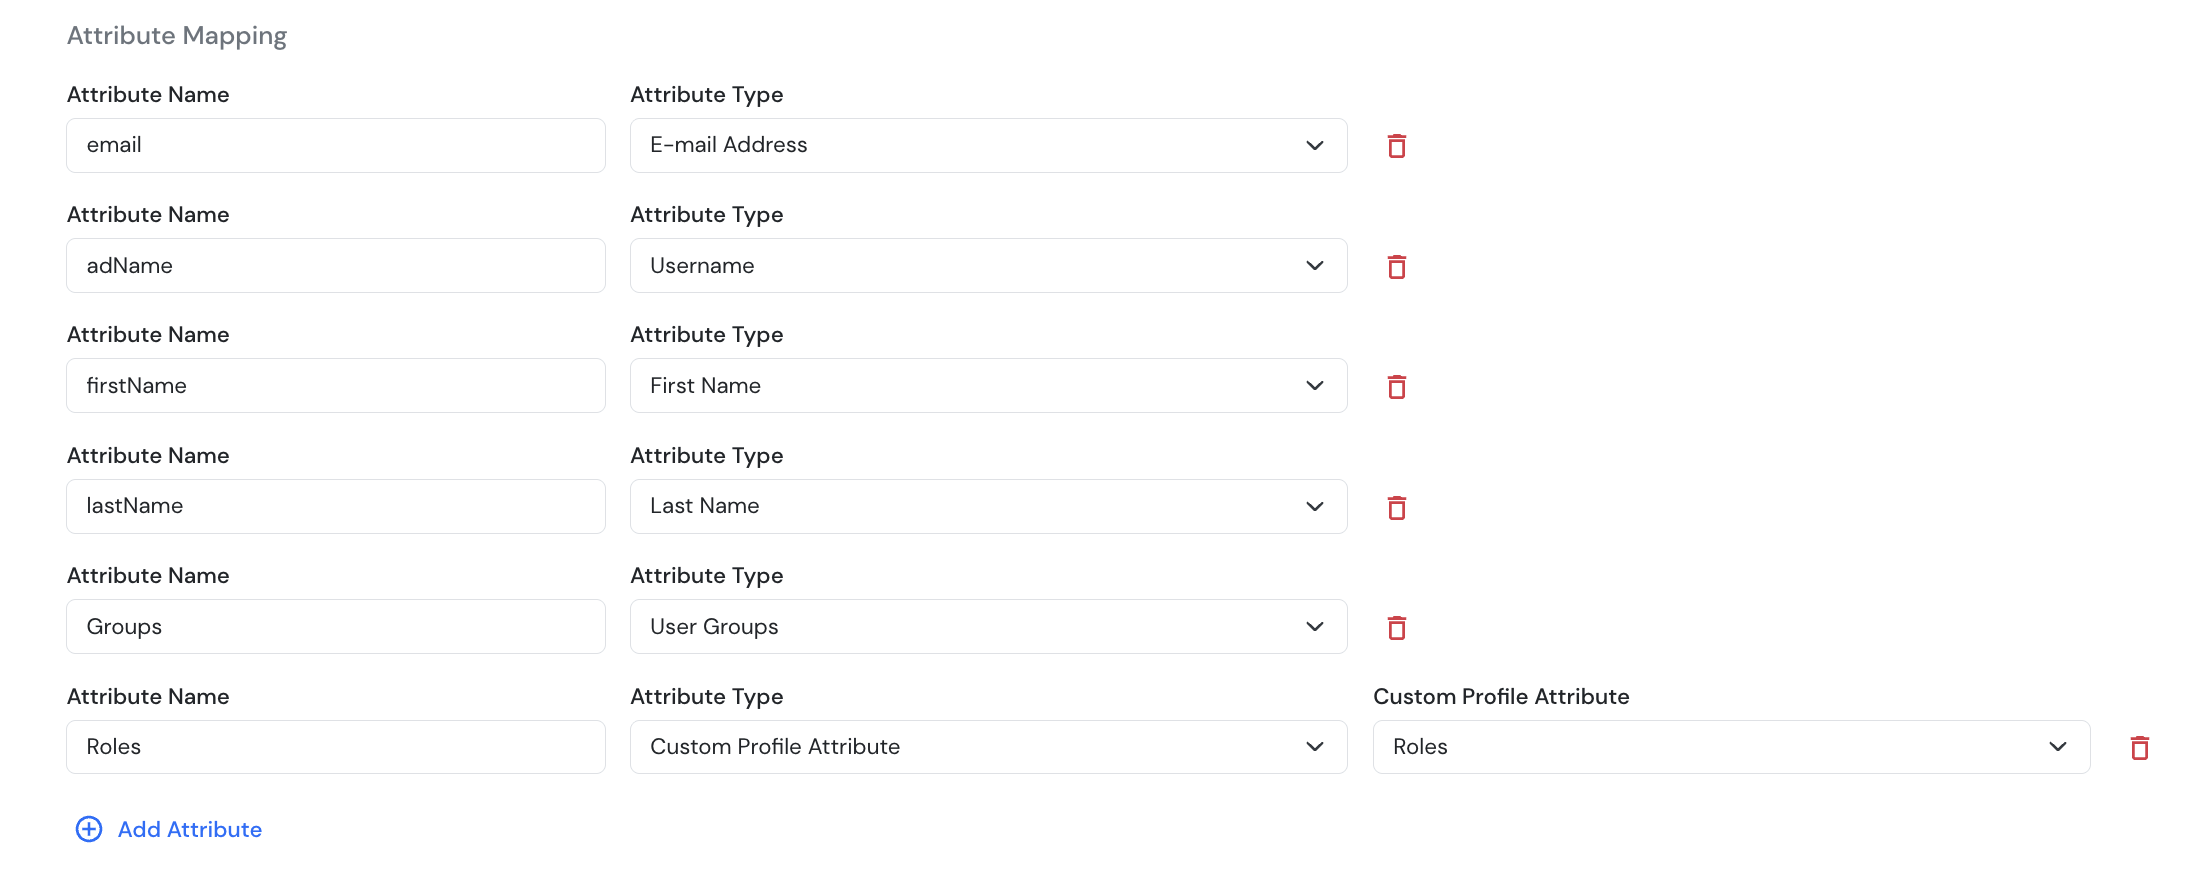
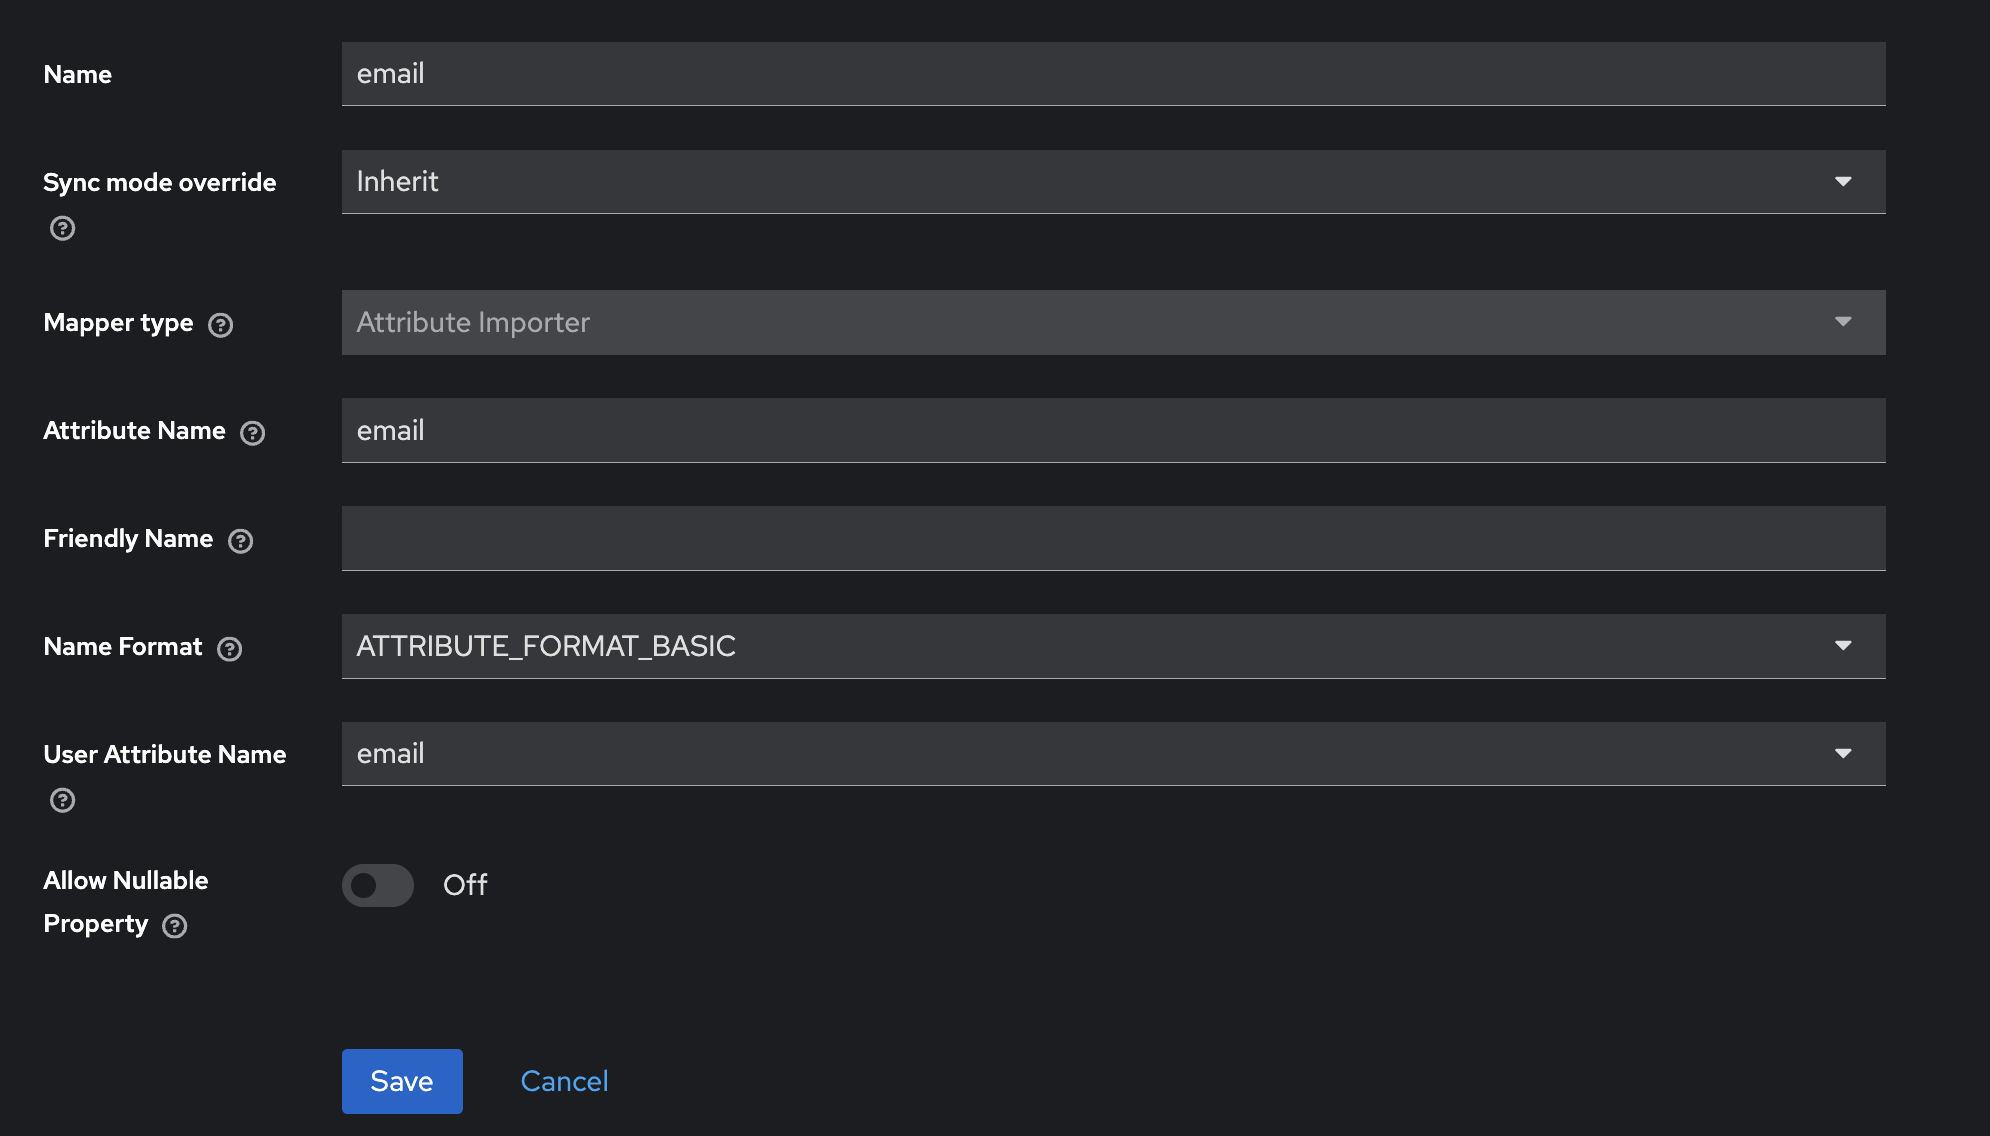
Use the miniOrange SAML guide for customers that use miniOrange as the SAML 2.0 identity provider. The guide explains how to create the Keycloak SAML broker, configure the miniOrange Custom SAML App, map NameID and required attributes, import metadata into Keycloak, review SAML settings, and test the end-to-end sign-in flow.
Configuring miniOrange as a SAML 2.0 Identity Provider in Keycloak
Okta SAML SSO Setup
Use the Okta SAML guide when Okta will send SAML assertions to Keycloak instead of OIDC tokens. The guide covers SAML app creation, Keycloak ACS and entity ID values, SAML signing settings, required attribute statements, Okta assignments, metadata import, Keycloak mappers, and validation.
Configure Okta as a SAML 2.0 Identity Provider in Keycloak
Other SAML SSO Identity Provider Setup
Use the generic SAML guide for any standards-compliant SAML 2.0 identity provider that does not have its own dedicated setup page, including Authentik when it is configured as a SAML provider. The guide covers the reusable Keycloak configuration pattern for metadata, attributes, mappers, roles, groups, and testing.
Configure a SAML 2.0 Identity Provider in Keycloak
Other OIDC SSO Identity Provider Setup
Use the generic OIDC guide for any standards-compliant OpenID Connect provider that does not have its own dedicated setup page, including Authentik when it is configured as an OIDC provider. The guide covers the Keycloak OIDC broker setup, provider discovery endpoint or manual endpoint values, client credentials, token claims, profile mappers, group or role mappers, and validation.
Configure an OpenID Connect Identity Provider in Keycloak
Active Directory / LDAP federation
We don't recommend this method. Your Keycloak realm runs on Apporto's servers, so LDAP federation needs your domain controllers to accept connections from the internet. Connect your identity provider through SAML or OIDC instead whenever you can.
Instead of brokering to an external identity provider, you can federate an LDAP or Active Directory directory directly into the tenant's Keycloak realm. Users authenticate with their directory credentials, and , with a group mapper , their groups sync into Keycloak.
Note: This is an alternative to the classic on-premises LDAP login (which is unchanged). Use federation when you want directory users to sign in through Keycloak and have their groups and roles managed there.
Steps
-
In the tenant realm, go to User Federation → Add provider → LDAP.
-
Set Vendor to Active Directory , this presets the AD defaults (
sAMAccountName,objectGUID, and the standard object classes). -
Set the Connection URL:
ldap://<dc-host>:389, orldaps://<dc-host>:636for TLS. The Keycloak host must be able to resolve and reach the domain controller. -
Set Bind type to
simple, and provide a Bind DN and Bind credentials for a read-only service account (for example,CN=svc-keycloak,OU=Service,DC=example,DC=com). -
Set Users DN to the subtree to search (for example,
DC=example,DC=comor a specific OU). Keep Edit mode asREAD_ONLY, Keycloak does not write back to your directory. -
Set the Username LDAP attribute to match how users sign in ,
sAMAccountName(e.g.bob) oruserPrincipalName(e.g.bob@example.com). This determines the sign-in format. -
Email is required. NextGen login requires an email address. The default email mapper reads the AD
mailattribute , if your users do not havemailpopulated, sign-in fails. Edit the federation'semailmapper (Mappers → email) to sourceuserPrincipalName(or another always-populated attribute) so every user has an email. -
Add a group-ldap-mapper (Mappers → Add → group-ldap-mapper) so directory group memberships sync into Keycloak groups.
-
Leave Import users on (the default). NextGen recognizes directory users by the
LDAP_IDattribute Keycloak stores on each imported user. -
Click Save, then Synchronize all users.
-
Show the sign-in form: go to Clients → your tenant client → Settings → Login settings and set Login theme to
apporto-ldap. The default theme hides the username and password form, so directory users can't sign in without this. -
Identify directory users to NextGen: go to Clients → your tenant client → Client scopes → your client's dedicated scope, then Add mapper → By configuration → User Attribute. Set Name and Token Claim Name to
ldap_idand User Attribute toLDAP_ID, and turn on Add to ID token, Add to access token and Add to userinfo. -
Users can now sign in; map their groups to NextGen roles using the Roles section below.
Roles
You can map a role from your identity provider to a role in the Apporto NextGen tenant. NextGen recognizes these role names:
-
administrator -
sub-admin -
faculty -
tech-support
Prerequisite , turn on SSO role override. By default, NextGen keeps each user's locally-assigned role and ignores any role sent by your identity provider. To let IdP-sent roles take effect, go to Setup → Identity Management and enable Allow SSO to override locally-assigned roles. Turn this on only if you intend to manage roles through your IdP: while it is on, a mapped IdP role replaces the user’s local role at each login (and if the IdP sends no role for a user, their locally-assigned role still applies).
Manage each user's role in one place , either the IdP or NextGen, not both. When the IdP sends a role, that role is used; if the IdP does not send a role for a user, the role assigned manually in NextGen applies.
The mechanism depends on the identity provider type: a brokered SAML or OIDC provider maps a claim or attribute value to the role, while an LDAP or Active Directory federation assigns the role to a synced directory group. Both are described below.
Brokered IdP (SAML or OIDC): map a claim or attribute to a role
-
Make sure the target role exists as a client role on the tenant's OIDC client (Clients → your tenant client → Roles → Create role), named exactly one of the four role names above.
-
Configure your IdP to send the role:
-
Entra ID: define App Roles on the app registration, then assign users or groups to them on the enterprise application. The
rolesclaim is emitted automatically once assigned. -
SAML IdPs: emit the role as an assertion attribute.
-
-
On the identity provider in Keycloak, go to Mappers → Add mapper:
-
OIDC (e.g. Entra ID): choose Claim to Role. Set Claim to the claim carrying the role (e.g.
roles), Claim Value to the value that should grant it (e.g.Faculty), and Role to the client role on the tenant client (e.g.faculty). Use Advanced Claim to Role for multiple values or regex matching. -
SAML: choose Attribute to Role. Set the attribute name and value, and the target client role.
-
Set Sync Mode Override to Force so the role is re-evaluated on every login.
-
-
Make sure the role reaches the tenant: Keycloak emits the tenant client's roles under
resource_access.{client}.rolesby default. Do not enable Lightweight Access Tokens on the tenant client, or the role will not reach the tenant.
After this, a user signing in through the IdP receives the mapped NextGen role.
LDAP / Active Directory federation: assign a role to a directory group
With federation there is no per-user role claim , role assignment follows group membership. The federation's group mapper syncs your directory groups into Keycloak (keeping their existing names); you then assign the NextGen role to the group whose members should receive it. This works with any existing group names, so there is no need to rename groups or create a dedicated OU.
-
Make sure the federation's group mapper is configured so your directory groups appear under Groups in Keycloak.
-
Make sure the target client role exists on the tenant's OIDC client (one of the four role names above).
-
Go to Groups, select the directory group whose members should get the role (for example
IT-Admins), then Role mapping → Assign role. -
Choose Filter by clients, find the tenant's OIDC client, select the role (for example
administrator), and click Assign.
Members of that group receive the role under resource_access.{client}.roles on their next login, and the tenant applies the matching NextGen role.
Syncing groups
Apporto can sync the groups your SSO users belong to. Synced groups map to groups in your tenant and can then be used to grant access to apps and desktops.
How sync behaves:
-
Sync occurs when a user logs in. Apporto reads the groups the user belongs to and updates their membership accordingly (adding and removing as needed).
-
Groups are not deleted when they have no members, so they can be reused later. An administrator can manually delete groups that are no longer needed.
There are two ways to sync groups from your identity provider.
Method 1: Manual mapping
This creates a mapping for each group individually. It must be repeated for every group you want to sync.
-
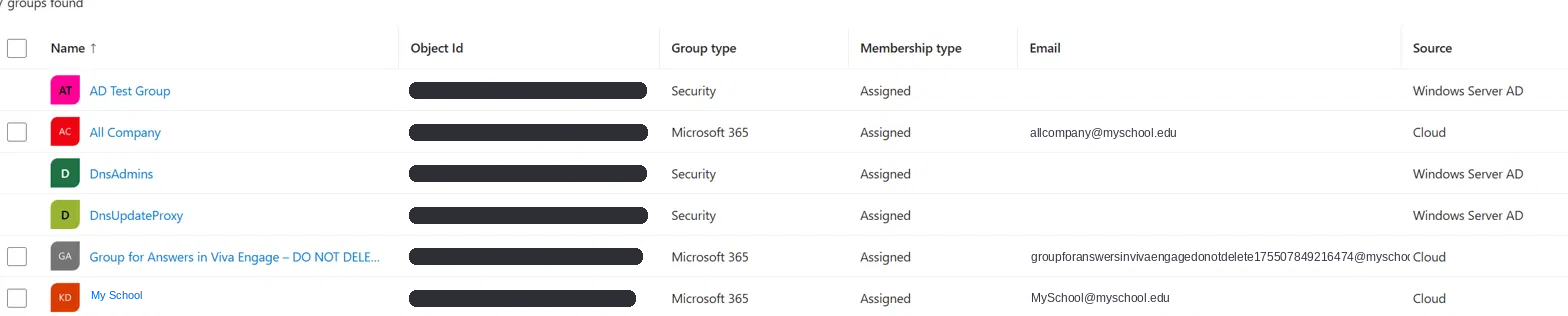
Find the group ID in your IdP (for example, on the Groups page in Entra ID).
-
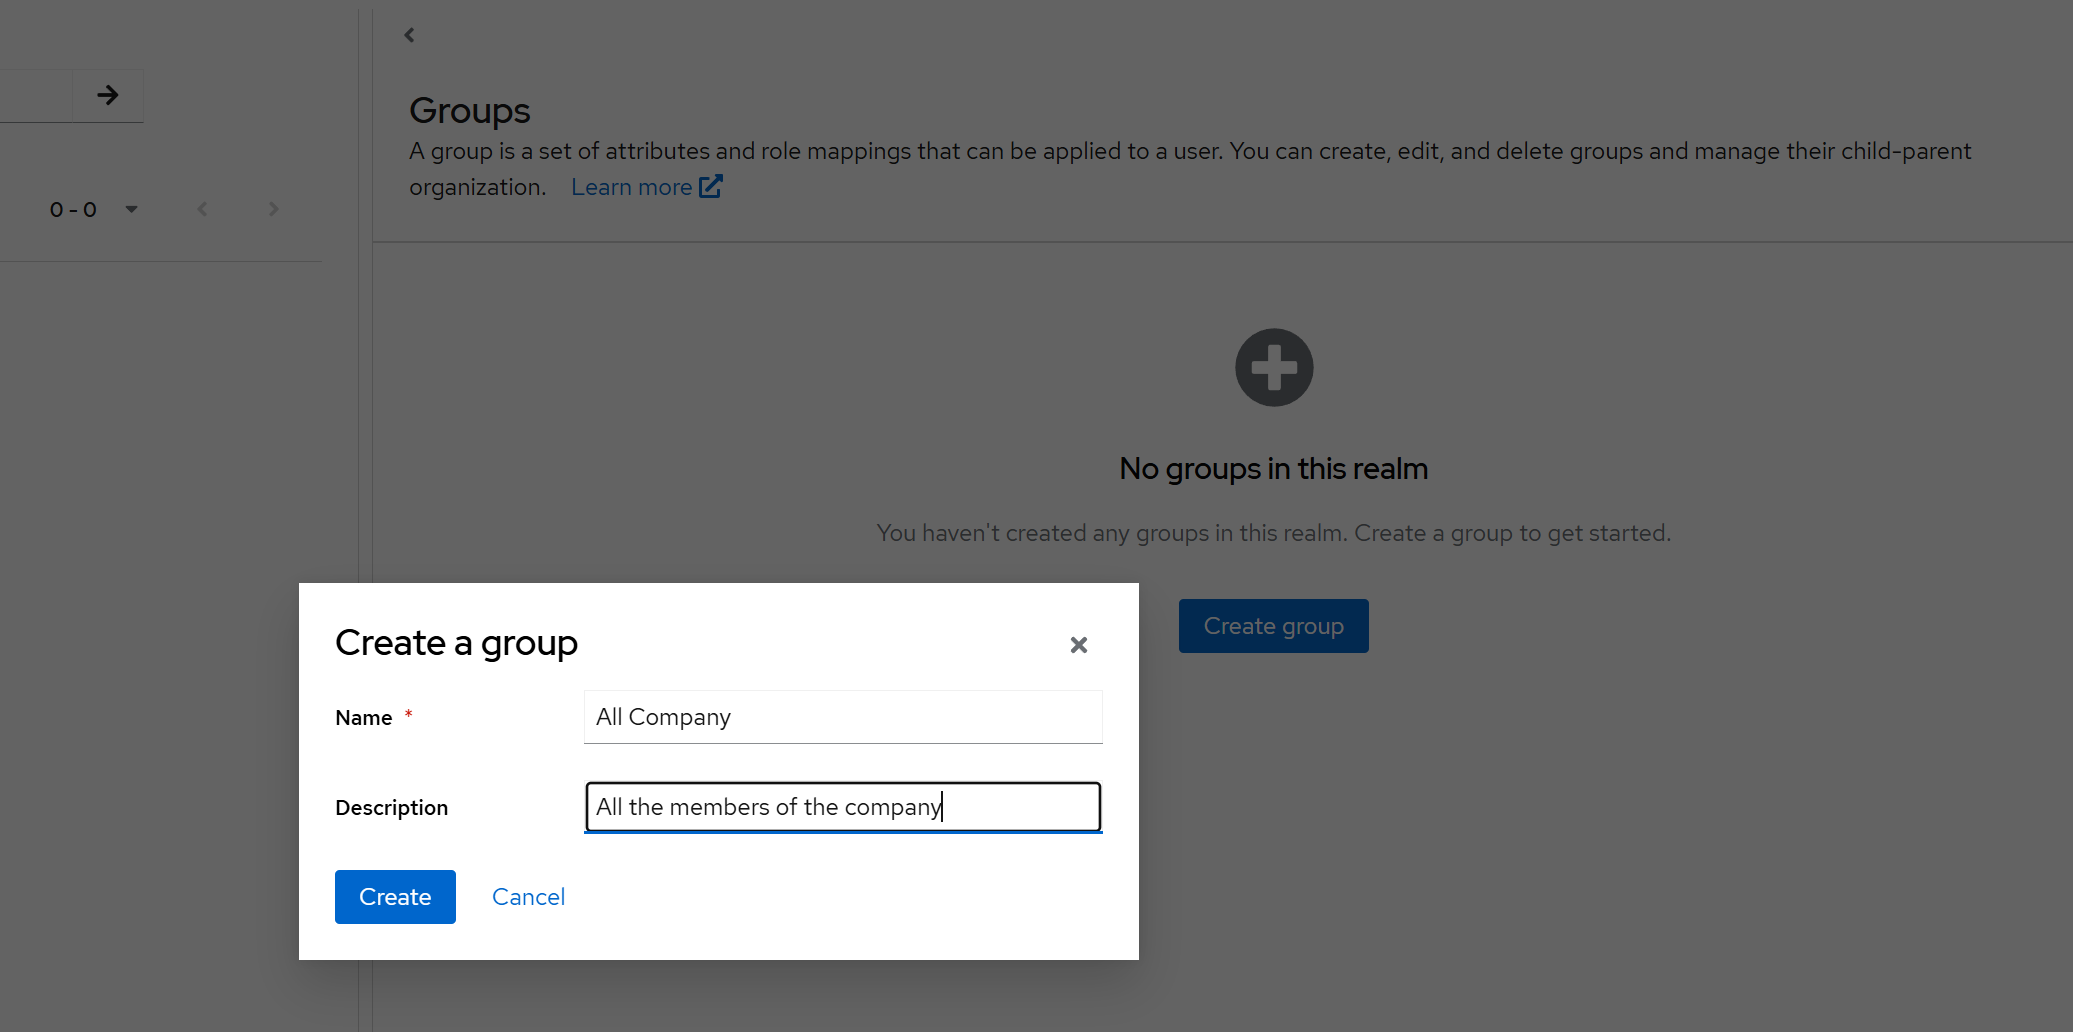
Create a group in Keycloak that corresponds to the IdP group.
-
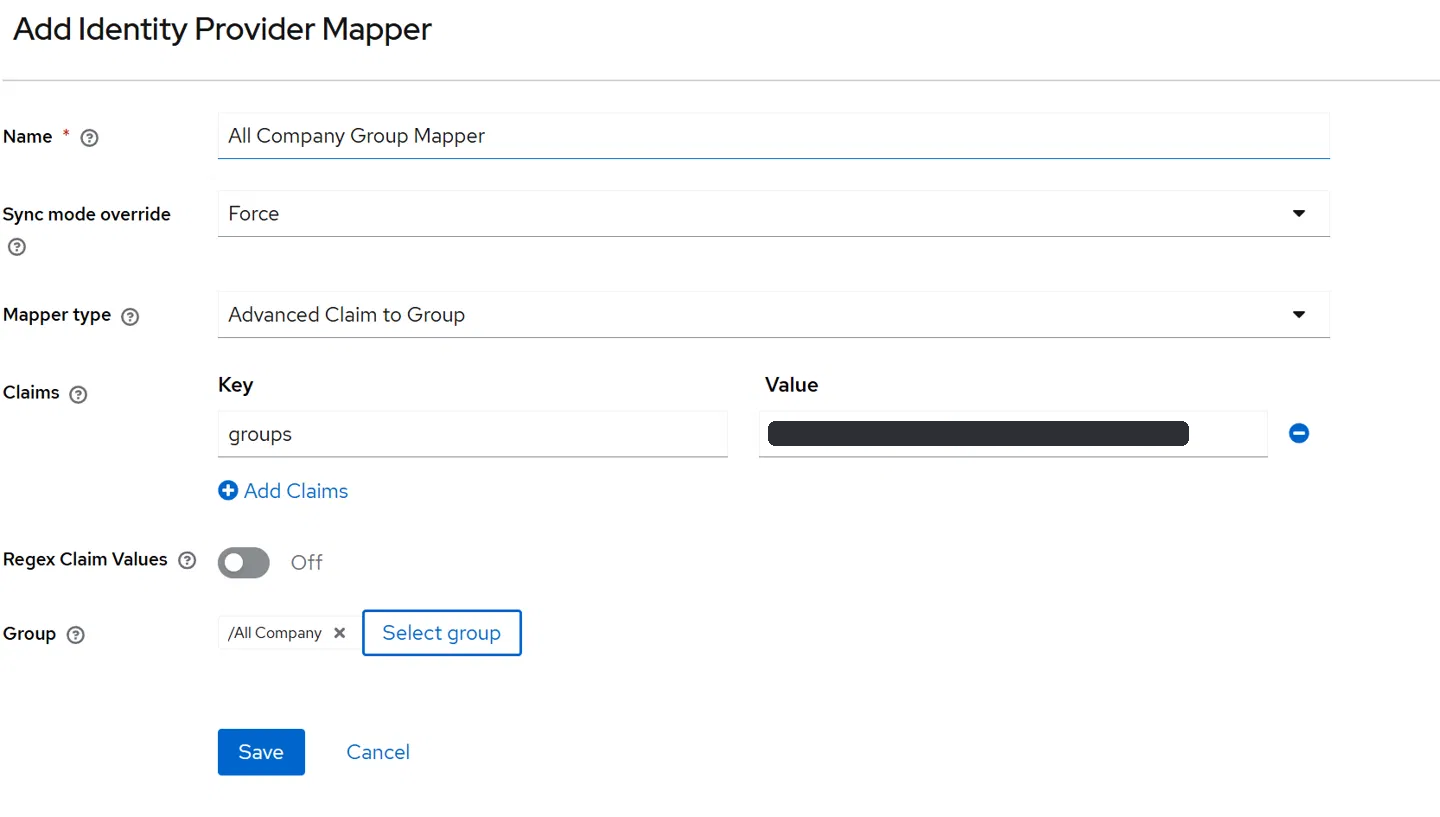
Set up a mapping on the IdP: go to Identity Providers → your IdP → Add Mapper.
-
Set Sync mode to FORCE so membership is always updated.
-
Set the mapper type to Advanced Claim to Group.
-
Set the claim to
groupsand the value to the group's ID from the IdP. -
Select the Keycloak group you created.
-
Click Save.
-
-
Repeat for every other group you want to map.
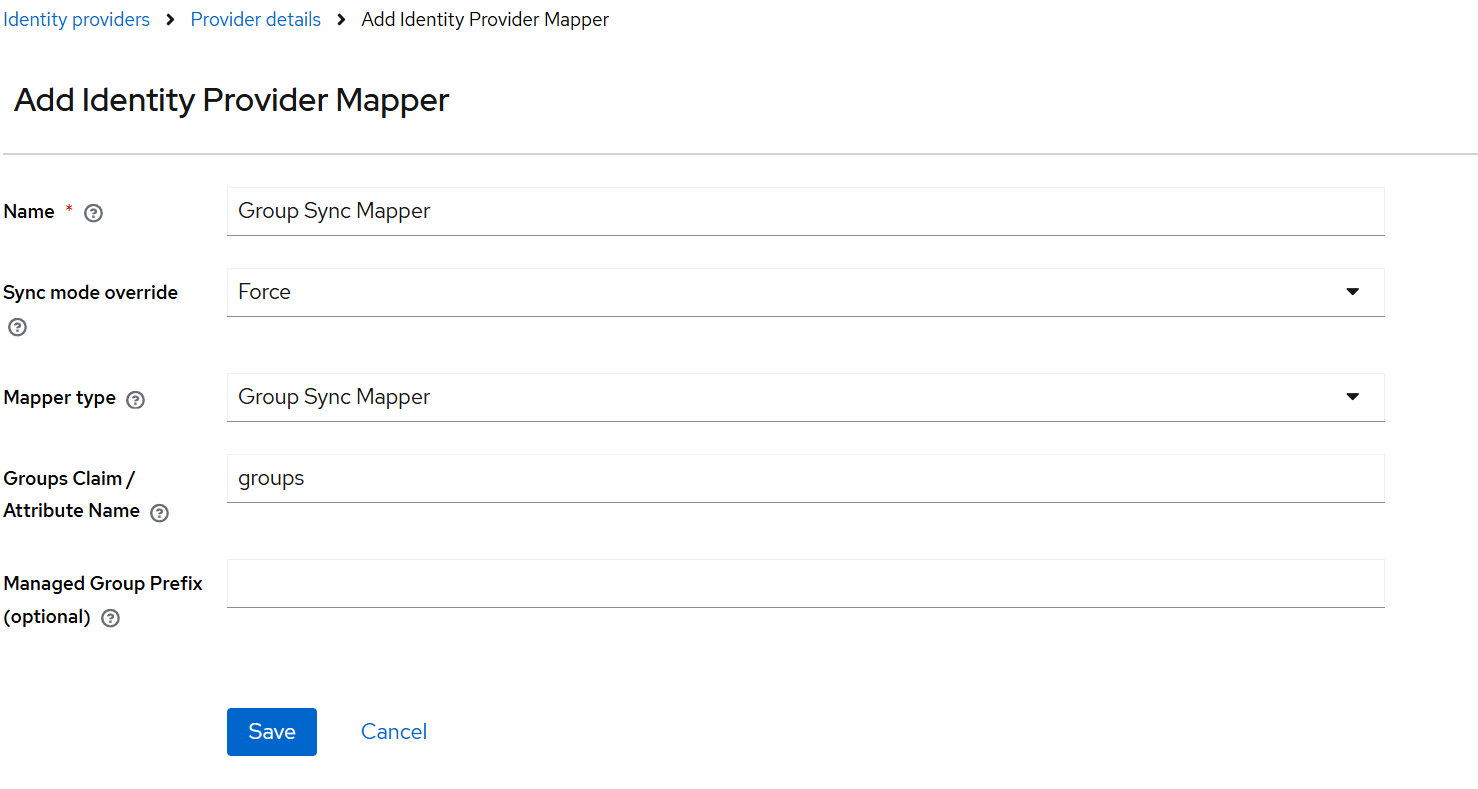
Method 2: Group Sync Mapper (recommended)
Manual mapping works but is tedious. Apporto provides a Group Sync Mapper that performs the mapping automatically , you do not need to know each group's ID or create a mapping per group. You only add it once as a mapper.
-
Go to Identity Providers → your IdP → Add Mapper.
-
Set Sync mode to FORCE so membership is always updated.
-
Set the mapper type to Group Sync Mapper.
-
Set Group Claim / Attribute Name to
groups(unless your IdP uses a different name). -
Click Save.
With the Group Sync Mapper in place, every group a user belongs to is created on the fly as needed when the user logs in. If a group name already exists, the user is simply added to or removed from it.