

Managing single-session servers and virtual machines (VMs)
The second tab of the Servers screen lets you configure single-session server pools and servers.
Use the information in this guide to learn how to:
For information on how to drain a single-session server pool, visit the article on draining server sessions.
Manage single-session servers
For single-session servers, end users will have dedicated OS, CPU, RAM, etc., and will not be sharing those with any other users. If desired, the users can have administrative privileges to their servers.
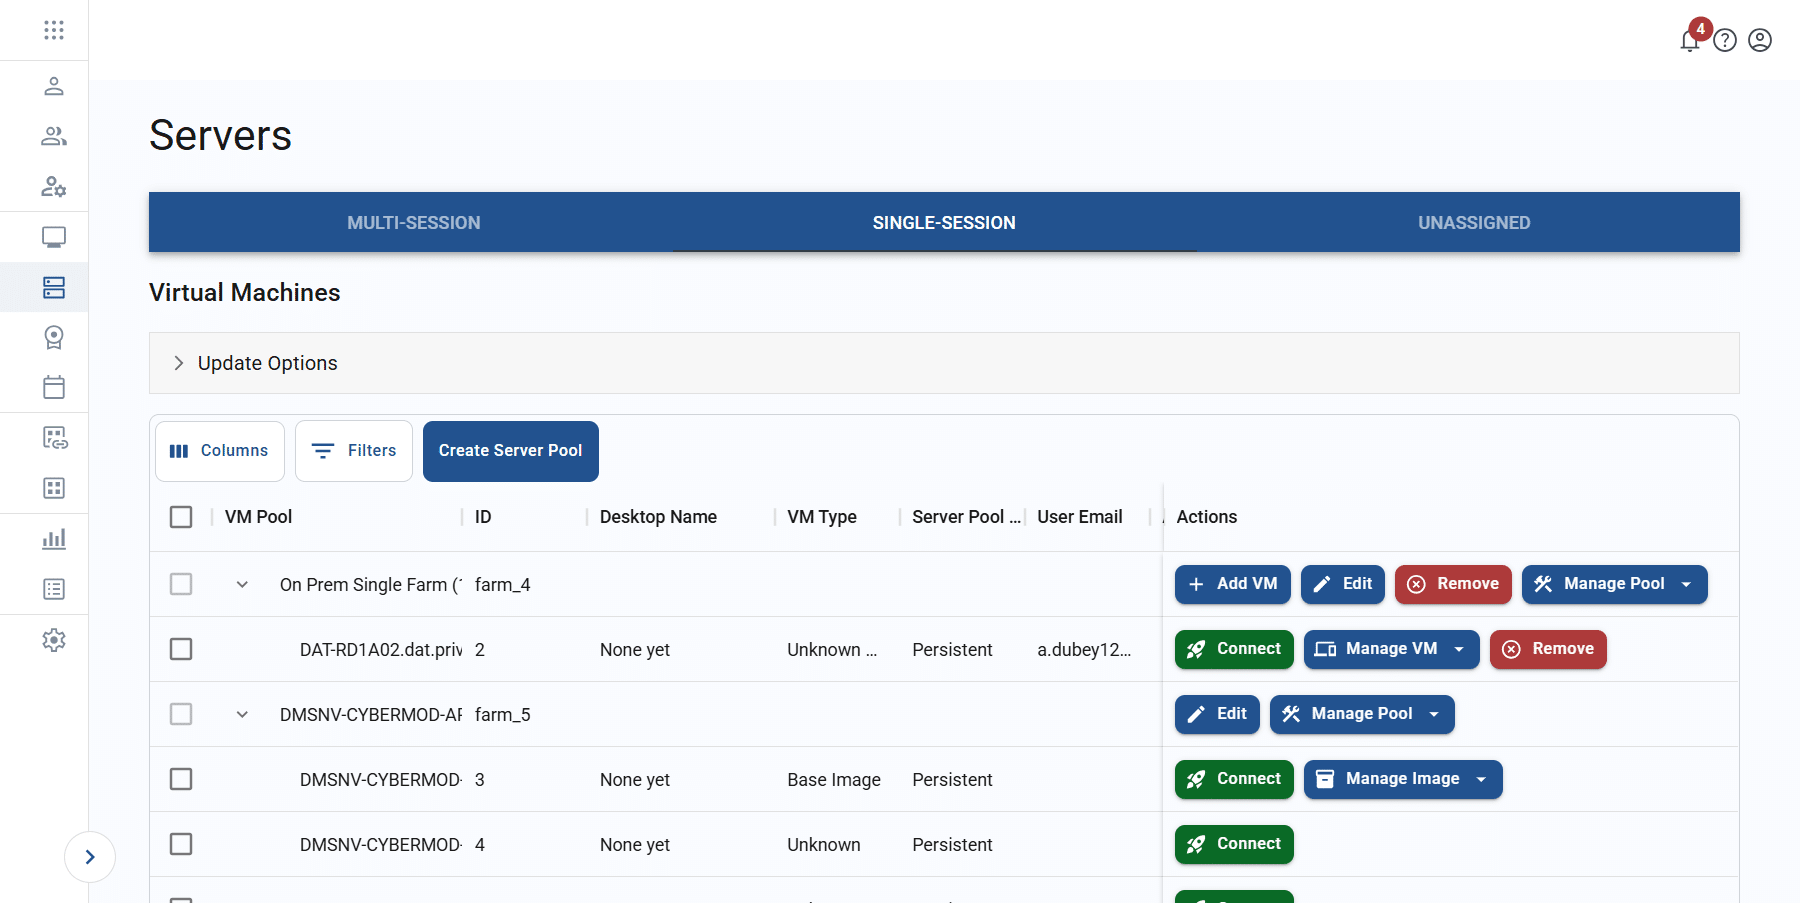
To view the single-session server pool list, follow the steps below.
-
to the system using your credentials.
-
Click servers or the

icon in the navigation panel.
-
Click on the “single-session” tab to display the list of servers. You may filter the list or adjust the displayed columns to locate records. See the article on working with lists for more information.
Create a server pool
A server pool is a group of servers that share an image and will work as a group to deliver virtual desktops to end users. Each server pool must be tied to a resource hub and will inherit its settings.
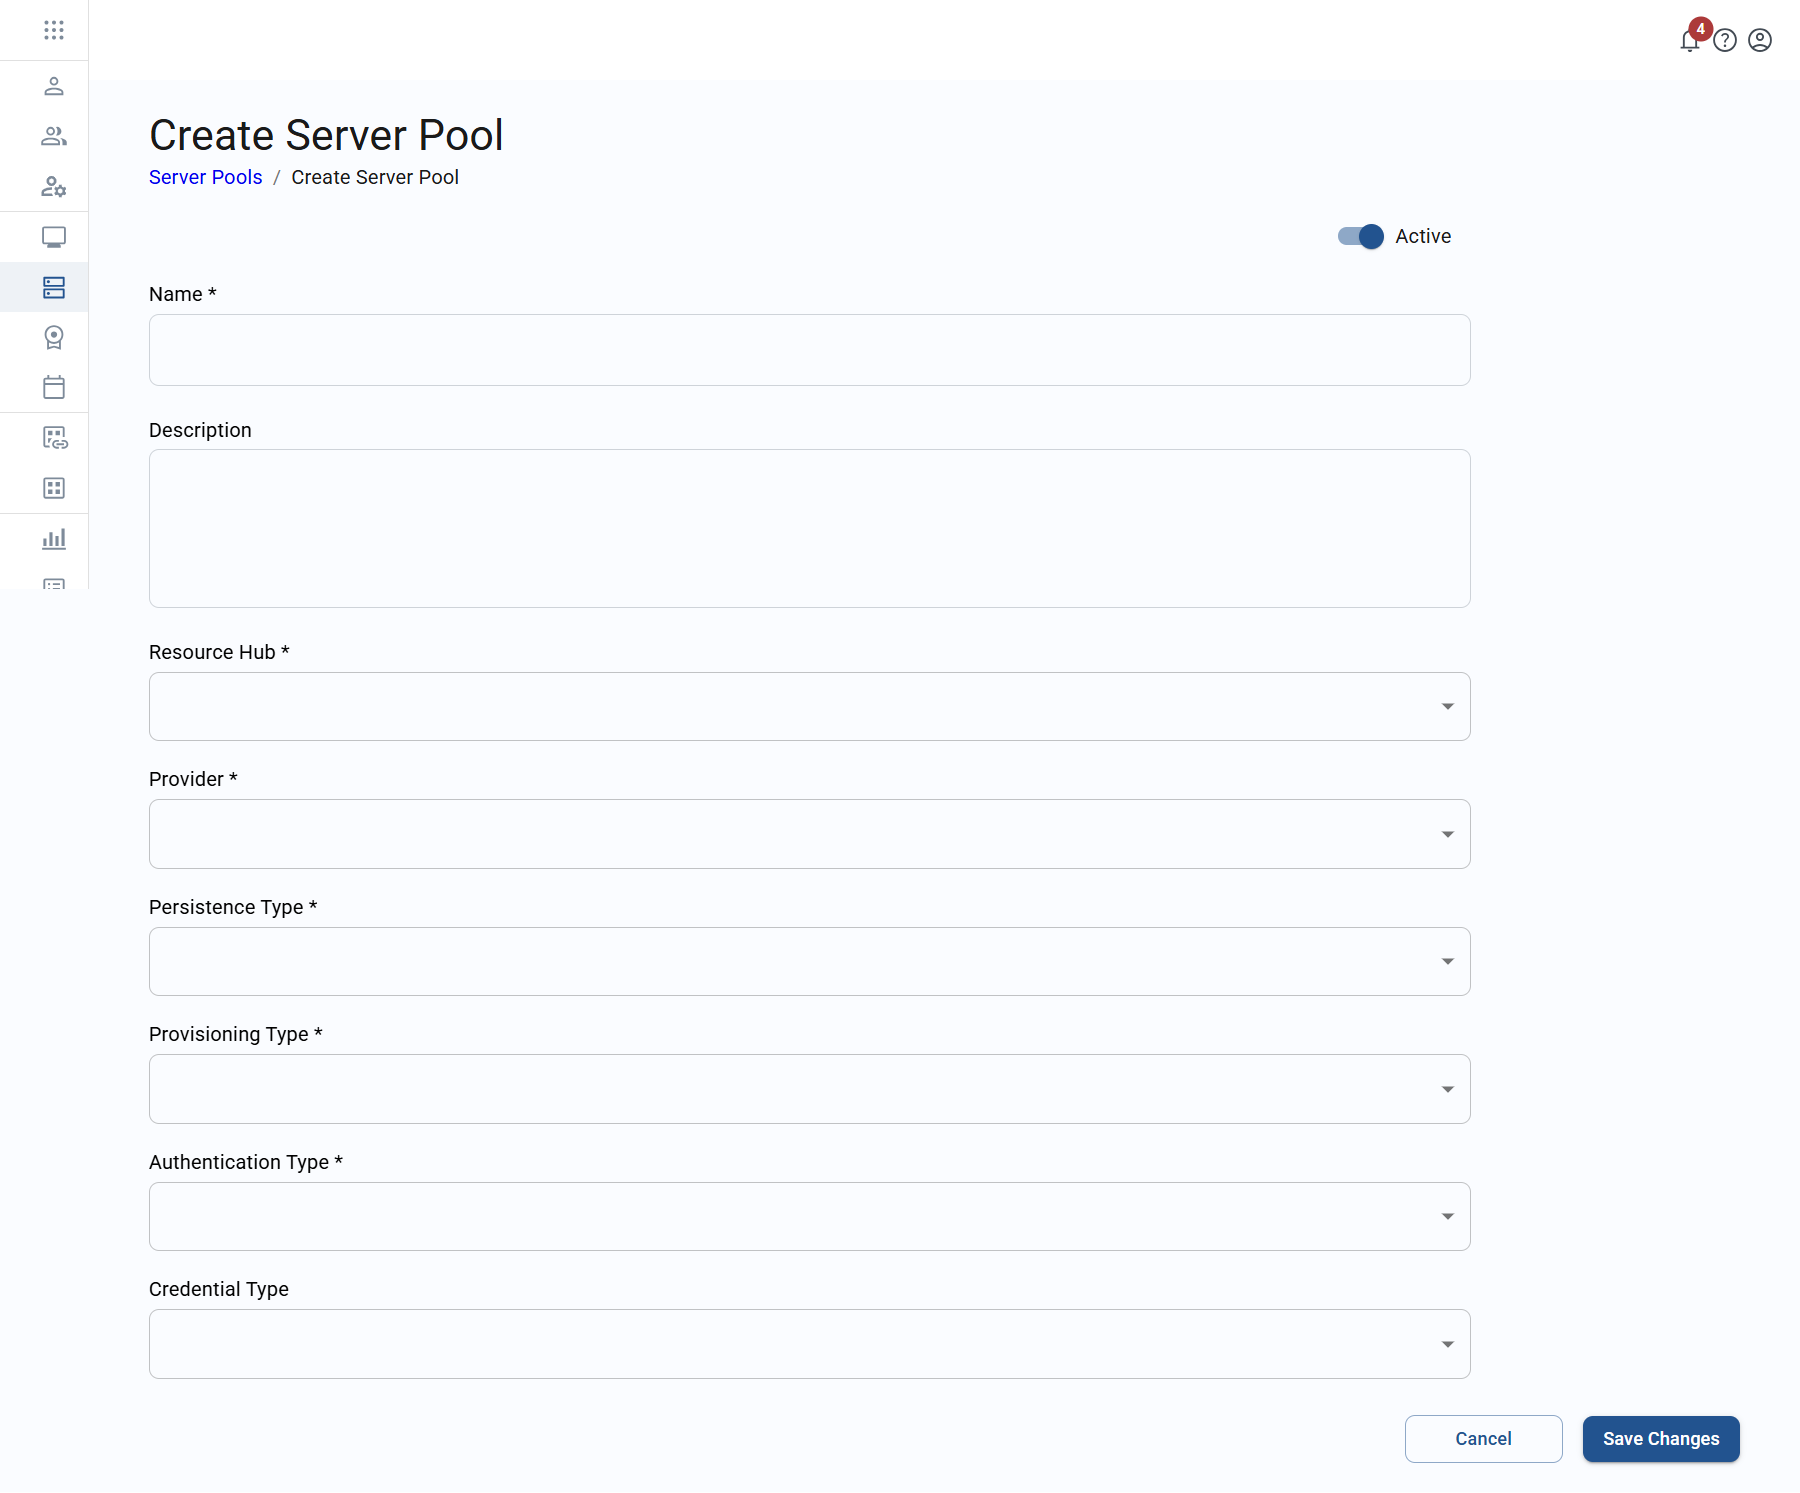
The table below shows the values that make up a server pool profile.
|
Field |
Datatype |
Required? |
Notes |
|---|---|---|---|
|
Name |
String |
Yes |
A user-friendly name |
|
Description |
String |
Yes |
Any meaningful description |
|
Resource hub |
Lookup value |
Yes |
List of all resource hubs in the system available to the user |
|
Provider |
Lookup value |
Yes |
List of all providers for the selected resource hub |
|
Persistence type |
Lookup value |
Yes |
|
|
Provisioning type |
Lookup value |
Yes |
|
|
Authentication type |
Lookup value |
Yes |
This field is visible for on-premises server pools, and it is dependent on provider:
|
|
Credential type |
Lookup value |
No |
This field is visible for pools using local auth:
|
|
Active |
Boolean |
Yes |
|
To create a new server pool, follow the steps below.
-
From the Servers page, click on the “single-session” tab to access the server pools list.
-
From the top of the list, click create server pool to trigger the Create Server pool screen.
-
Enter the appropriate values, and then click save changes to submit.
-
The new server pool will now appear in the list.
Edit a server pool
A server pool is a group of servers that share an image and configuration. In the list, server pools are left-justified and the servers within those pools are indented below them.
To edit a server pool, follow the steps below.
-
From the Servers page, click on the “single-session” tab to access the server pools list.
-
From the list, click edit on a server pool row to edit that record. To make it easier to locate the appropriate server pool, you may adjust the visible columns or filter or search through the list. See the article on working with lists for more information.
-
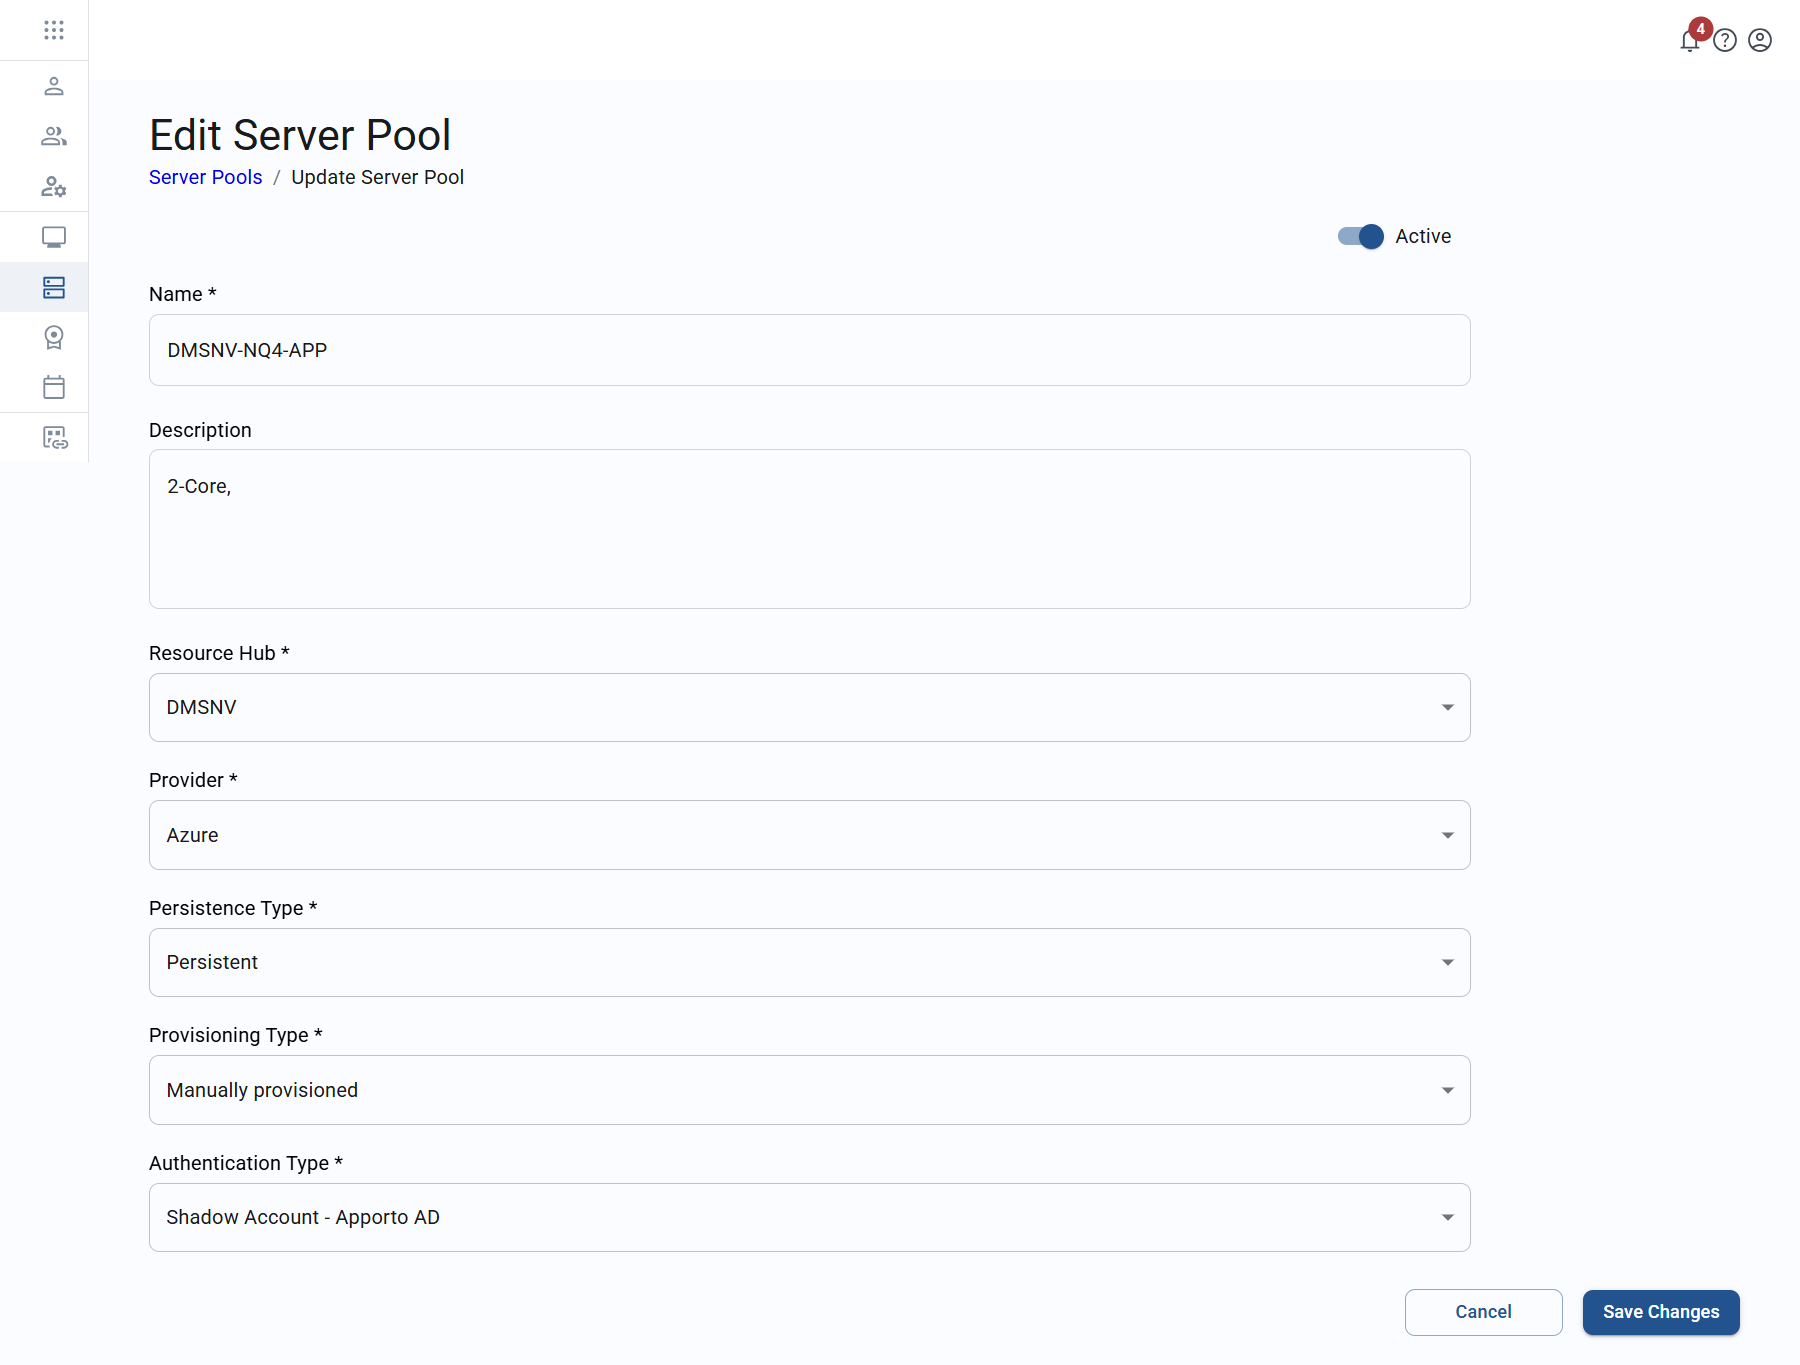
The system will direct you to the Edit server pool screen.
-
Update any values, and then click save changes to submit.
Remove a server pool
To remove a server pool, follow the steps below.
-
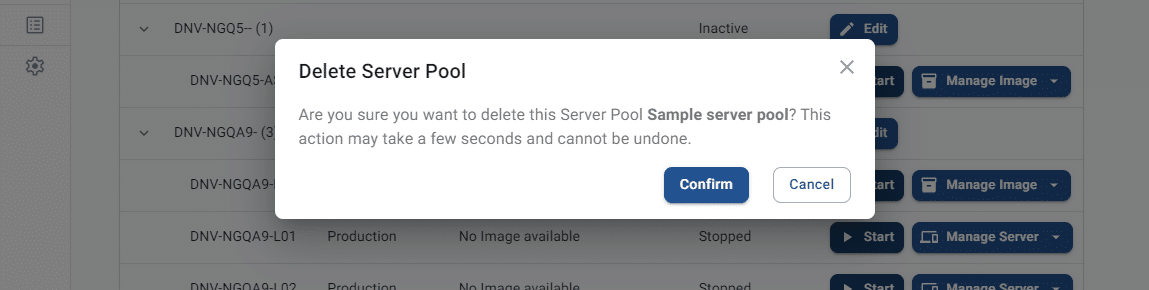
From the “single-session” tab of the Servers page, click remove on a server pool row. This will trigger the Delete server pool pop-up screen.
-
Click confirm to complete removal of the server pool. This will remove the server pool from the list.
Create a VM
Once a server pool has been created, you can add one or multiple VMs to it.

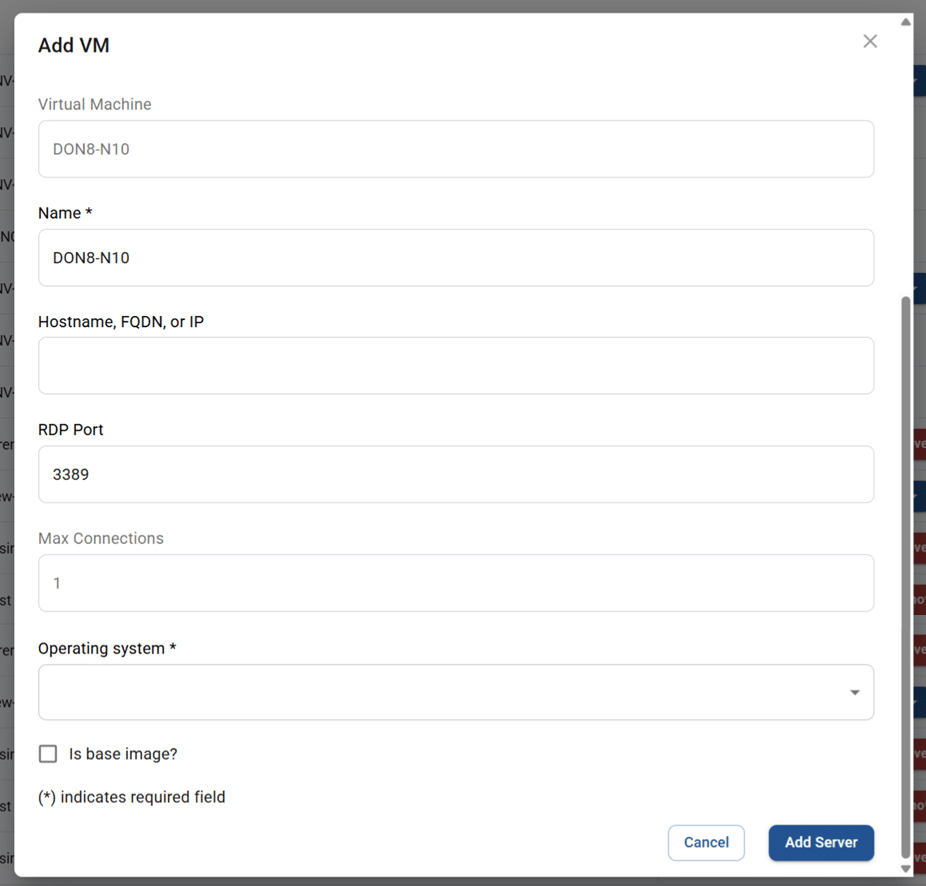
The table below shows the values that make up a server profile.
|
Field |
Datatype |
Required? |
Notes |
|---|---|---|---|
|
Virtual machine |
String |
Display only |
Name of the server (VM) pool from which you triggered server creation |
|
Name |
String |
Yes |
|
|
Hostname, FQDN, or IP address |
String |
No |
The hostname, fully qualified domain name, or IP Address of the RDP server instance |
|
RDP port |
String |
No |
RDP Service listening port The value for this is usually 3389. |
|
Max connections |
Integer |
Disabled |
Single session servers will be set to 1 concurrent user. This field is not editable. |
|
Operating system (OS) |
Lookup value |
No |
|
|
Is base image? |
Boolean |
No |
Determines whether the new VM should be used as the base image You must designate 1 VM in the pool to be the base image. |
To create a VM, follow the steps below.
-
From the Servers page, click on the “single-session” tab to access the list.
-
From the list, click add VM on a server pool row to trigger the Add VM pop-up screen. To make it easier to locate the appropriate server pool, you may adjust the visible columns or filter or search through the list. See the article on working with lists for more information.
-
Enter the appropriate values, and then click add server to submit.
-
The new VM will now appear in the list.
Remove a VM
To remove a VM, follow the steps below.
-
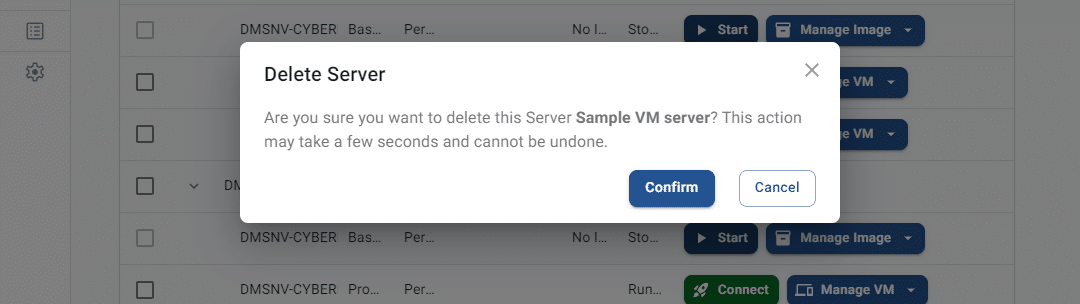
From the “single-session” tab on the Servers page, click remove on a server row. This will trigger the Delete server pop-up.
-
Click confirm to complete deletion. The VM will no longer appear in the list.
Removing a VM record in Apporto does not destroy the VM, it simply removes the VM from the Apporto interface.
Manage a VM
VMs within a server pool have multiple options.
Back up an image
At times, you may want to create a backup image from a server.
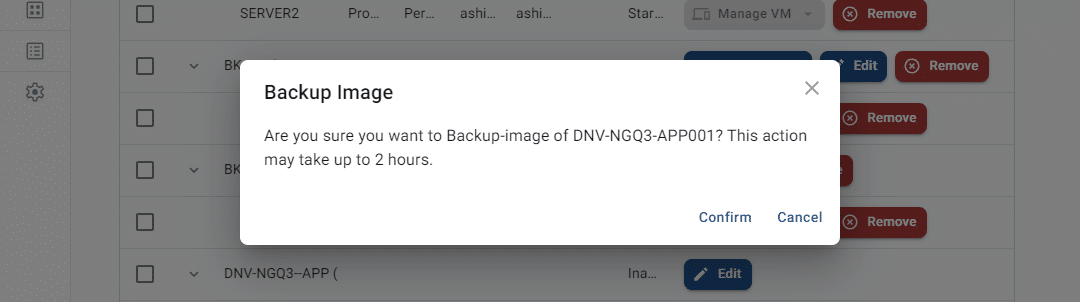
To create a server backup image, follow the steps below.
-
From the “single-session” tab on the Servers page, locate a server. To make it easier to locate the appropriate server, you may adjust the visible columns or filter or search through the list. See the article on working with lists for more information.
-
Click manage server to view server options.
-
Click backup image to trigger the Backup image confirmation pop-up.
-
Click confirm to complete creation of the backup image. The process may take up to 2 hours.
-
After the backup is created, it can be restored.
Restore image
If a server has had a backup image created, it can be restored.
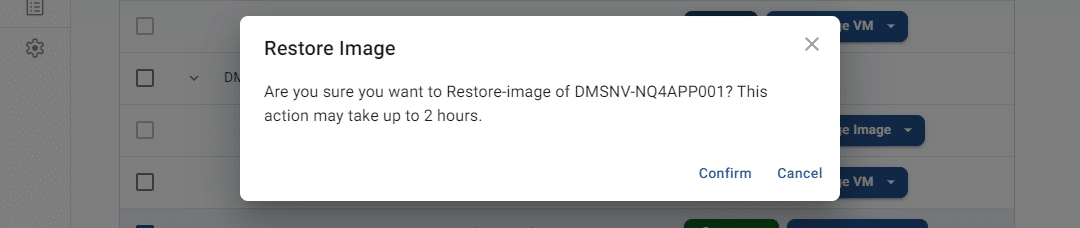
To restore a server backup image, follow the steps below.
-
From the “single-session” tab on the Servers page, locate a server. To make it easier to locate the appropriate server, you may adjust the visible columns or filter or search through the list. See the article on working with lists for more information.
-
Click manage server to view server options.
-
Click restore image to trigger the Restore image confirmation pop-up.
-
Click confirm to restore the most recent image backup. The process may take up to 2 hours.
Re-image
At times, you may wish to create a new base image from a single server and deploy it to all servers in the pool.
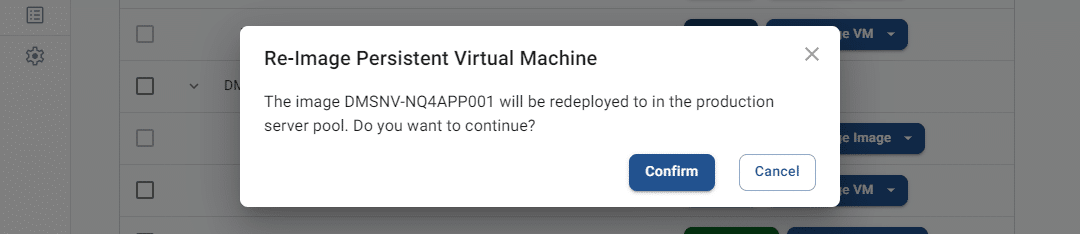
To re-image a server, follow the steps below.
-
From the “single-session” tab on the Servers page, locate a server. To make it easier to locate the appropriate server, you may adjust the visible columns or filter or search through the list. See the article on working with lists for more information.
-
Click manage server to view server options.
-
Click re-image to trigger the Re-image persistent virtual machine confirmation pop-up.
-
Click confirm to reimage the server. The new image will be deployed throughout the server pool.
Unassign a server
If a user mapping has been applied to a server, the association between the user and the server can be removed.

To remove a user association, follow the steps below.
-
From the “single-session” tab on the Servers page, locate a server. To make it easier to locate the appropriate server, you may adjust the visible columns or filter or search through the list. See the article on working with lists for more information.
-
Click manage server to view server options.
-
Click unassign to trigger the Remove association confirmation pop-up.
-
Click confirm to complete the association removal.
Start a virtual machine (server)
Before being able to connect to a server, it must be running. Apporto-hosted cloud subscriptions can be started from within the Apporto interface.
To start a server, follow the steps below.
-
Manual start
-
From the “single-session” tab on the Servers page, locate a stopped server. To make it easier to locate the appropriate server, you may adjust the visible columns or filter or search through the list. See the article on working with lists for more information.
-
Click start to start the server. It may take a few minutes to begin running.
-
Once the server is running, the connect option appears.
-
-
Scheduled – For information on how to schedule a server start event, see the article on managing calendar events.
Connect to a virtual machine (server)
When a server is running, you can connect to it.
To connect to a server, follow the steps below.
-
From the “single-session” tab on the Servers page, locate a running server. To make it easier to locate the appropriate server, you may adjust the visible columns or filter or search through the list. See the article on working with lists for more information.
-
Click connect to connect to the server.
-
If the server you selected is in the cloud, you may see the following message while the connection is being established: “Please wait while we start your cloud computer.”
Import server pools
To import pool and server relationships, follow the steps below.
-
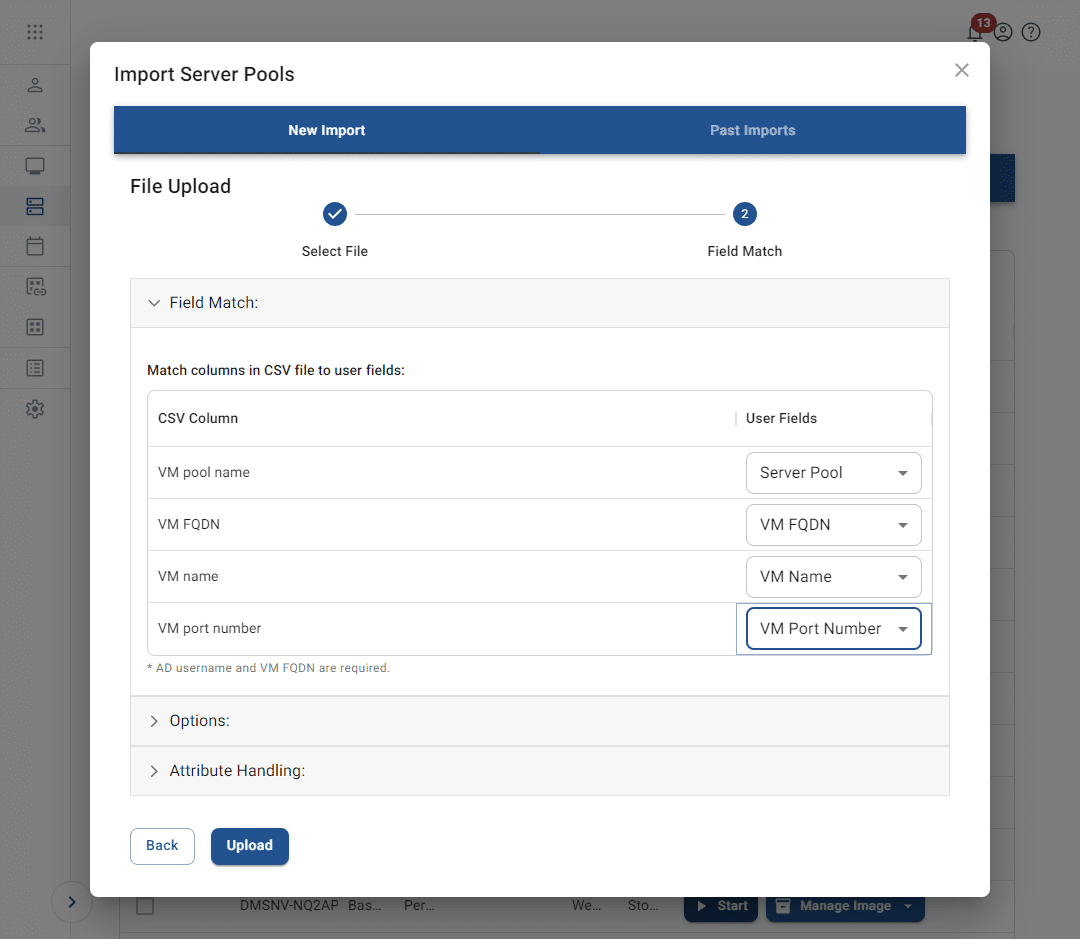
Prepare a CSV file to map users to servers in the server pool. The CSV can have either named or unnamed column headings, but it should contain at least the following data: “Server Pool Name”, “VM Name”, “VM FQDN”, and “VM Port Number”. During the import process, you will have the opportunity to select which source columns will be matched to these fields.
-
From the “single-session” tab on the Servers page, click import server pools to trigger the Import server pools pop-up screen.
-
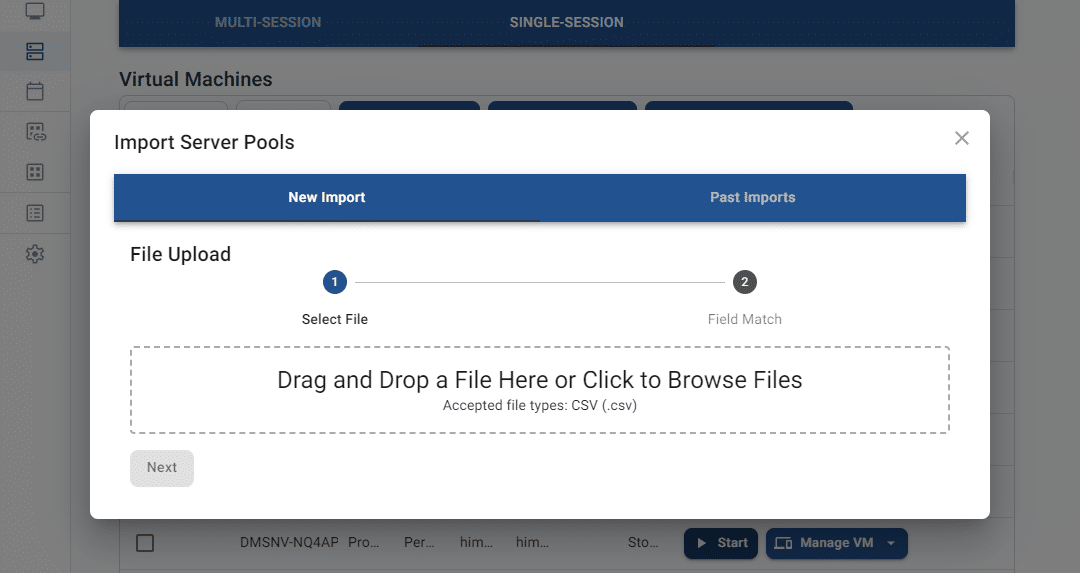
By default, the “new import” tab will display. This is the first step of the import wizard.
-
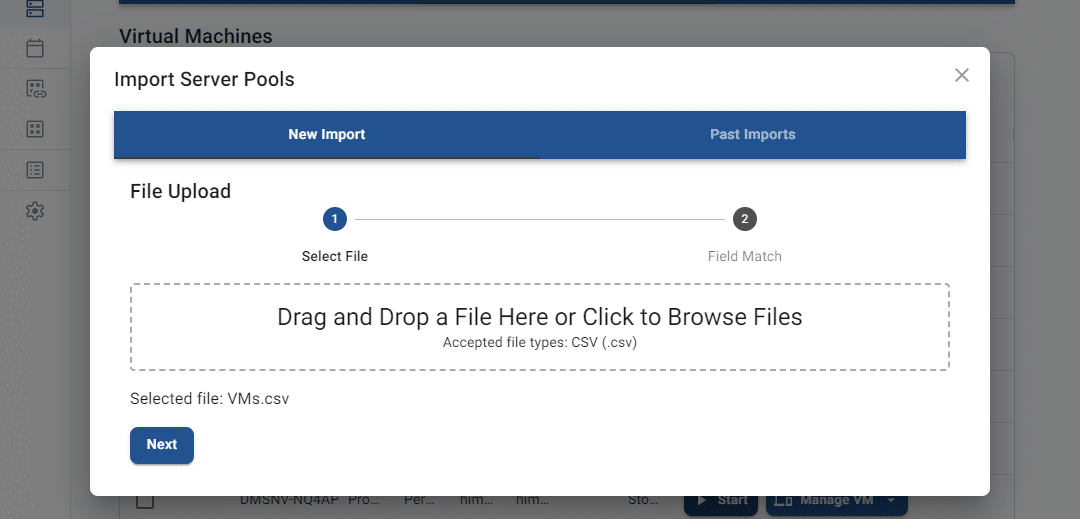
Drag and drop a file from local storage or click on the pop-up to trigger the file manager and select a file. The name of the selected file will display on the screen.
-
Click next to move on to field matching in step 2. Use the dropdowns to select fields to match to the columns in your file.
-
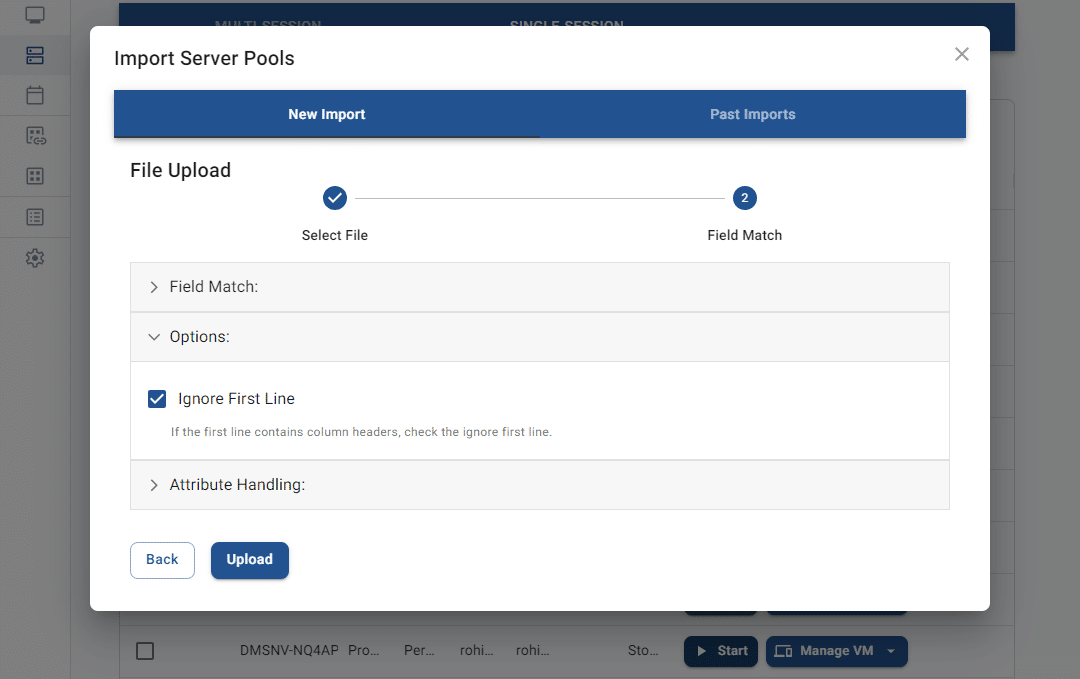
Expand the “options” accordion section to adjust whether your file has a first line of header values.
-
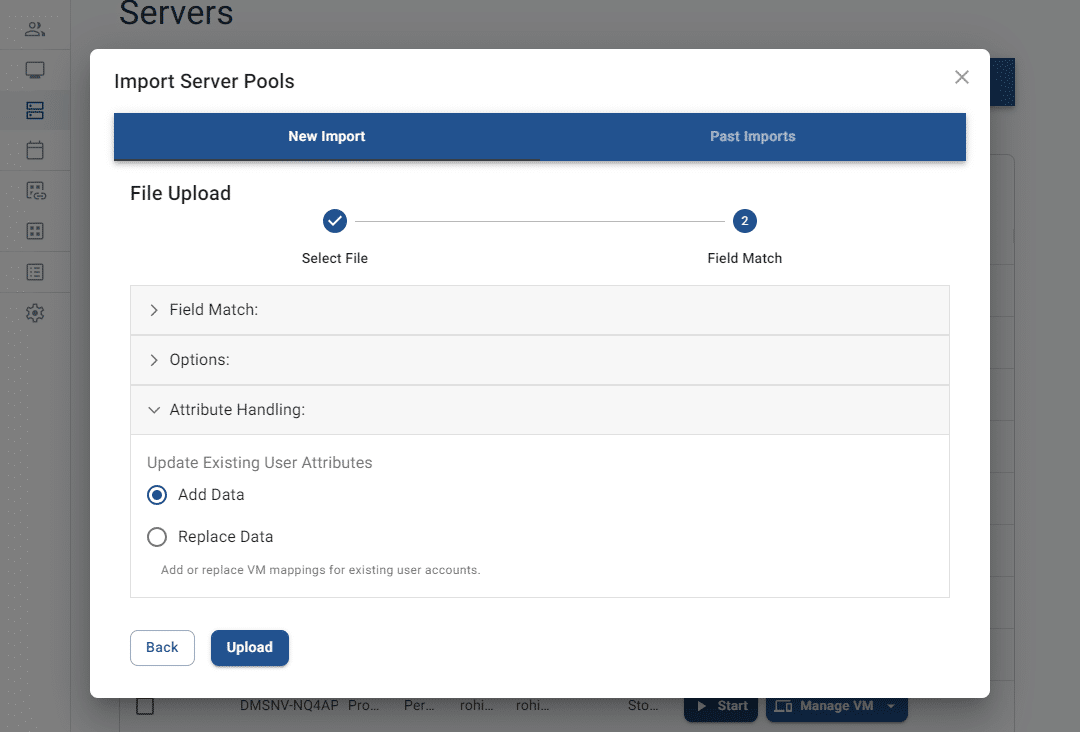
Expand the “attribute handling” accordion section to configure whether the server pool and server values should append to or update any existing values.
-
Click upload to complete the import. The system will display alerts for the import process.

-
After the import has successfully completed, any new server pools or servers will appear in the list. Some configuration values may be missing.

-
Newly created server pools will not be assigned to a resource group by default, and their pool type will be set to AD Synced. To assign a server pool to a resource group or to change its pool type, click the edit button on the newly created server pool.
-
To update a new server’s configuration, you can either use the edit button next to the server or you can reupload a new CSV file using the import server pools button at the top of the page.
-
-
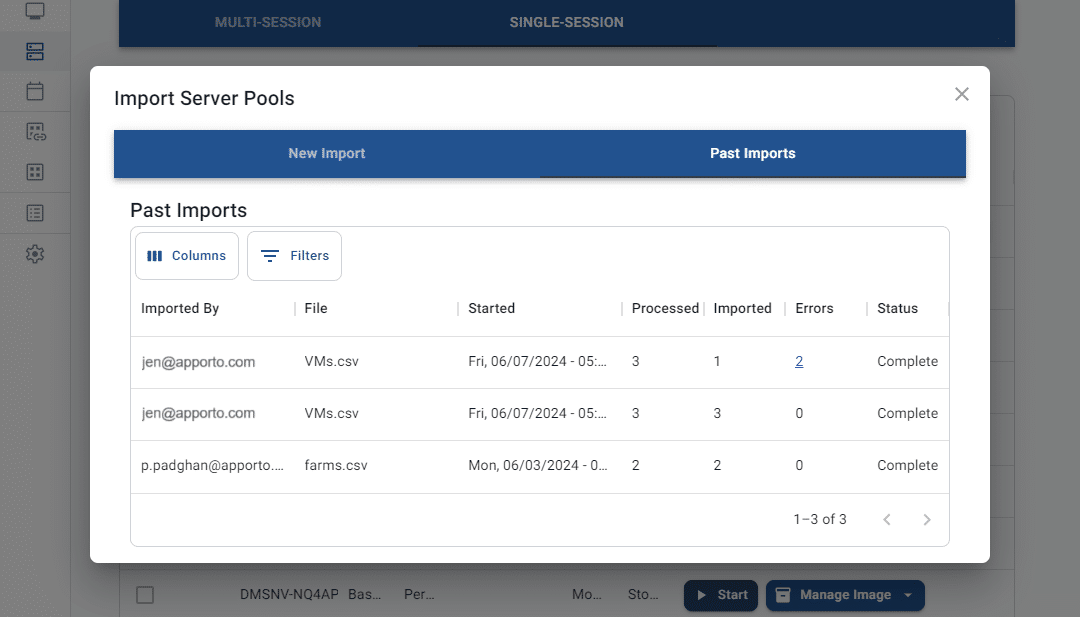
To view completed imports, click import server pools again and select the “past imports” tab of the Import server pools screen. To make it easier to locate specific imports, you may adjust the visible columns or filter or search through the list. See the article on working with lists for more information.
-
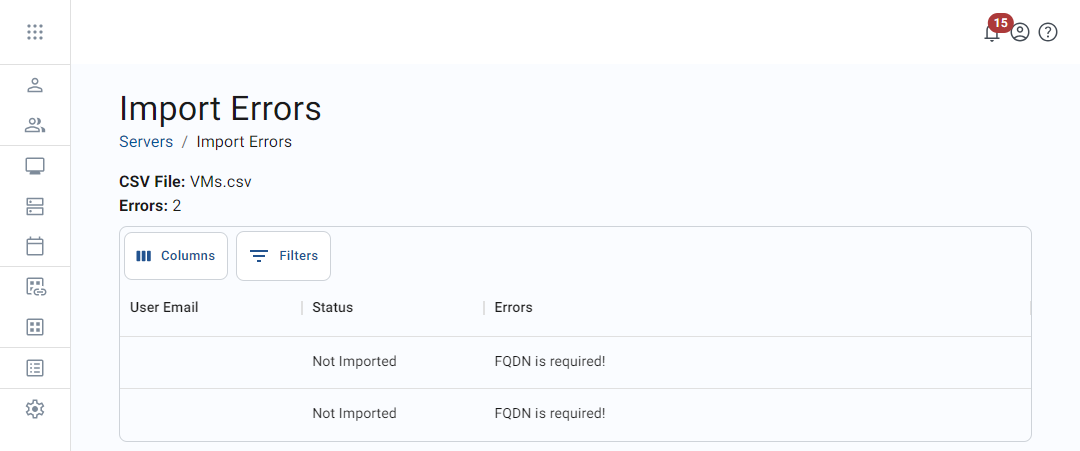
For any import that contained errors, click the error count link in the import row to trigger the Import errors screen.
Import user mappings
To simplify the process of relating users to specific VMs, you may wish to import user mappings.
To import a VM user mapping, follow the steps below.
-
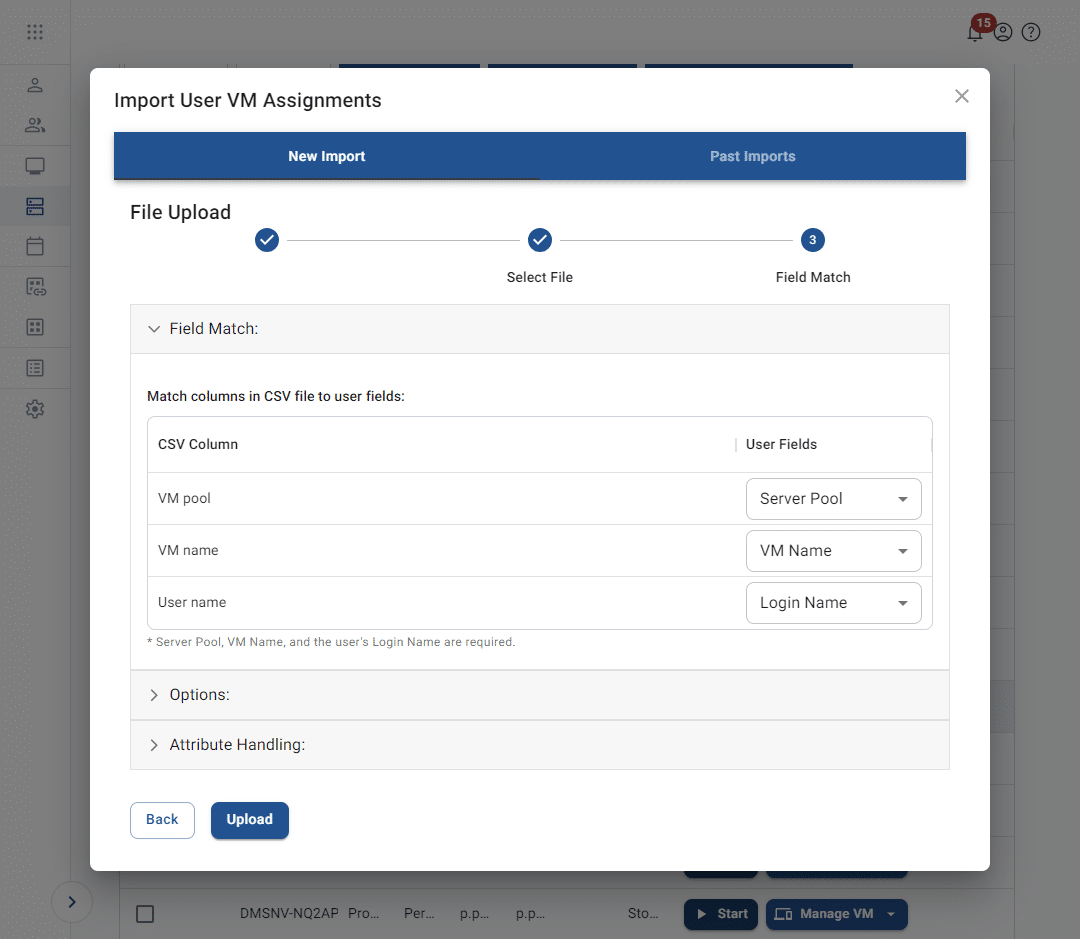
Prepare a CSV file to map users to servers in the server pool. The CSV can have either named or unnamed column headings, but should contain at least the following data: “Server Pool Name”, “VM Name”, “User Login Name”. During the import process, you will have the opportunity to select which source columns will be matched to these fields.
-
From the “single-session” tab on the Servers page, click import user VM assignments to trigger the Import user VM mapping pop-up screen.
-
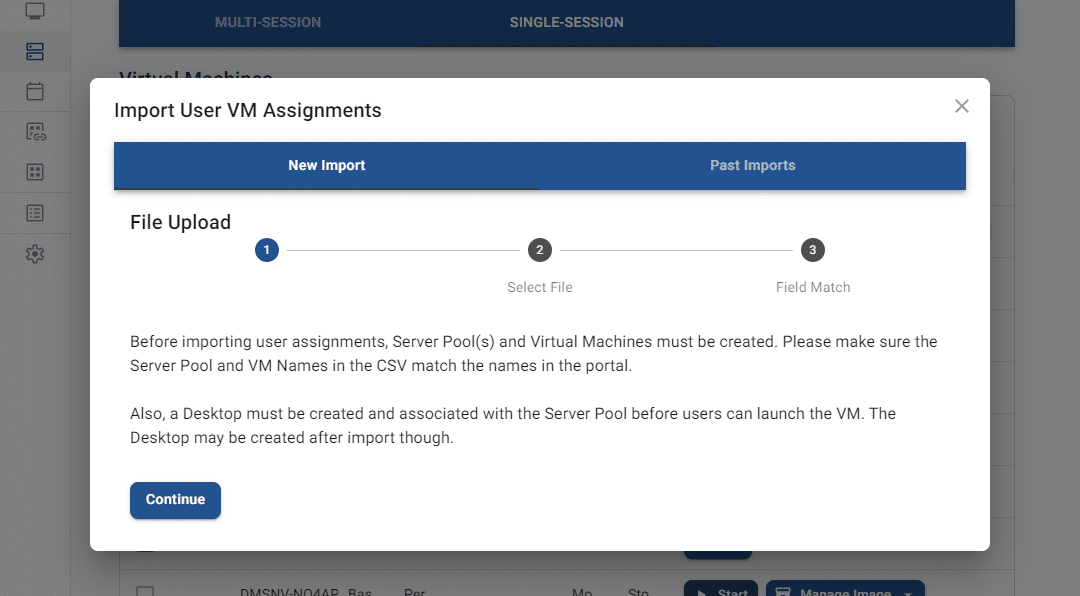
By default, the “new import” tab will display with a disclaimer message. If all necessary prerequisites are complete, click continue to proceed to step 2 of the wizard. If any other items are needed, exit the pop-up.
-
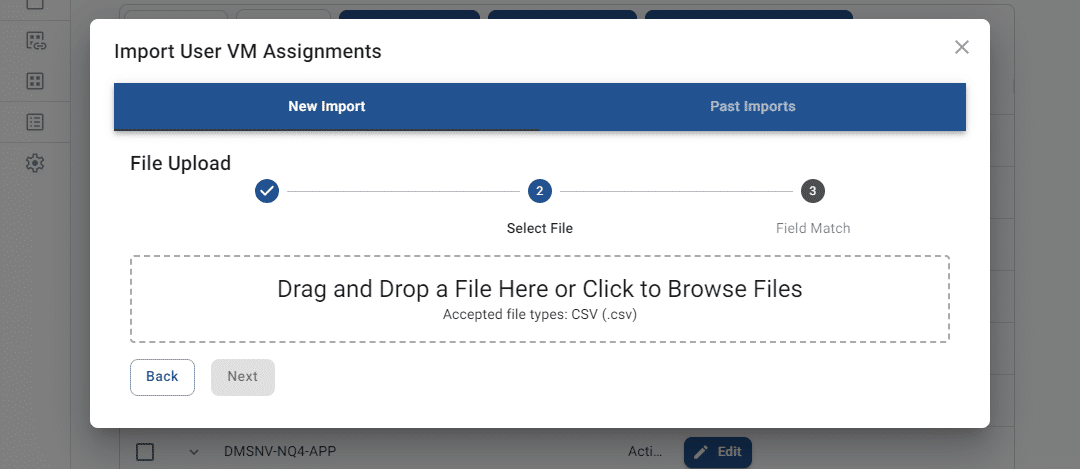
Step 2 prompts you to select a file to import. Drag and drop a file from local storage or click on the pop-up to trigger the file manager and select a file.
-
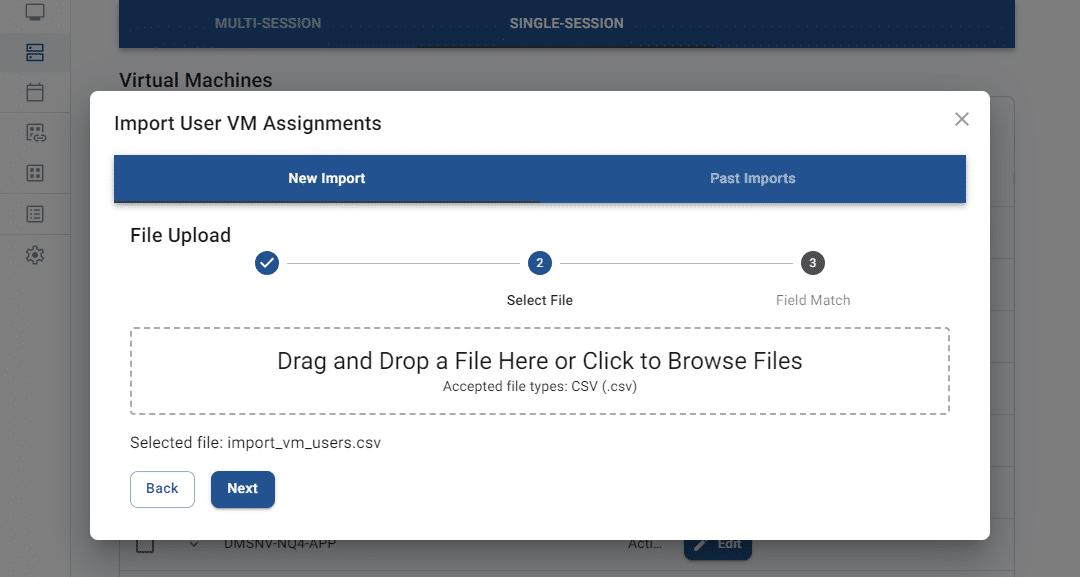
The name of the selected file will display on the screen. Click next to move on to field matching in step 3.
-
Use the dropdowns to select fields to match to the columns in your file.
-
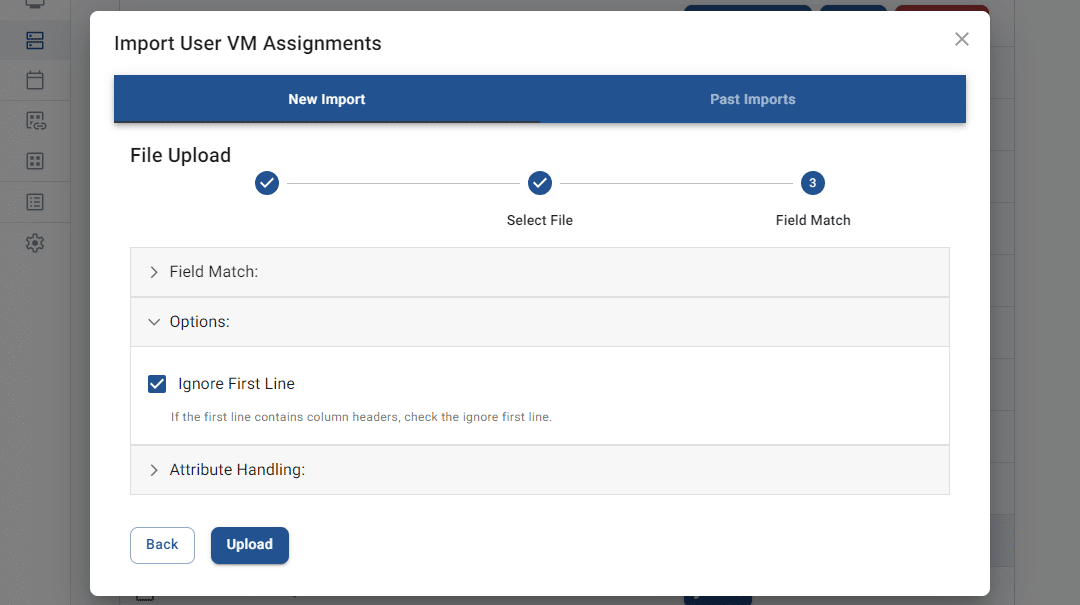
Expand the “options” accordion section to adjust whether your file has a first line of header values.
-
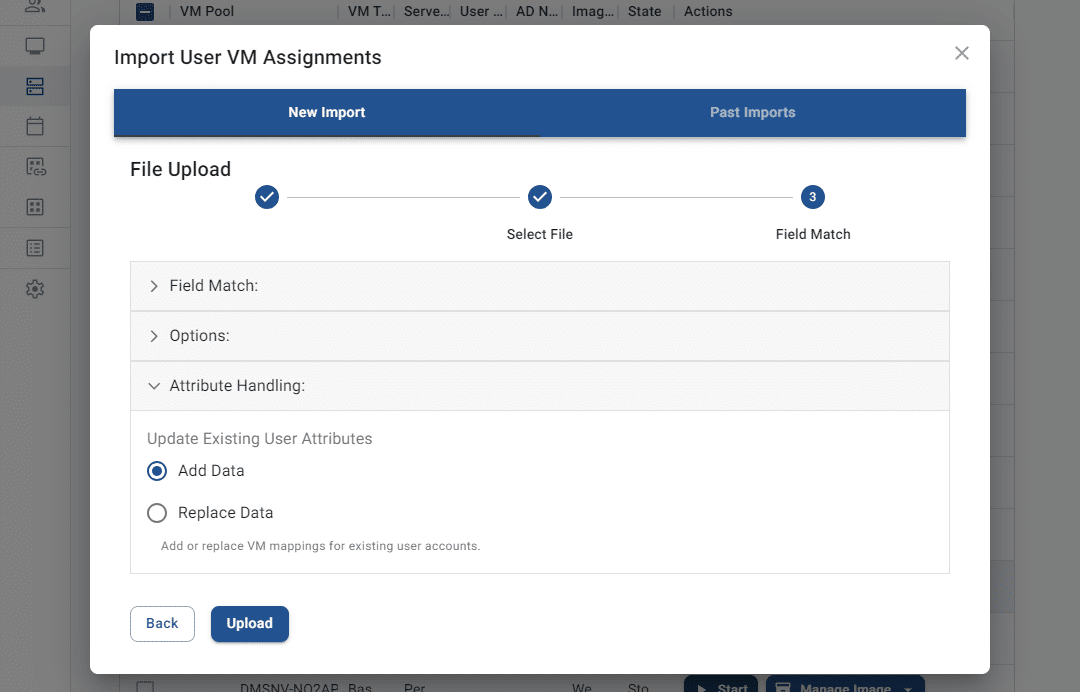
Expand the “attribute handling” accordion section to configure whether the user mappings should append to or update any existing values.
-
Click upload to complete the import. The system will display alerts for the import process.

-
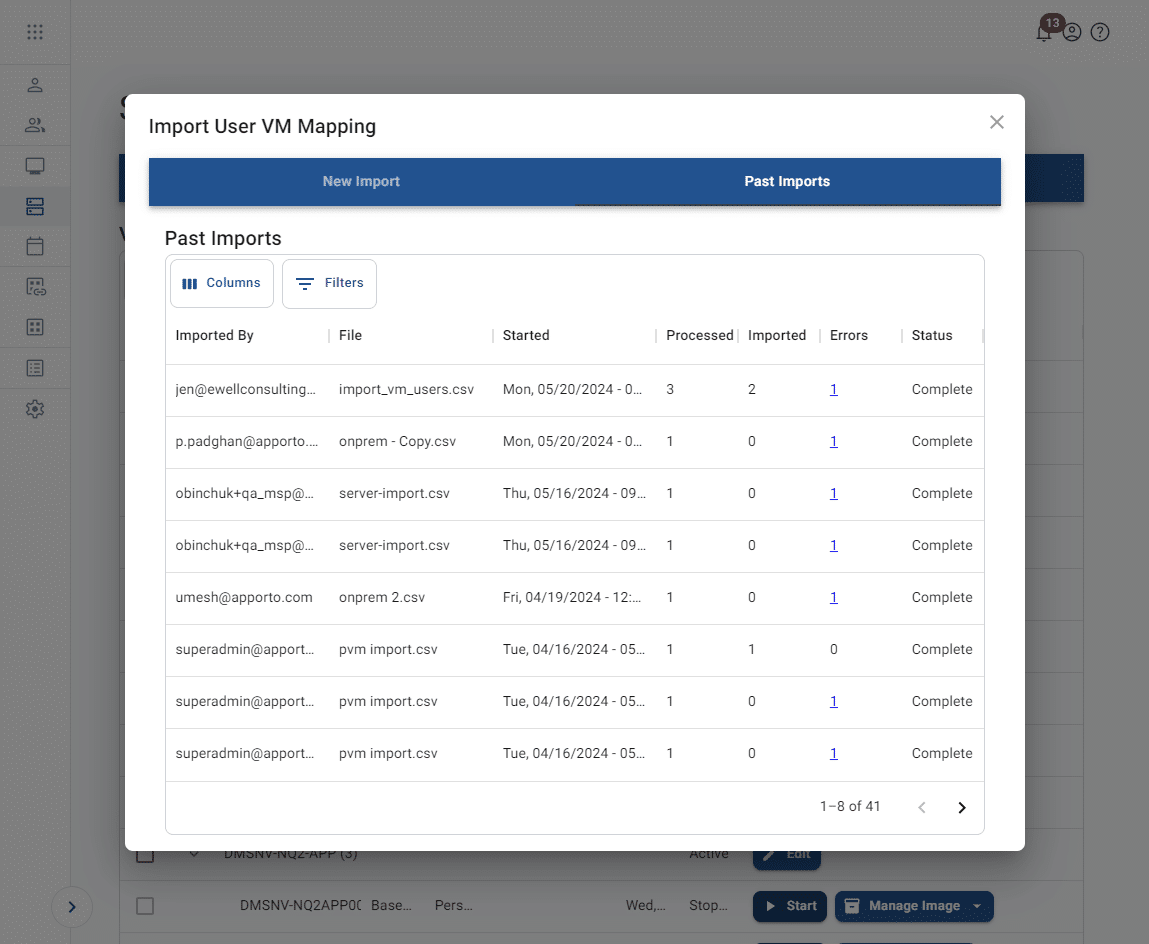
To view completed imports, click import user VM assignments again and select the “past imports” tab of the Import user VM mapping pop-up screen. To make it easier to locate specific imports, you may adjust the visible columns or filter or search through the list. See the article on working with lists for more information.
-
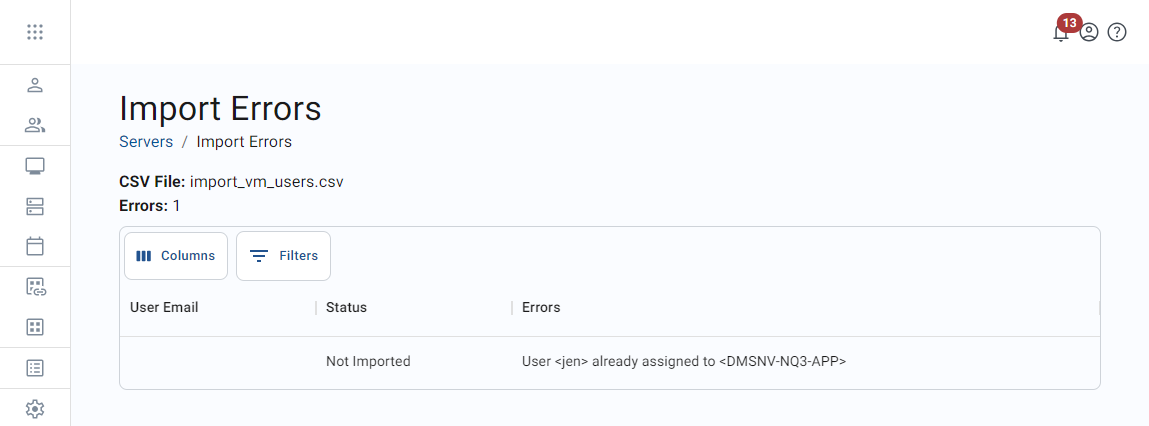
For any import that contained errors, click the error count link in the import row to trigger the Import errors screen.
Manage a server image
After a server has been imaged for the first time, additional imaging options become available. Admins may create additional images and deploy, back up, or restore existing images. They may also re-image selected servers.
Create image
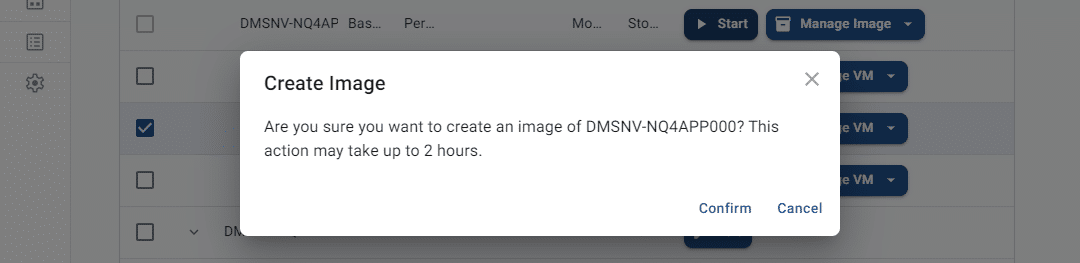
To create a new image, follow the steps below.
-
From the “single-session” tab on the Servers page, locate a base server image. To make it easier to locate the appropriate image, you may adjust the visible columns or filter or search through the list. See the article on working with lists for more information.
-
Click manage image to view server image options.
-
Click create image to trigger the Create image confirmation pop-up.
-
Click confirm to complete image creation. The process may take up to 2 hours.
-
After the new image is created, it will replace the previous base image.
Deploy image
After creating an image, you may deploy (replicate) it to production. Deployment typically takes 30 minutes to 1 hour. The base image is replicated to 5 servers at a time.
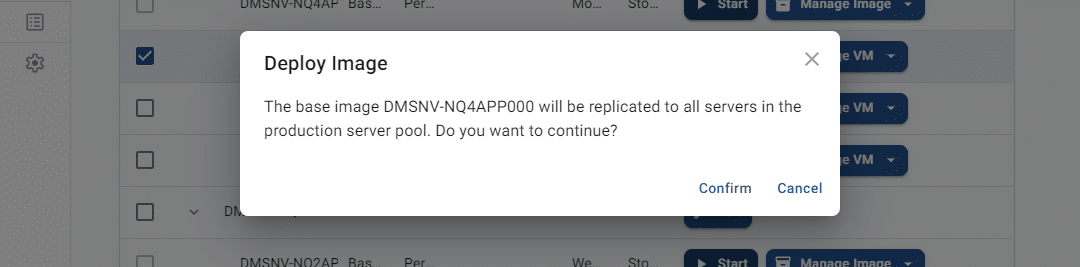
To deploy a server image, follow the steps below.
-
Manual deployment
-
From the “single-session” tab on the Servers page, locate a base server image. To make it easier to locate the appropriate server, you may adjust the visible columns or filter or search through the list. See the article on working with lists for more information.
-
Click manage image to view server image options.
-
Click deploy image to trigger the Deploy image confirmation pop-up.
-
Click confirm to complete image deployment. The image will deploy through all related servers, 5 servers at a time.
-
-
Scheduled – For information on how to schedule an image deployment event, see the article on managing calendar events.
Re-image selected servers
At times, you may wish to replace a server’s current image with the base image.
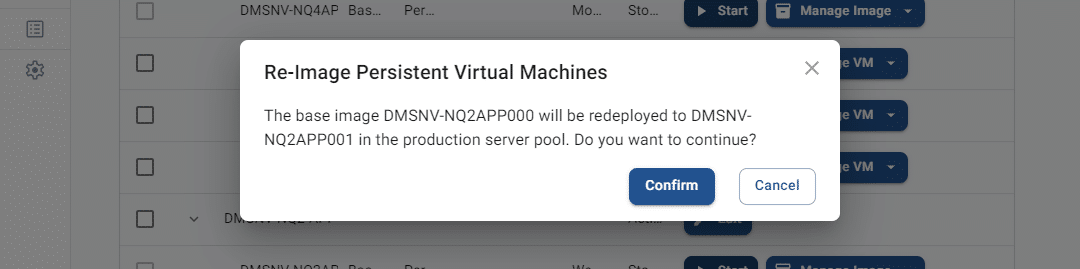
To re-image a server, follow the steps below.
-
From the “single-session” tab on the Servers page, locate a server and select the corresponding checkbox to the left. To make it easier to locate the appropriate image, you may adjust the visible columns or filter or search through the list. See the article on working with lists for more information.
-
Click manage image to view server image options.
-
Click re-image selected servers to trigger the Re-image persistent virtual machines confirmation pop-up.
-
Click confirm to reimage the server. The new image will be deployed throughout the server pool.
Back up an image
At times, you may want to create a backup of a base server image. This is useful for future image restoration.
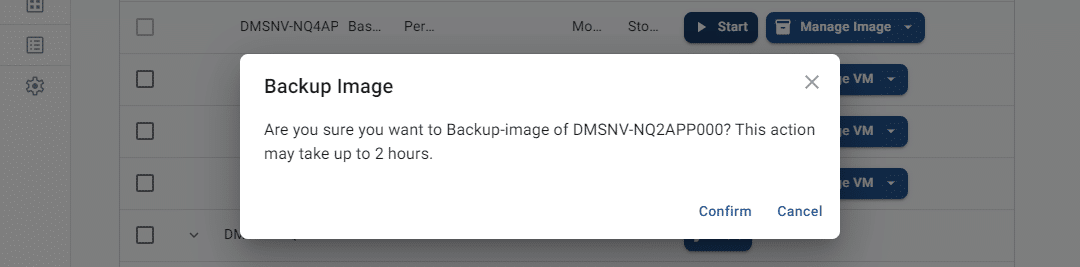
To create a server image backup, follow the steps below.
-
From the “single-session” tab on the Servers page, locate a base server image. To make it easier to locate the appropriate image, you may adjust the visible columns or filter or search through the list. See the article on working with lists for more information.
-
Click manage image to view server image options.
-
Click backup image to trigger the Backup image confirmation pop-up.
-
Click confirm to complete image backup. The process may take up to 2 hours.
-
After the backup is created, it can be restored.
Restore image
If a server image has been backed up, it can be restored.
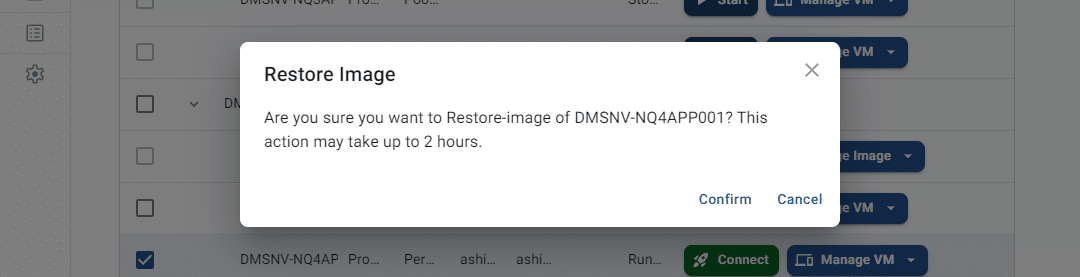
To restore a server image, follow the steps below.
-
From the “single-session” tab on the Servers page, locate a base server image. To make it easier to locate the appropriate image, you may adjust the visible columns or filter or search through the list. See the article on working with lists for more information.
-
Click manage image to view server image options.
-
Click restore image to trigger the Restore image confirmation pop-up.
-
Click confirm to restore the most recent image backup. The process may take up to 2 hours.
-
To view completed imports, click import user server assignments again and select the “past imports” tab of the Import user server mapping pop-up screen. To make it easier to locate specific imports, you may adjust the visible columns or filter or search through the list. See the article on working with lists for more information.
Migrated from the Apporto Help Center: https://www.apporto.com/help-center/managing-single-session-servers