

Configuring Windows 11 Single-Session for Persistent Users
This guide explains how to map specific Active Directory users to specific virtual machines (VMs) within the Nextgen On-Prem configuration.
Prerequisites
Before starting, ensure that ApportoService MSI version .1060 or later is installed and verified on all VMs that will be used.
Configuration steps
1. Create or verify users
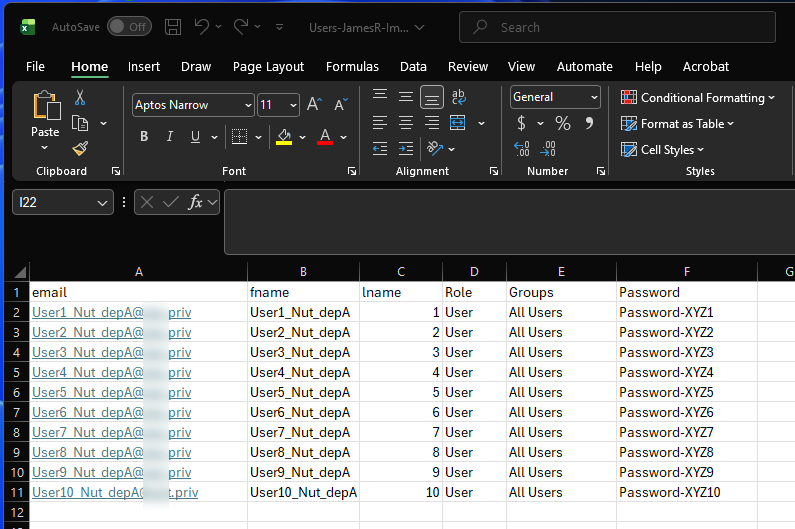
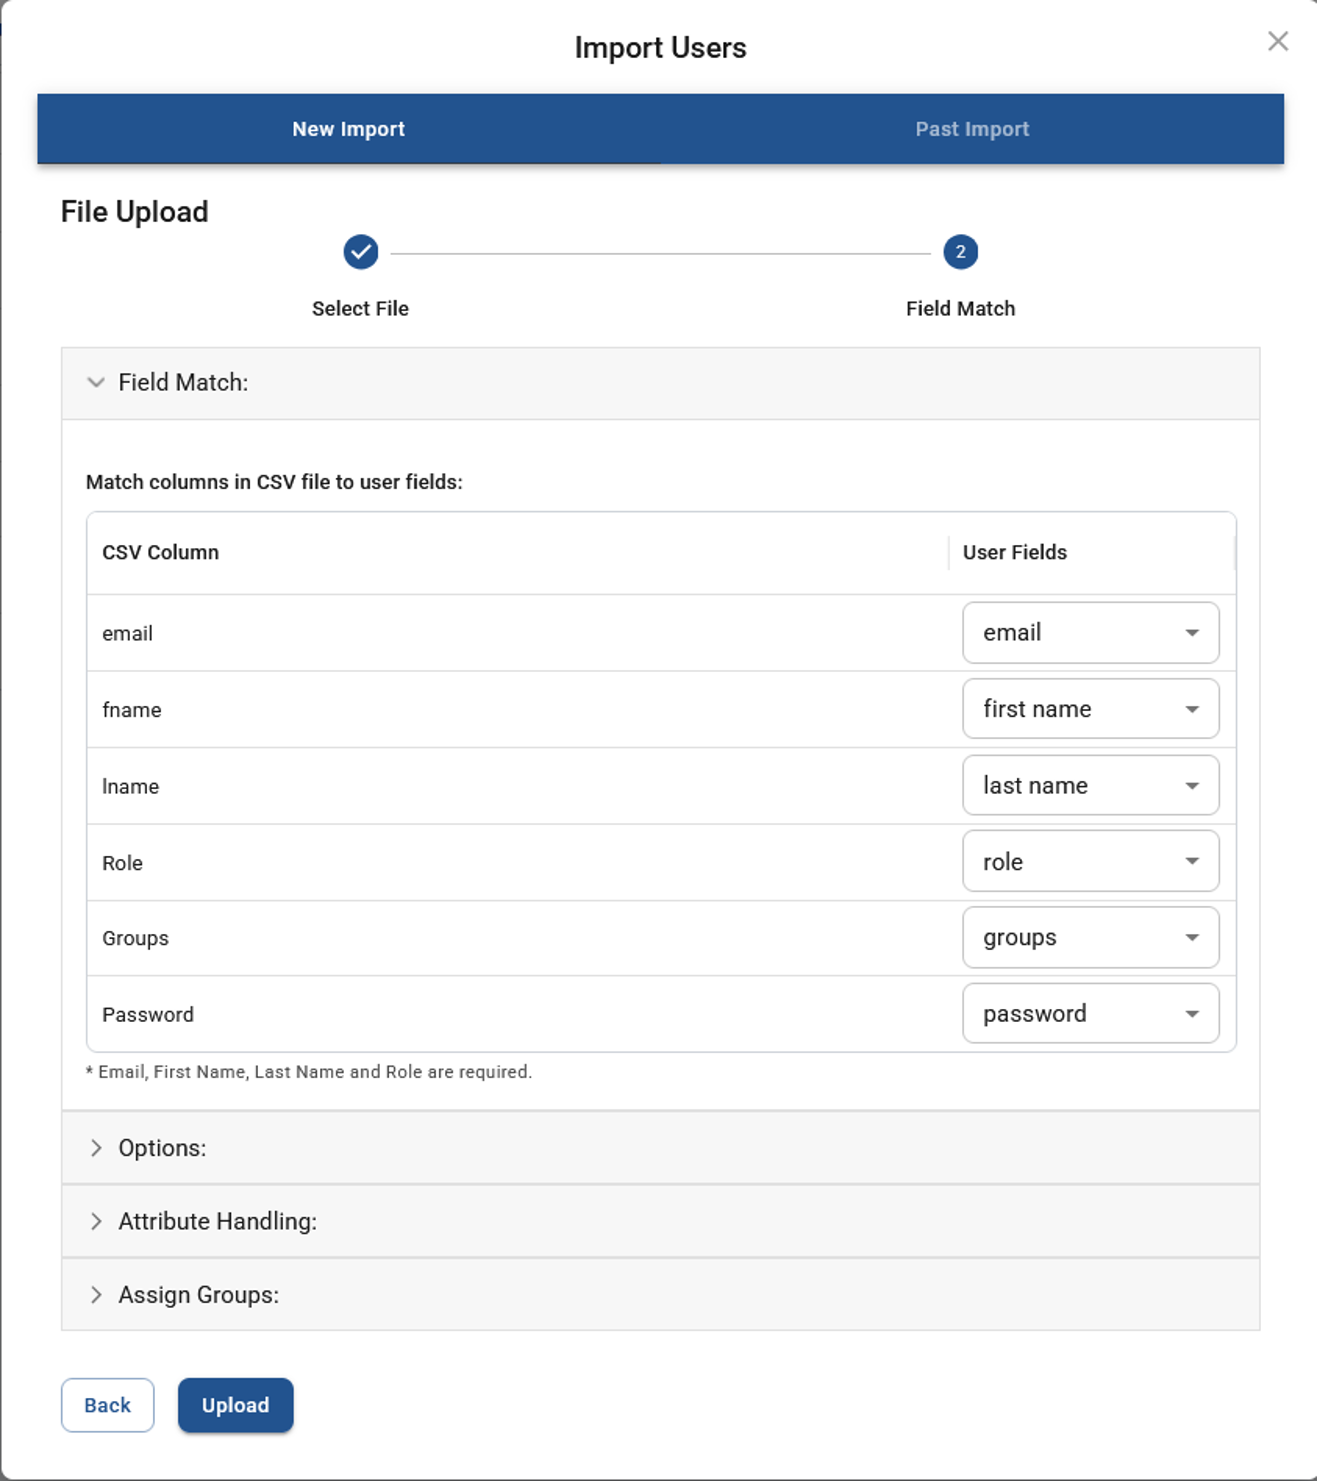
All required users must already exist in the Users node. Users can be added manually or by using the Import Users option. The following example shows the CSV import settings.
2. Open the Servers node
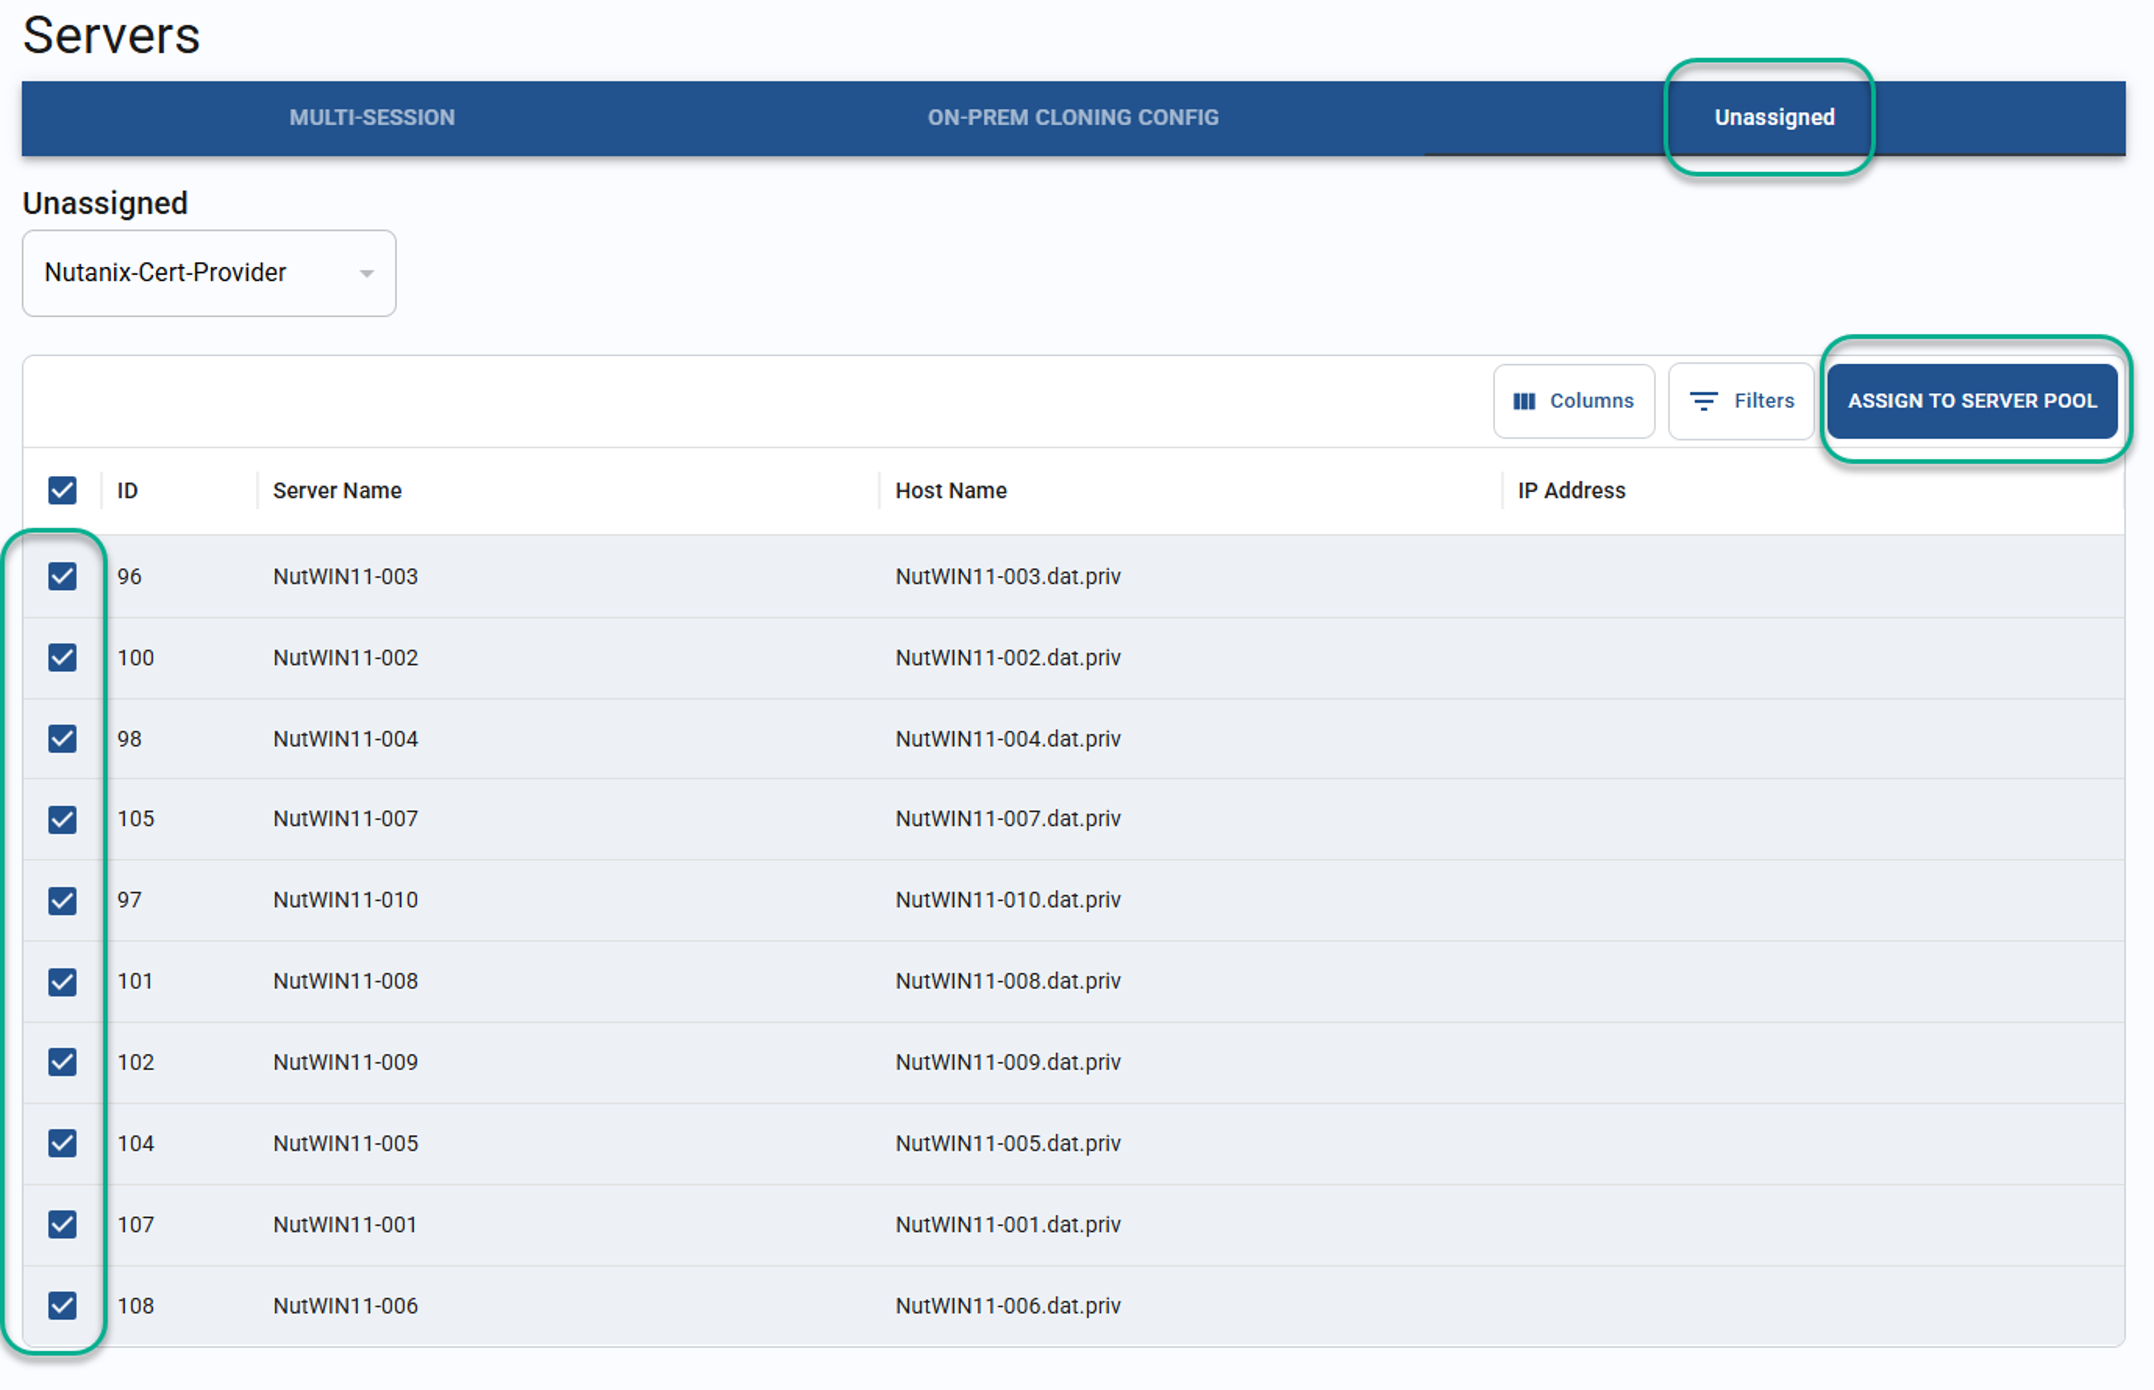
Navigate to the Servers node and select the Unassigned tab.
3. Create a persistent server pool
Create a new server pool and ensure that the Persistent option is selected.
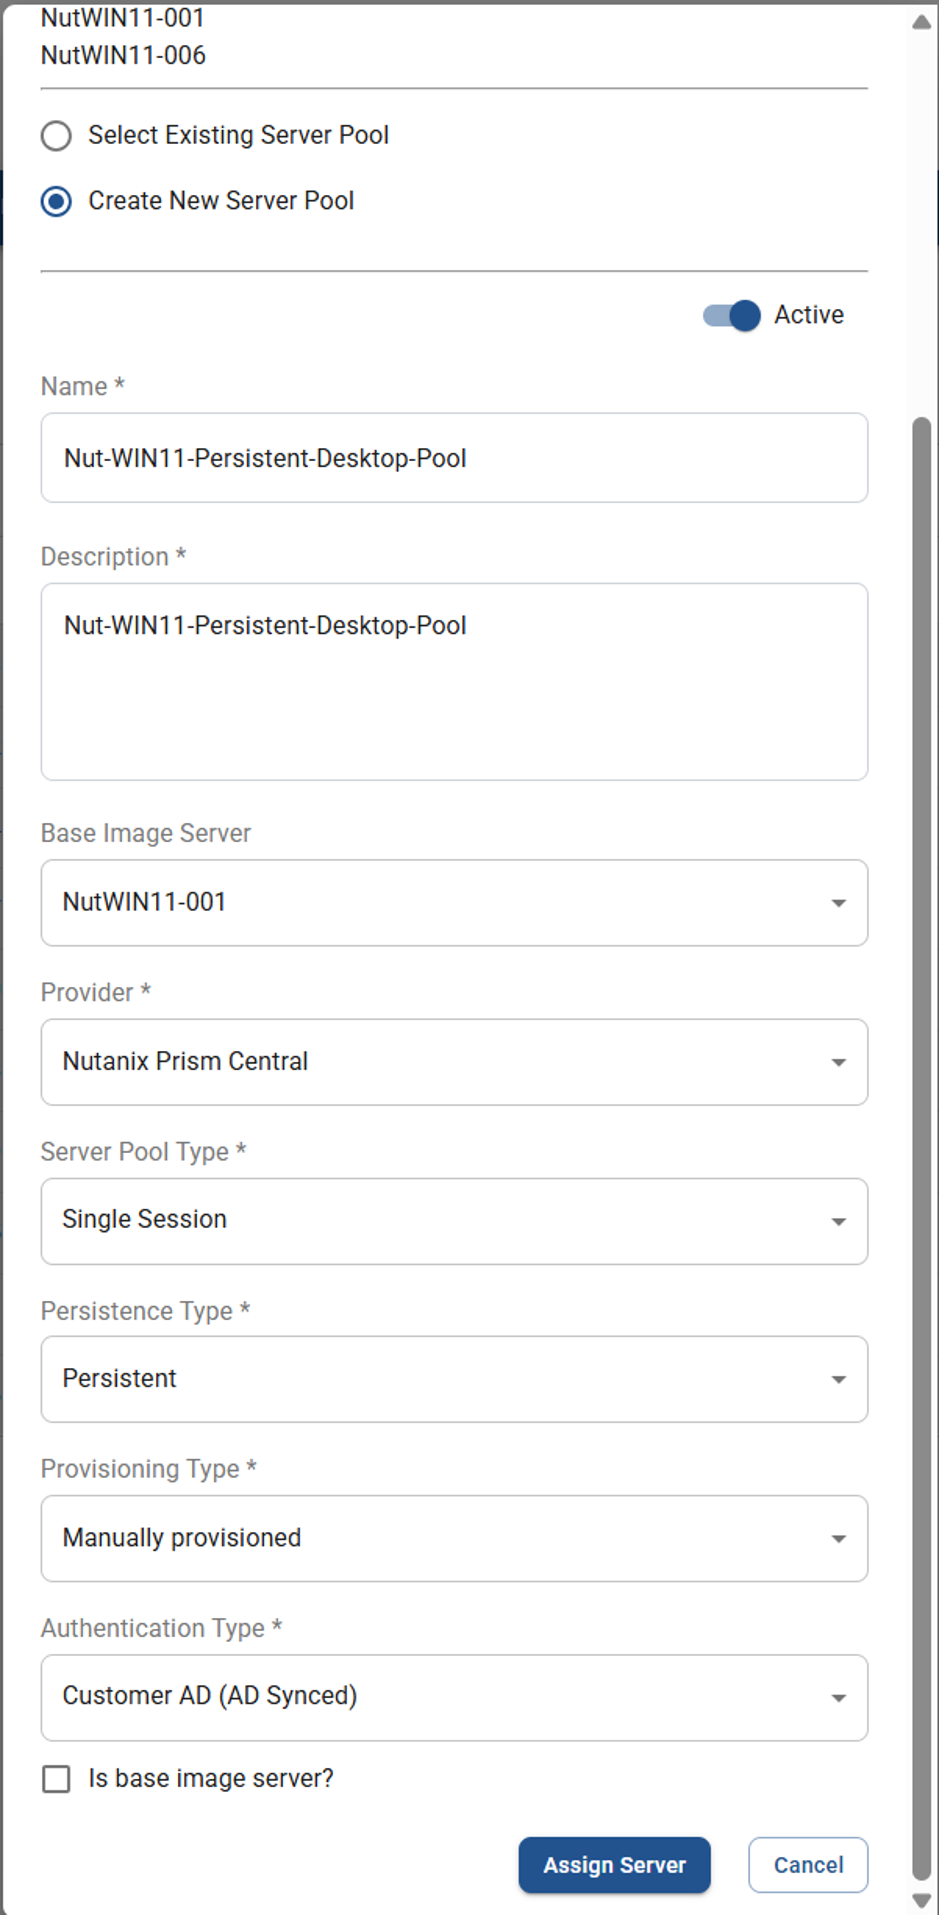
Note: The Is base Image server option should only be used for imaging or cloning purposes. It is also used for server-based operating systems for remote applications and should not be selected for persistent mappings.
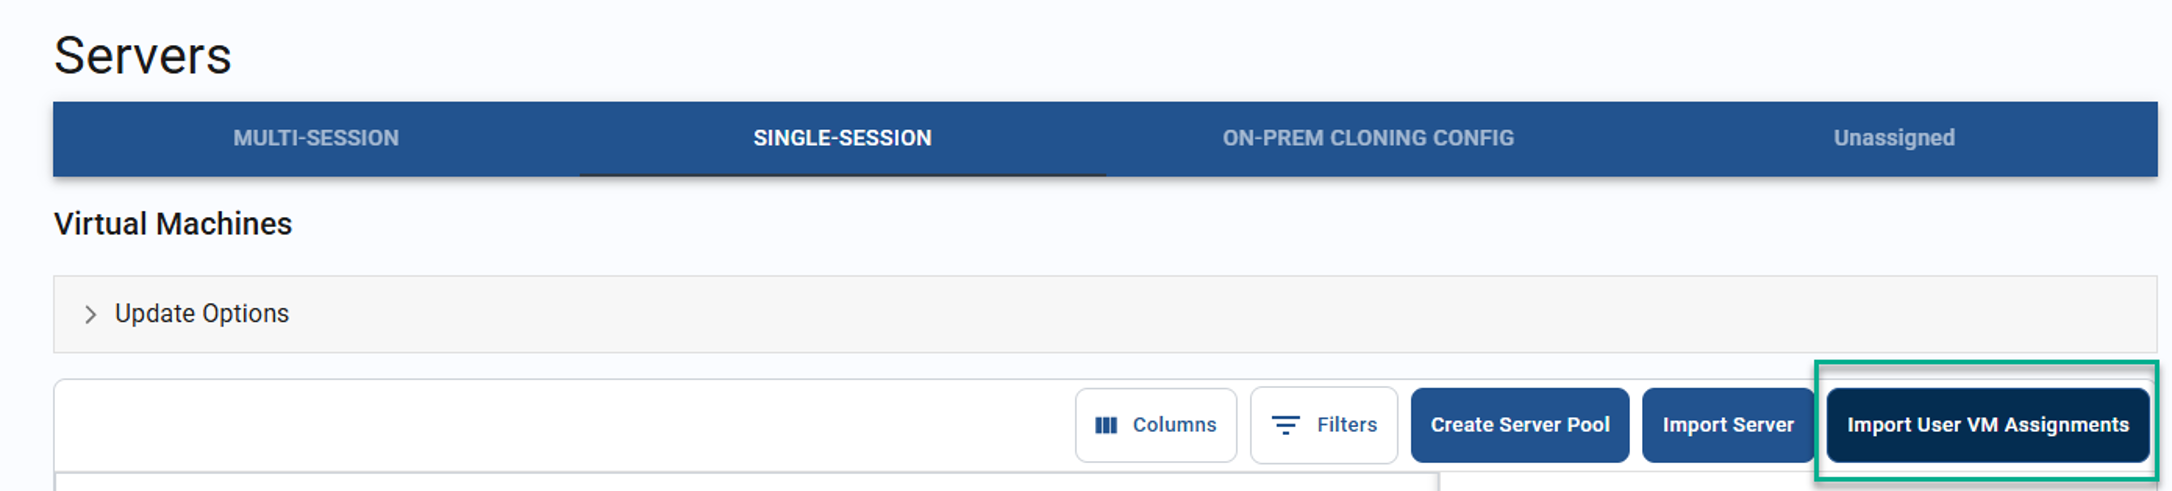
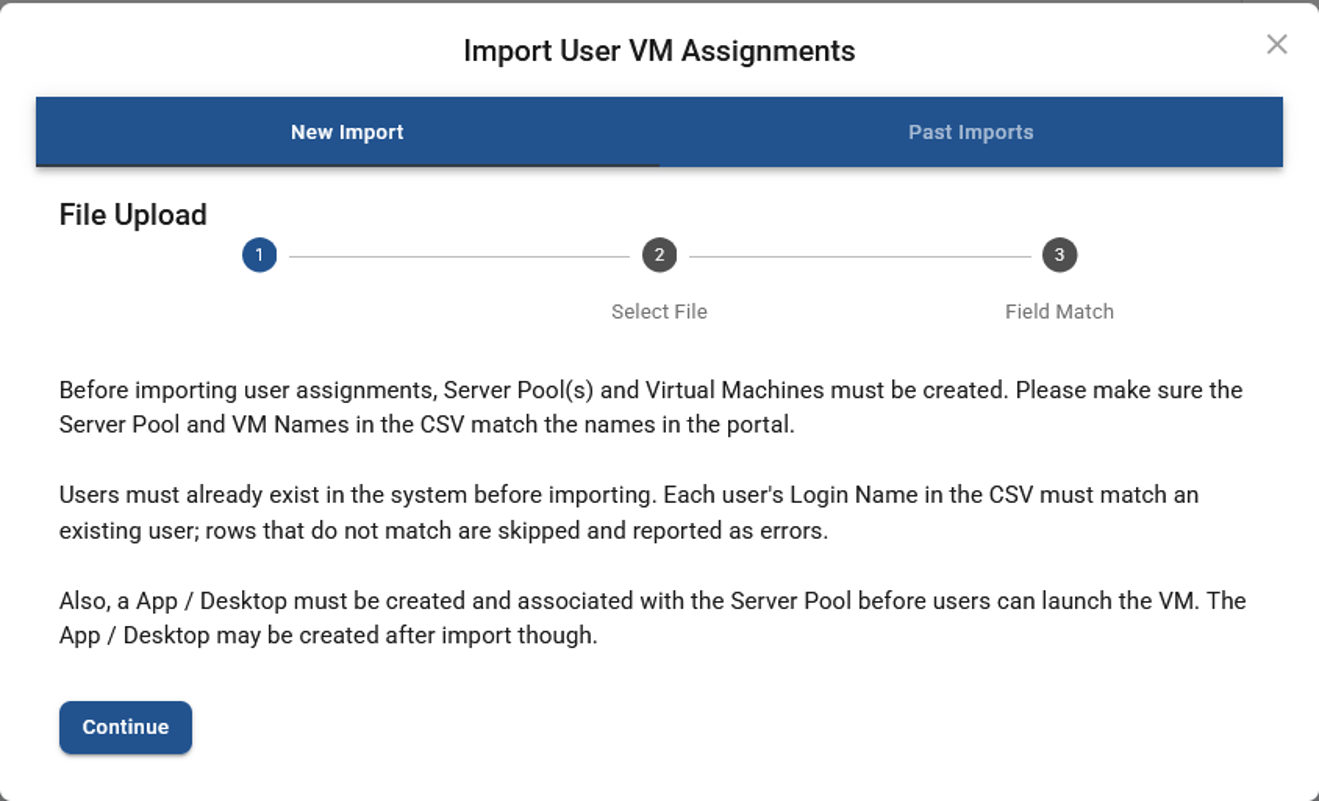
4. Import the VM-to-user mapping
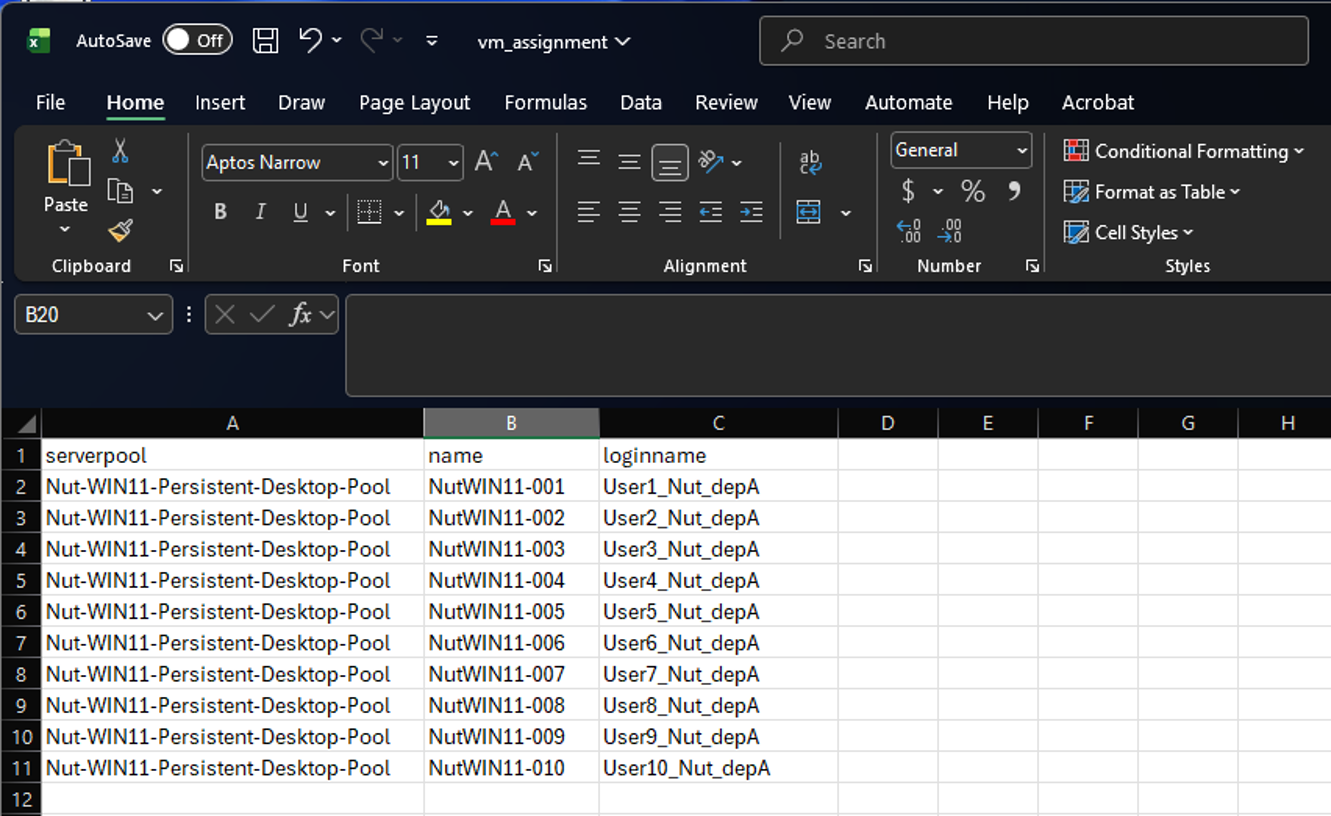
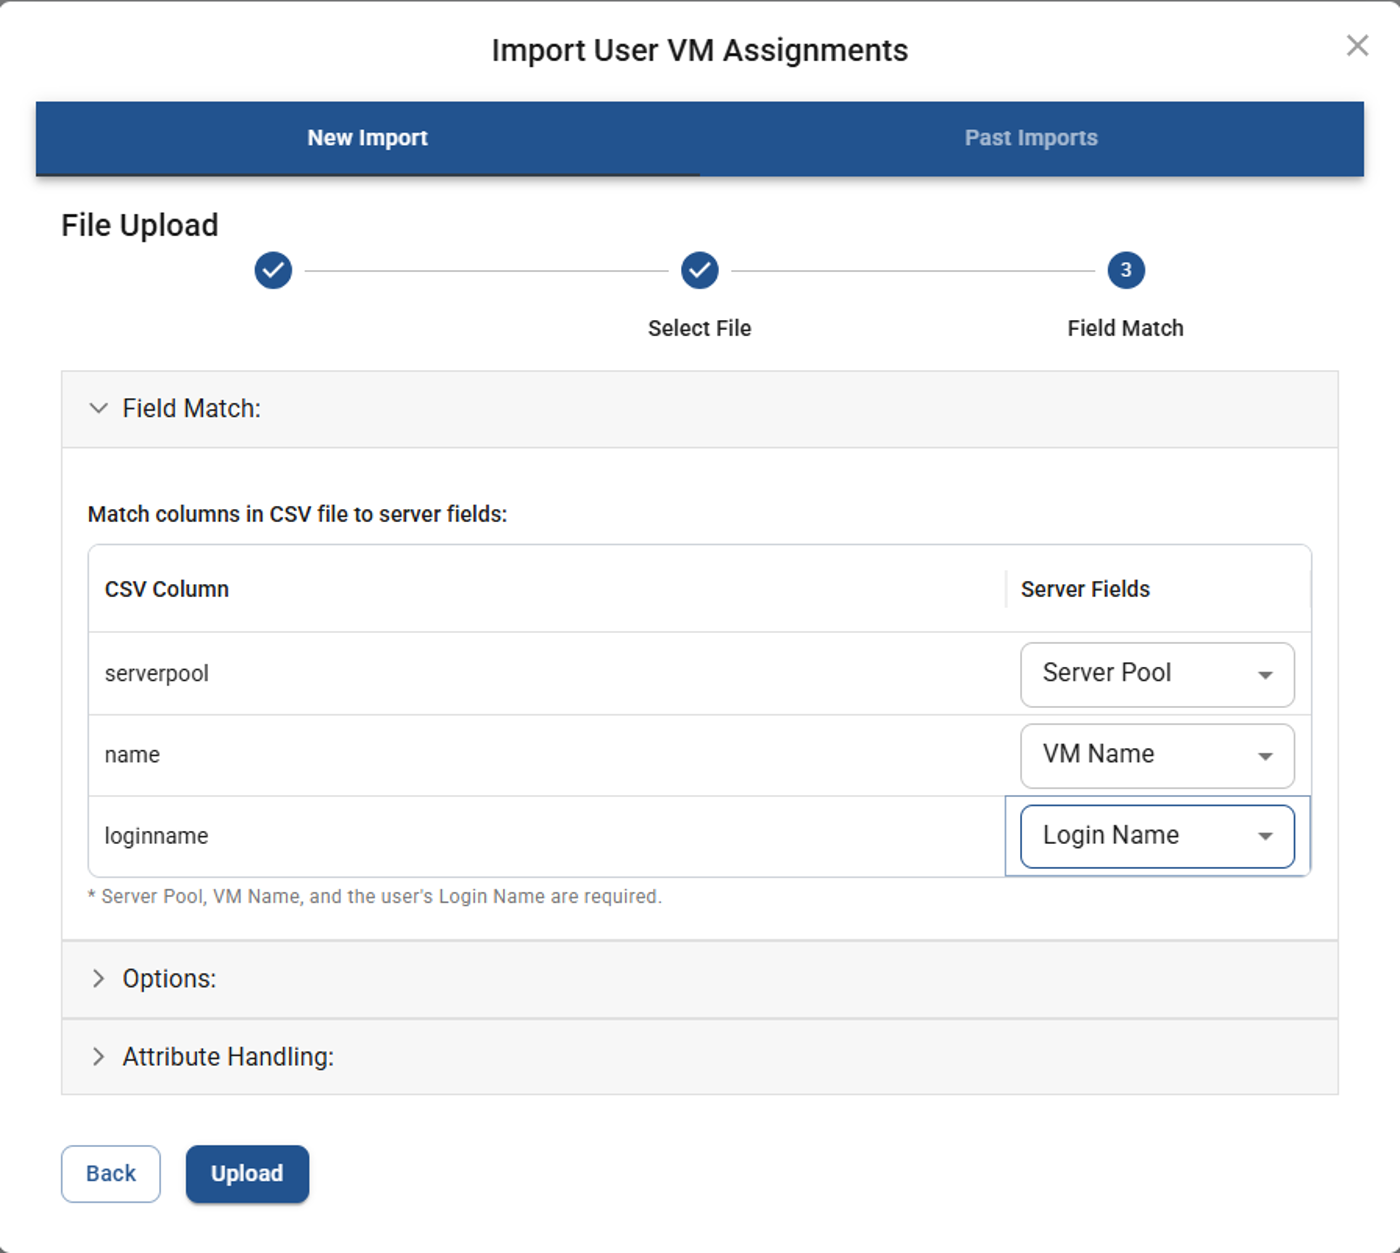
After the server pool has been created, use a CSV file and the appropriate import settings to assign each VM to a specific Active Directory user.
Example CSV file:
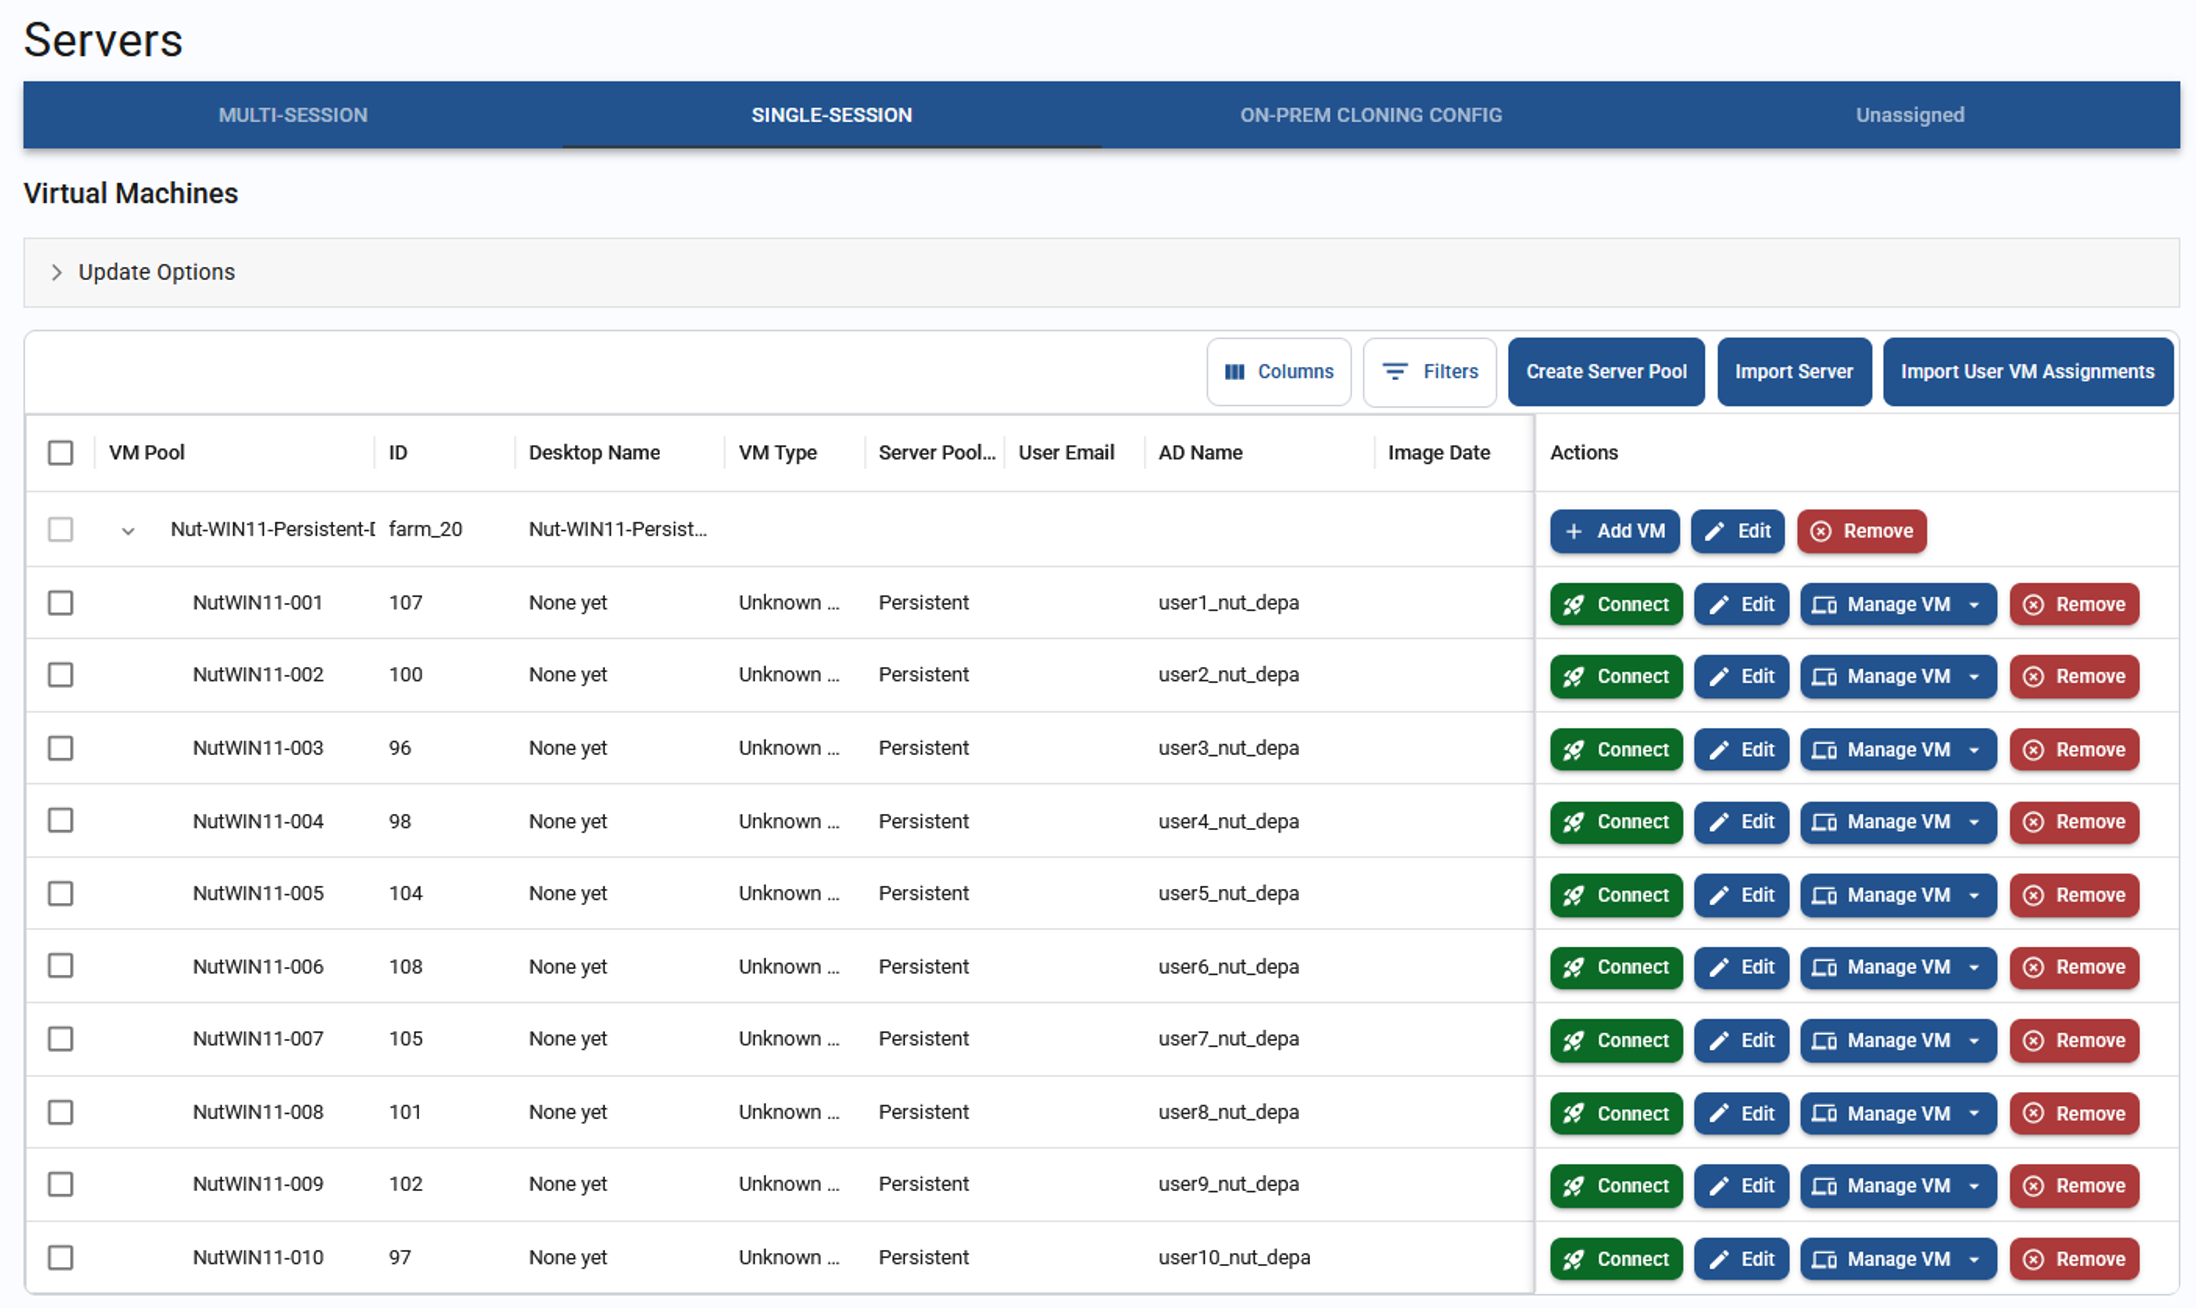
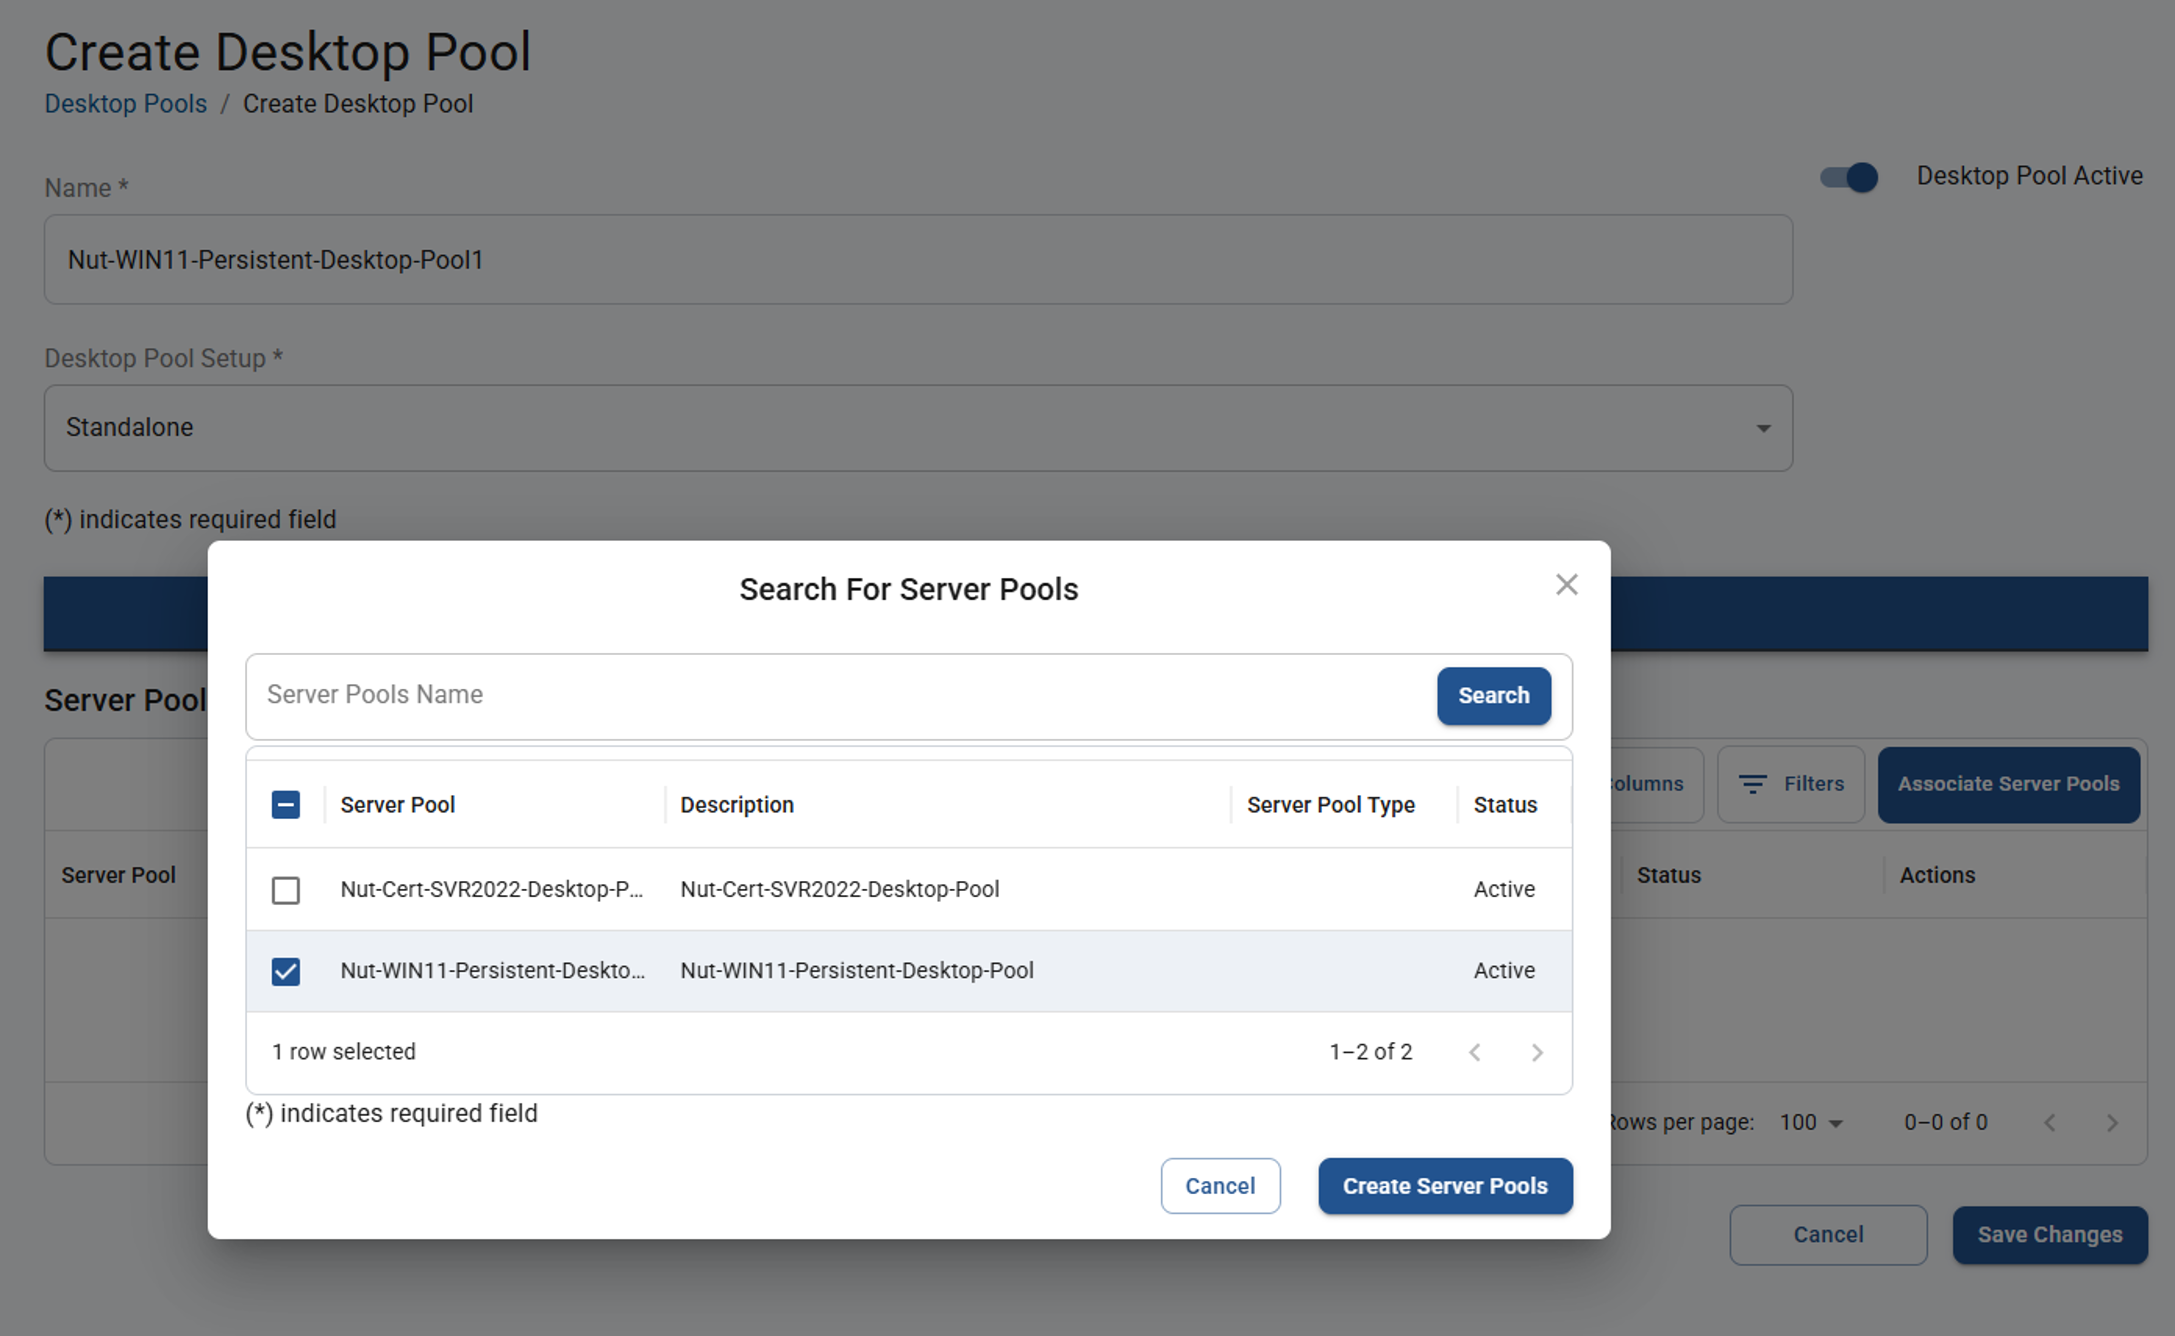
5. Create and associate a desktop pool
Create a desktop pool and associate it with the server pool created in the previous steps.
6. Create the desktop
Create the desktop that all Active Directory users will see when they authenticate to the portal or tenant.
Ensure the desktop name and description are clear and appropriate, as both will be visible to all Active Directory users in the portal.
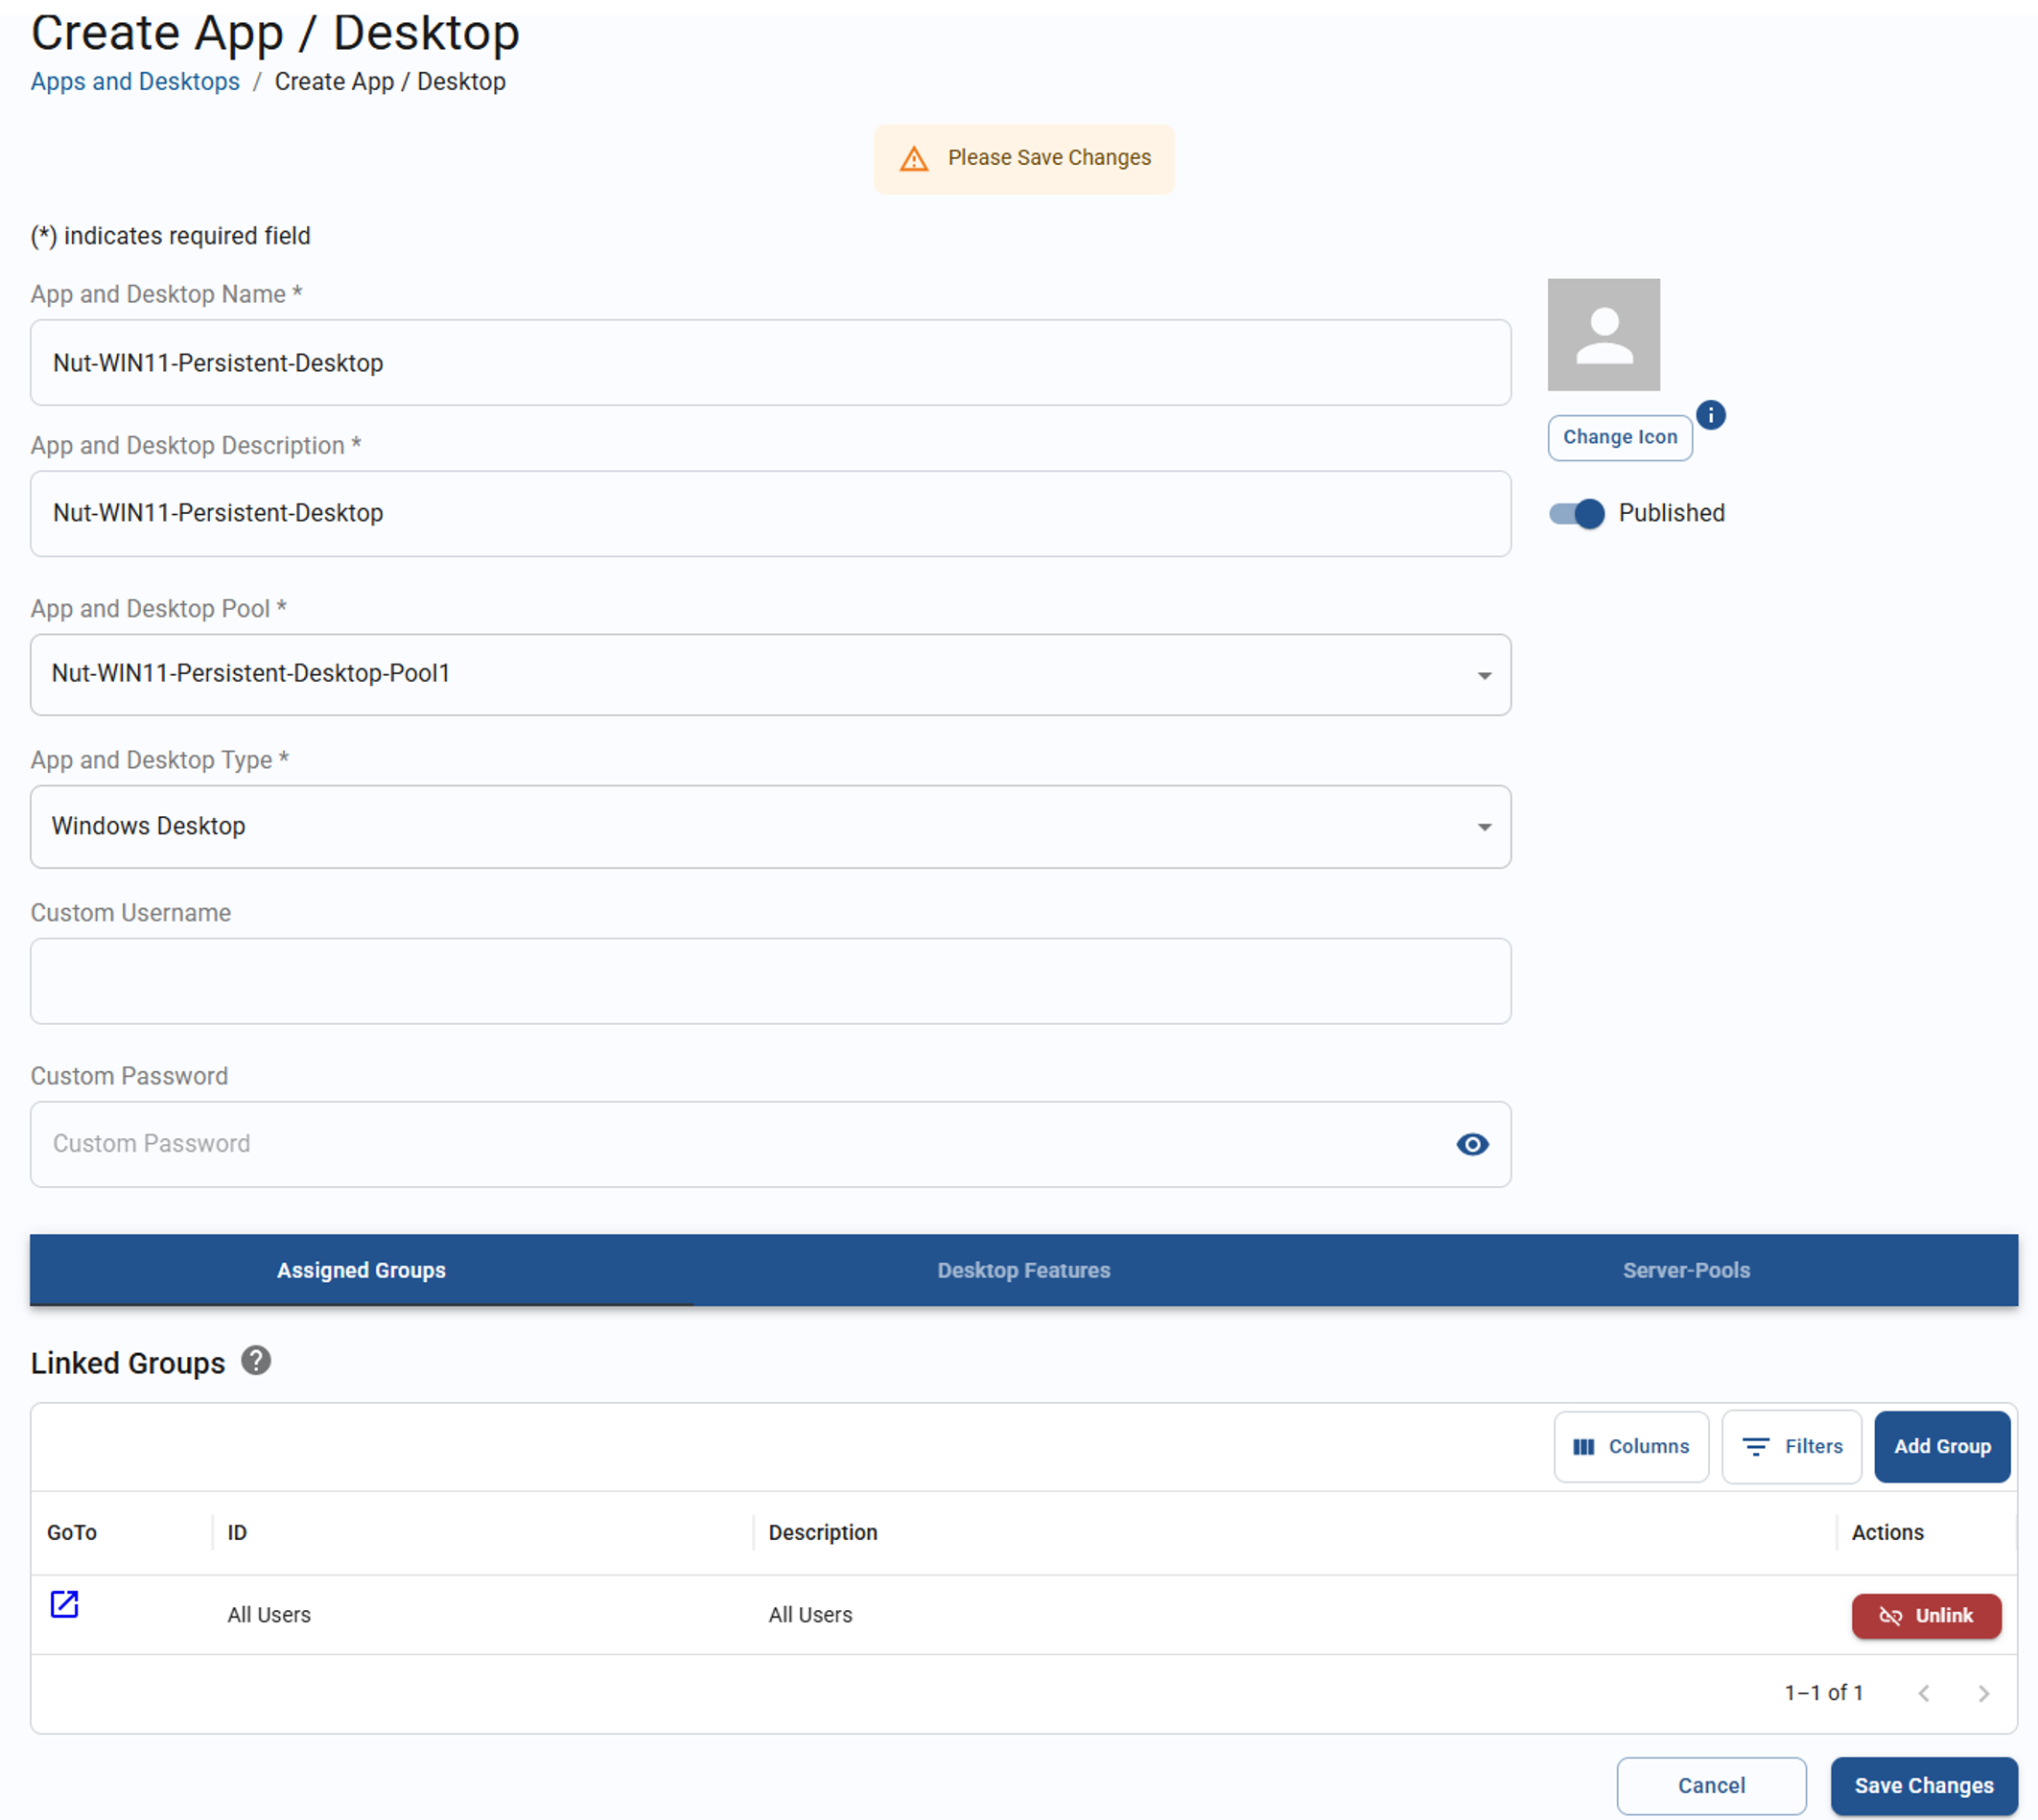
Note: Do not complete the Custom Username or Custom Password fields. These fields are for the Nextgen Cloud feature only.
Validation
Authenticate to the portal as one of the configured Active Directory users and launch the desktop. The desktop should now be persistent for that specific user.