

The Setup section provides configuration options for look and feel, identity management and authentication, desktop features, and more.
Instance configuration
For on-premises installations, the “Configure product for hybrid implementation” setting must be checked. This should already be enabled by Apporto staff.
There will also be a subscription value that is hidden once the hybrid checkbox is checked. Fill this field with “Apps” prior to checking the hybrid implementation checkbox to ensure that your user account is recognized during installation.
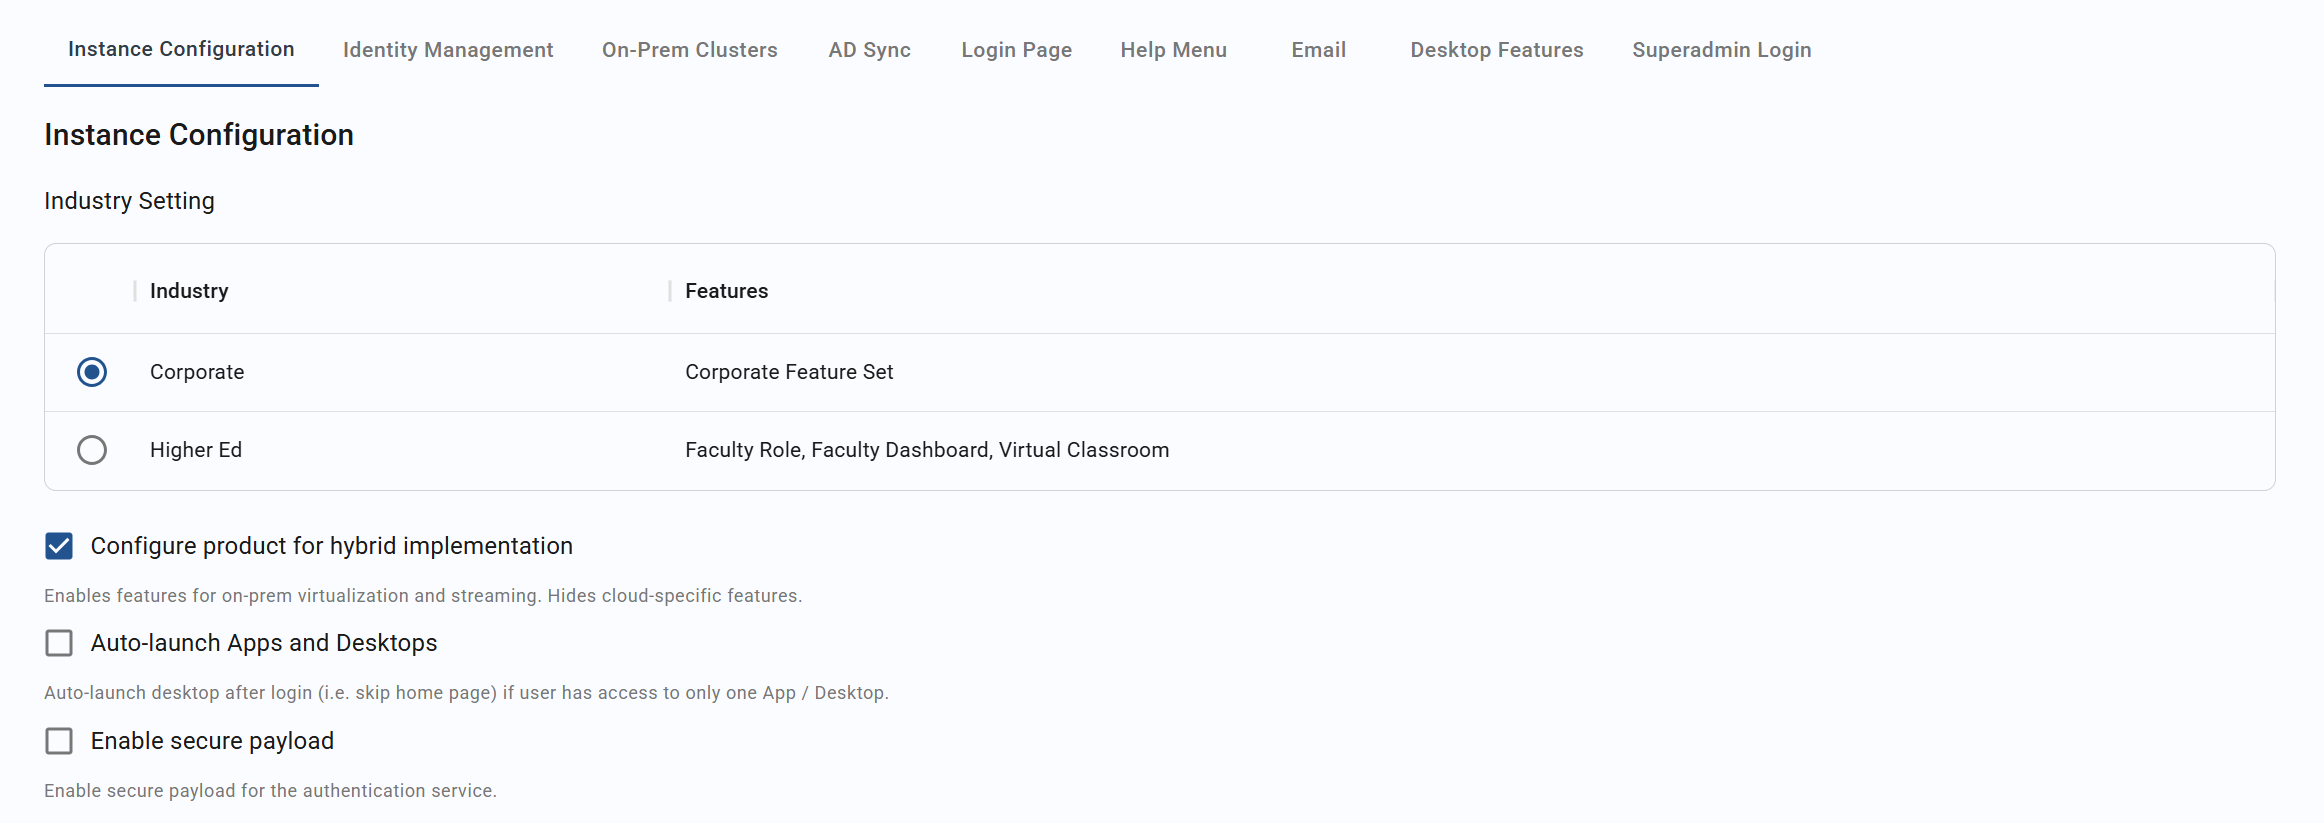
Do not uncheck this checkbox. Doing so would hide the “On-Prem Clusters” tab and the cluster installer.
Identity management
The “Identity Management” tab provides your instance’s authentication method settings.
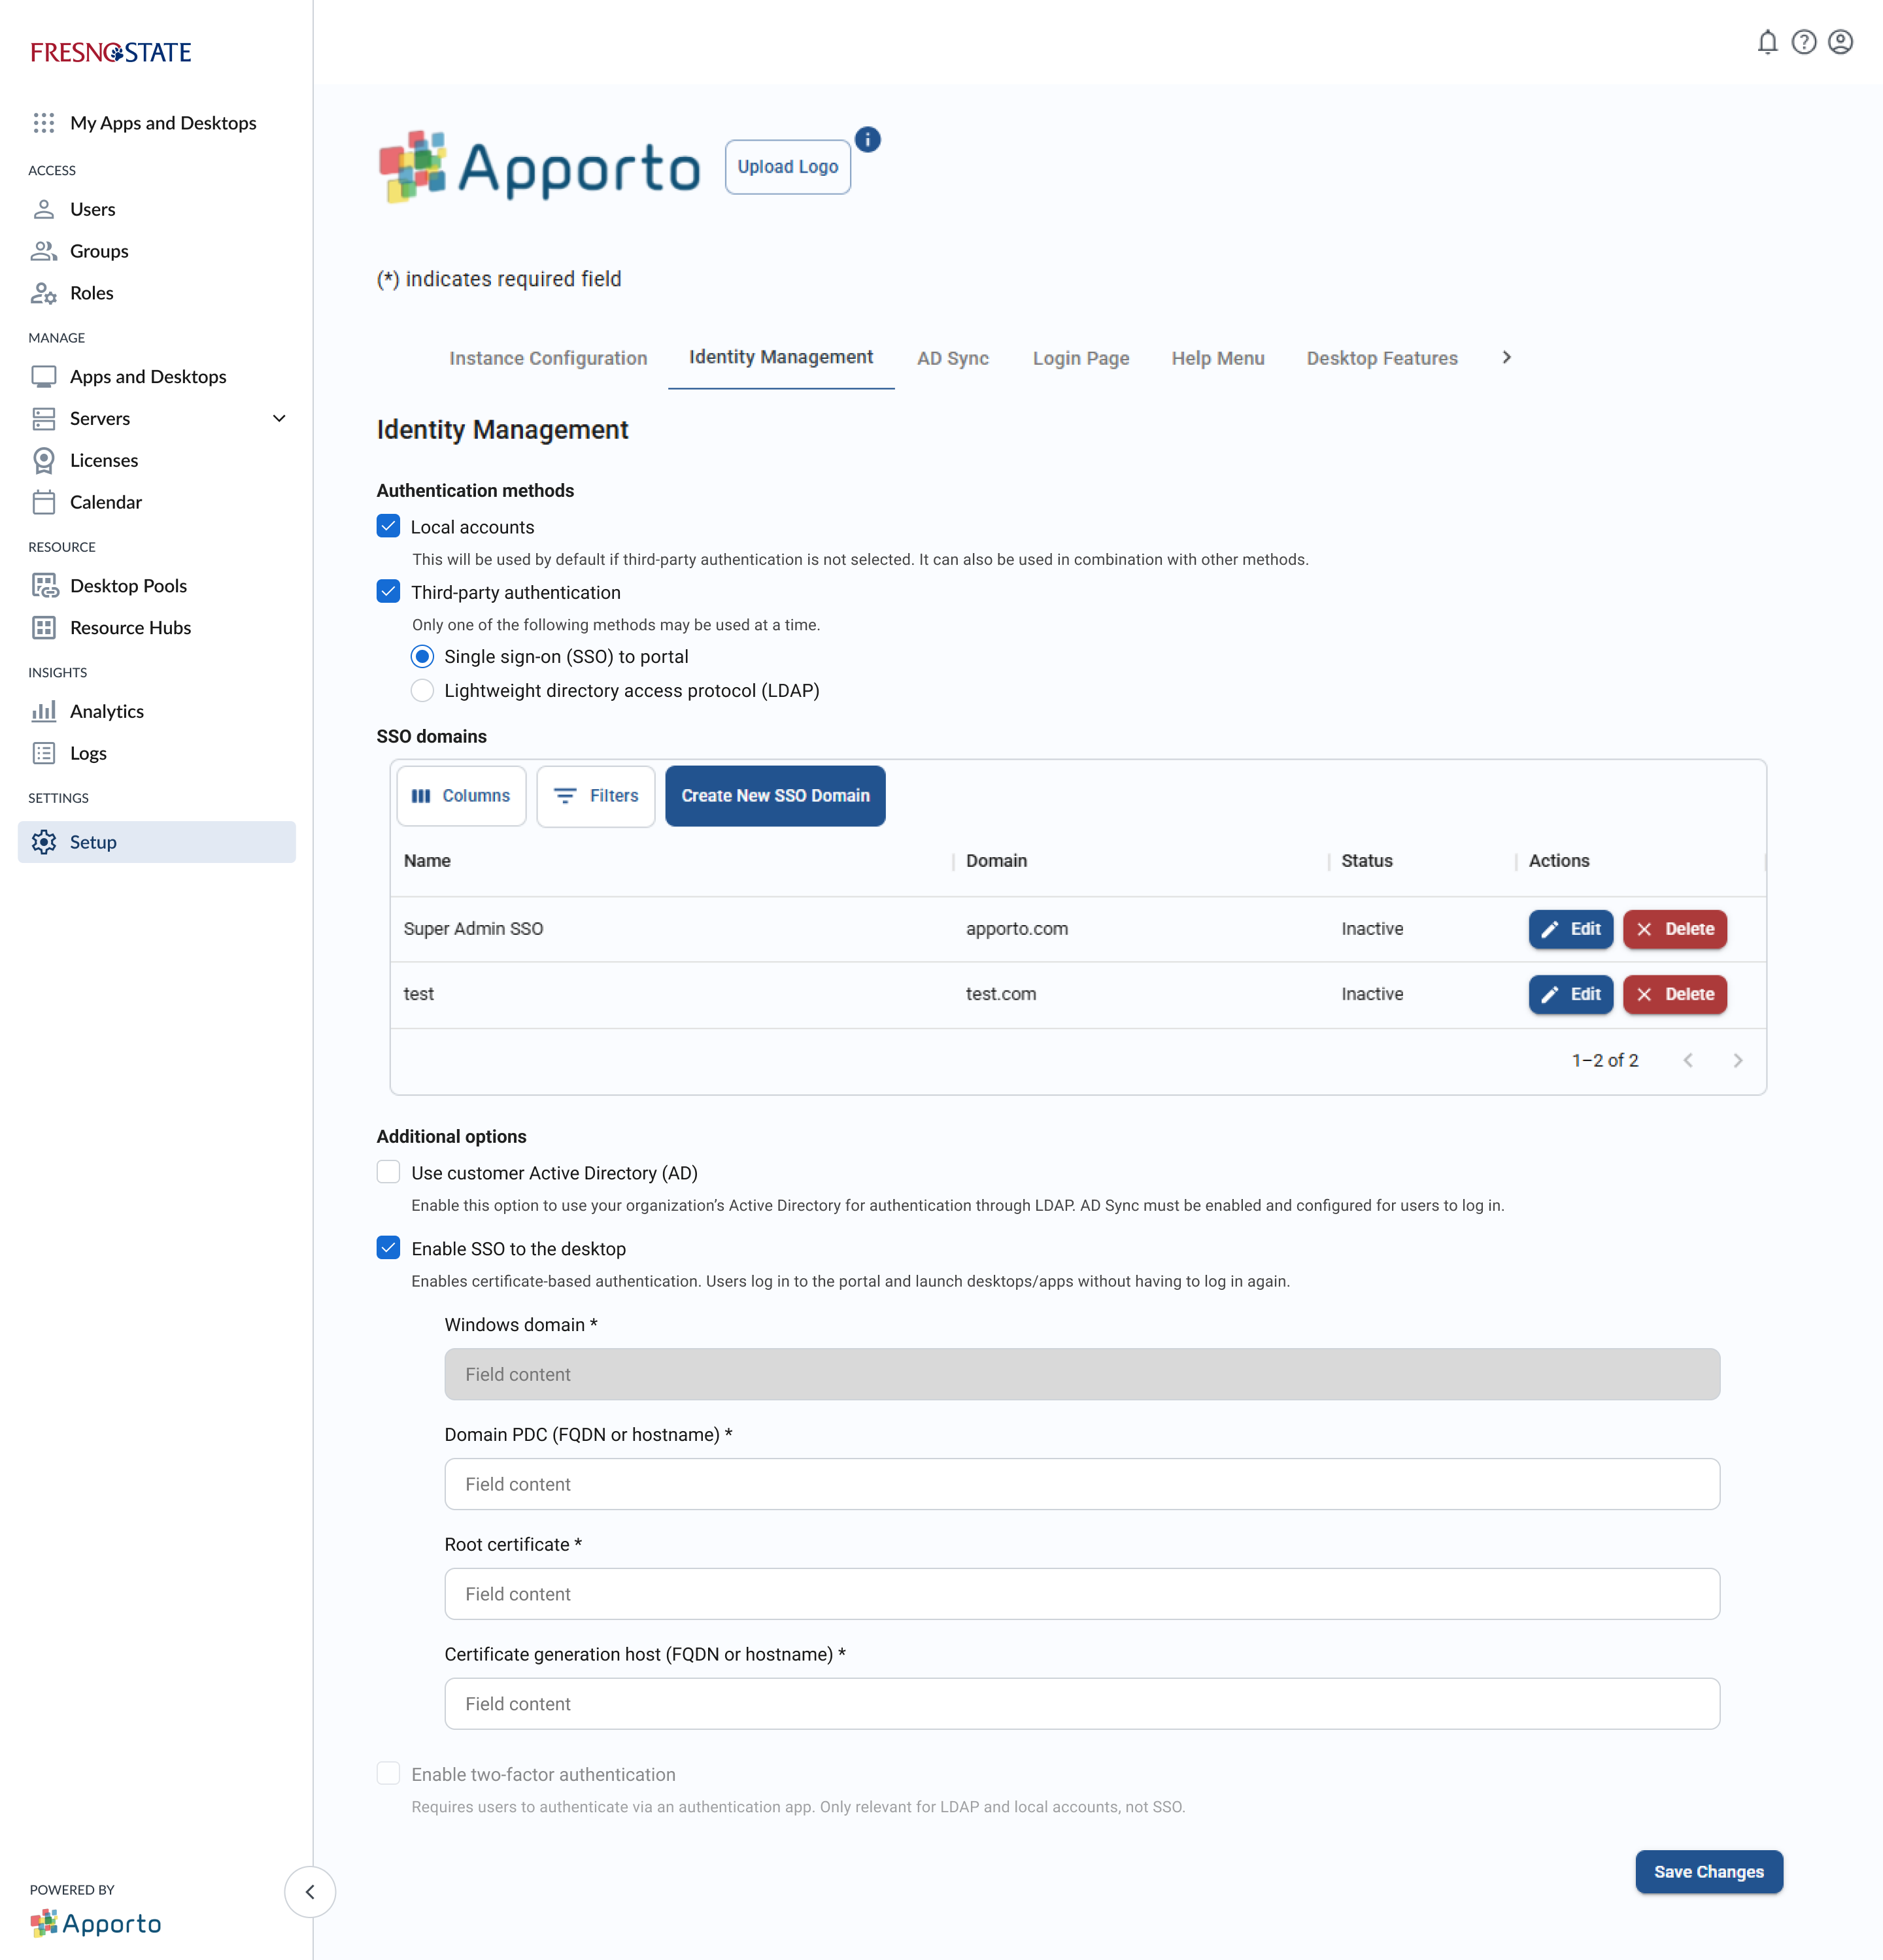
Users can be authenticated through the following methods:
-
Local accounts (email address & password)
-
Single sign-on (SSO) to the control plane
-
Lightweight directory access protocol (LDAP)
If you desire to use LDAPS, we recommend first attempting LDAP and then updating your configuration to LDAPS after obtaining the root certificate.
There are additional options for:
-
Using your organization’s Active Directory (AD)
-
If customer AD is selected for either SSO to the control plane or LDAP, the “AD Sync” tab will be visible.
-
-
Single sign-on (SSO) being passed from the control plane to the desktop
-
If SSO to the desktop is enabled, certificate values are required. See the Apporto Help Center article on generating SSO certificates for more information.
-
|
Field |
Datatype |
Required? |
Notes |
|---|---|---|---|
|
Windows domain |
String |
System-generated |
This value will be inserted by the system. |
|
Domain PDC (FQDN or hostname) |
String |
Yes |
Primary domain controller |
|
Root certificate |
String |
Yes |
Enter the full string of the certificate. In a future version, file upload may be made available. |
|
Certificate generation host (FQDN or hostname) |
String |
Yes |
|
-
Two-factor authentication (2FA)
If you desire to use SSO to the desktop, we recommend the following order of operations:
-
Use local accounts for initial setup.
-
Configure LDAP and AD sync settings. Verify that AD users are able to authenticate into Apporto.
-
Update your LDAP settings to LDAPS by adding your root certificate and updating your LDAP server port(s).
-
Enable SSO to the desktop and fill in its related values.
For information on how to configure authentication methods, visit the Apporto Help Center.
On-prem clusters
Information about this tab is available in the Deployment section on the cluster install wizard.
AD sync
This tab provides configuration options for Active Directory (AD) and Lightweight Directory Access Protocol (LDAP) sync.
The Service Account used can just be a Domain User account. This account is basically used to just Read into the AD Domain. No additional permissions or elevation are needed.
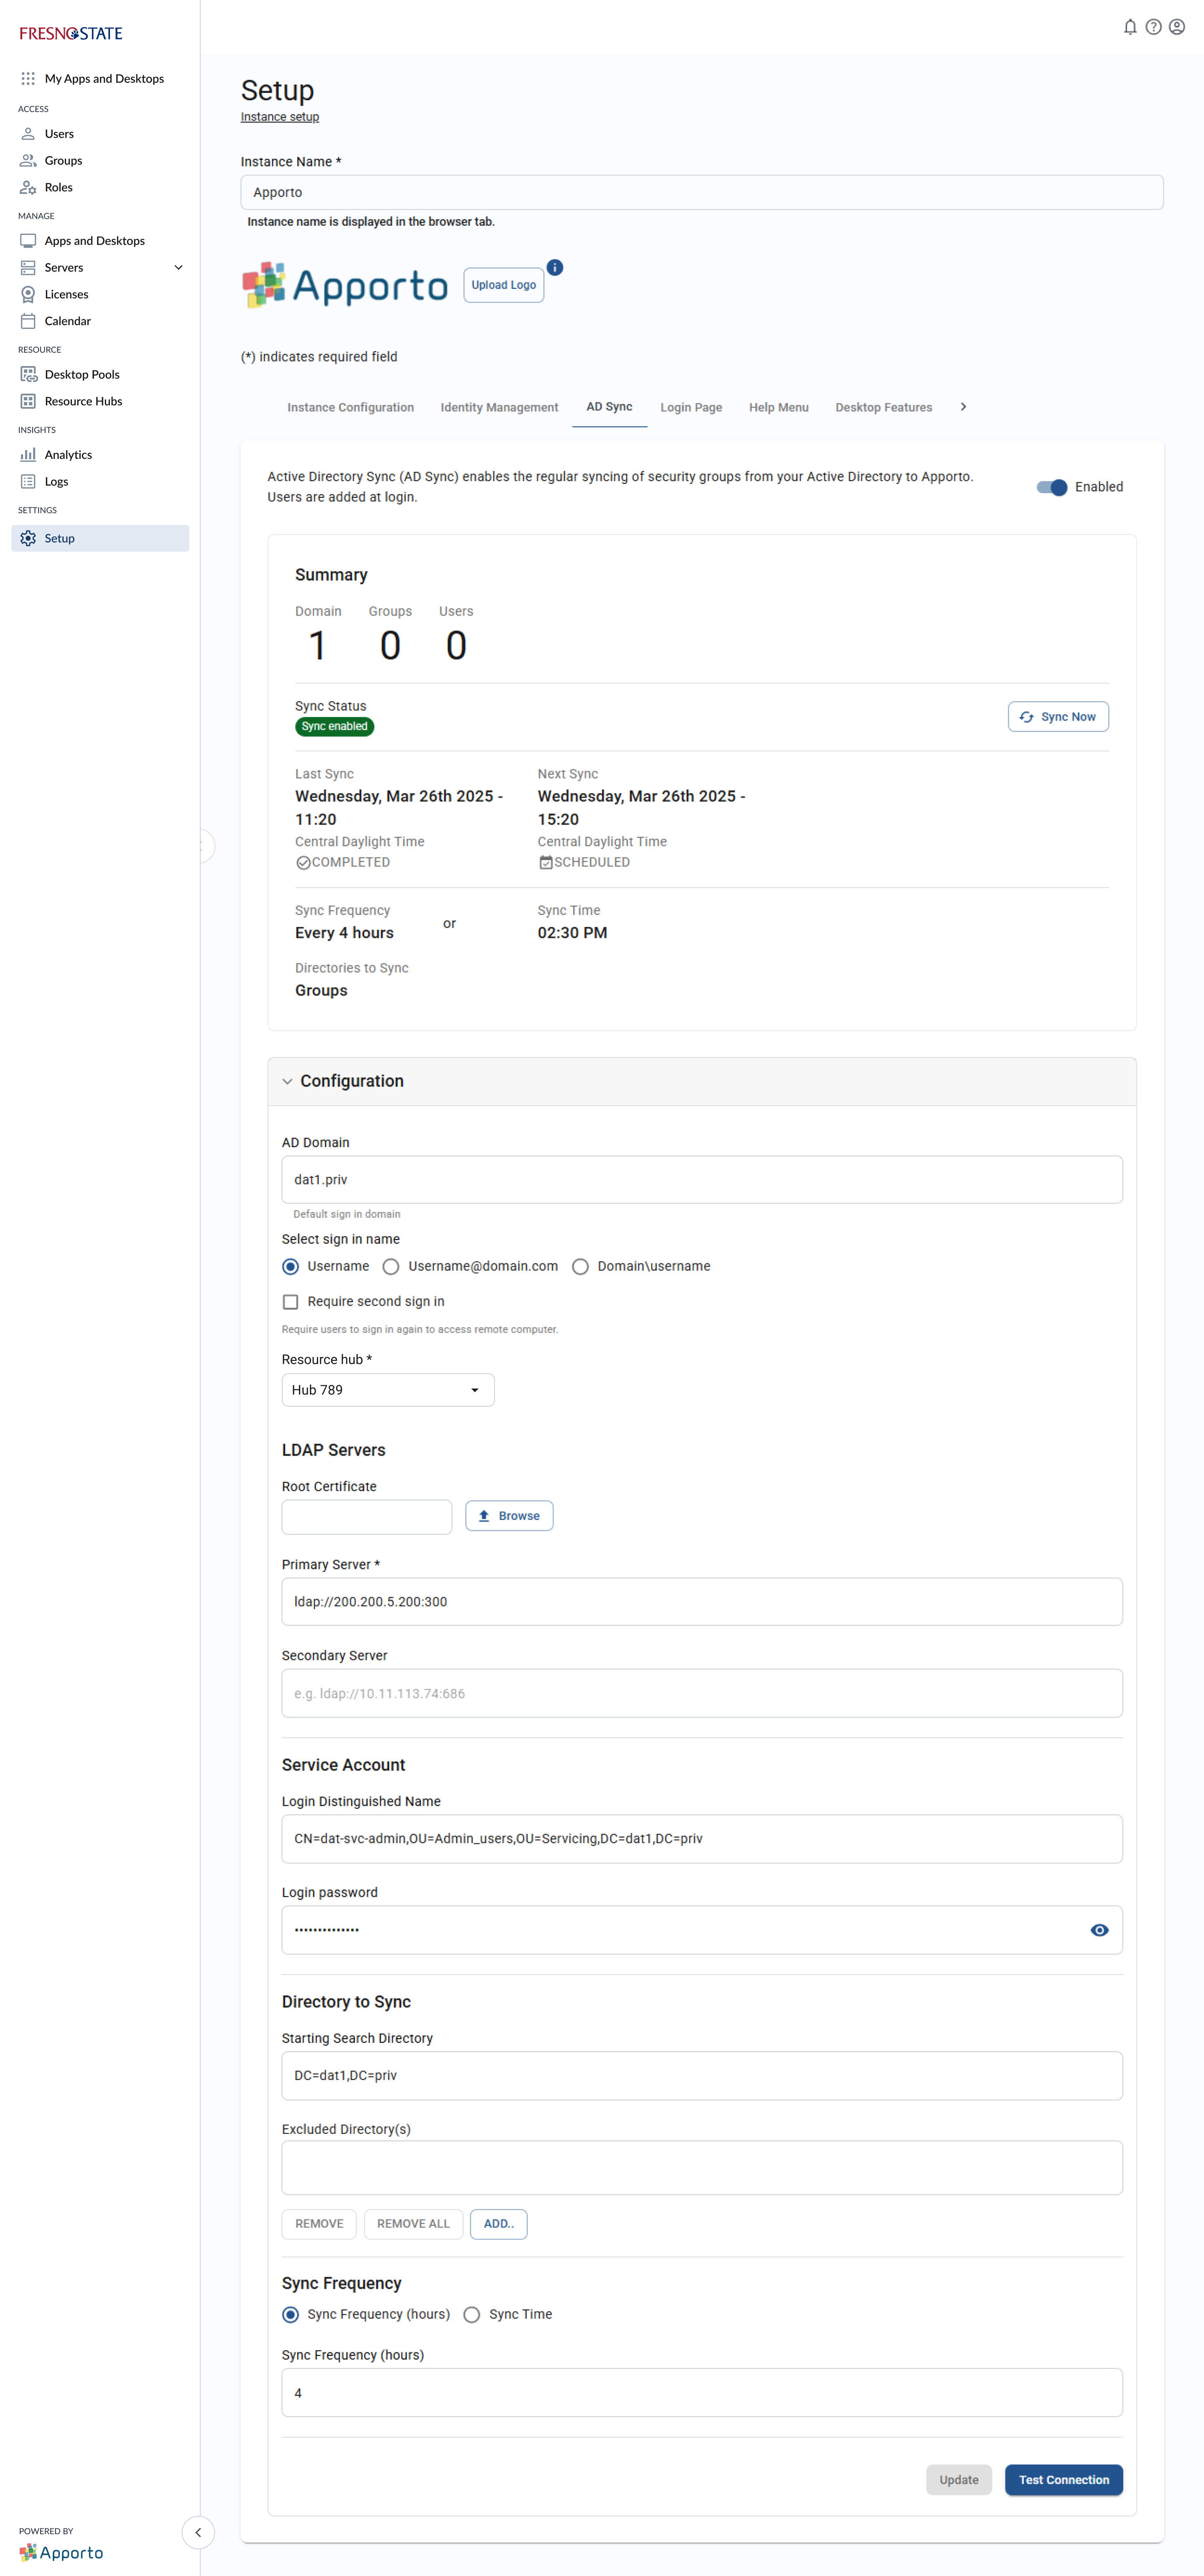
For on-premises deployments, the resource hub that houses the sync server must be selected. More information is available in the AD sync section of the Help Center.
Currently, the automated AD/LDAP sync schedules (by hours or by time) are not working for on-prem customers. After saving your settings, click on the Sync Now button at the top of the screen whenever you need to update the sync.
LDAPS configuration:
Step 1-From an AD DC\CA system run MMC.exe and proceed to add Certificates, then select Computer account-local computer.
Step 2-Open Certificates\Personal\Certificates, here you should see your Domain Root CA certificate issued to your AD DC.
Step 3-Select the above certificate, right click to then Export. Ensure to select No, do not export the private key.
Step 4-Now select the option for "Base-64 encoded X.509 (.CER) to the save to a File.
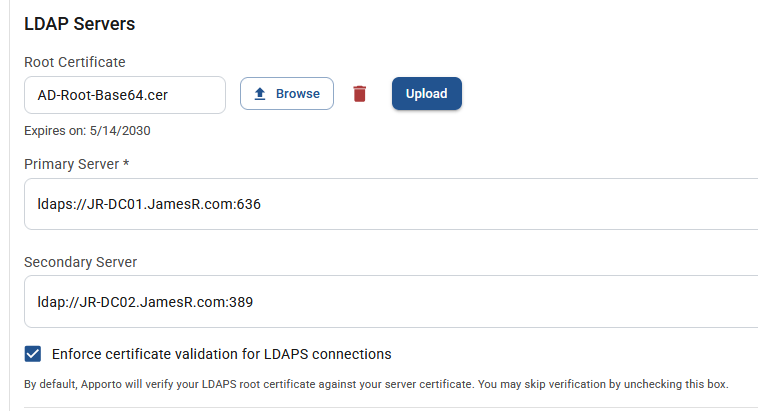
Step 5-Within AD Sync we will now proceed to Browse for the above certificate saved and then select to Upload.
Note-If an error occurs then likely points to using the wrong certificate or type used during export.
Step 6-For the Primary Server field make sure to use ldaps://FQDN of your AD DC:636
Note-Don't supply the IP Address of the AD DC as the FQDN name is required.
If using a Load Balancer here, given the certificate ties with an AD DC system name, ensure only the AD DC FQDN names are used.
It's also suggested to provide the Secondary Server to use; ldap://FQDN of your Backup AD DC:389
Make sure to select the option; Enforce certificate validation for LDAPS connections
For any EU\EMEA based customers the Cert Upload is only being stored on DBs in your GEO region in EU\EMEA.
Login page
The “Login page” tab allows you to configure the branding and content of the control plane sign-in screen. Refer to the Help Center article on the login page for more information.
Help menu
The control plane provides a handy way for users to find support resources. Use the information in the Help Center article on configuring the help menu to link to the resources you want to provide your users.
Email
Each instance is preconfigured with email templates. You can change these templates as needed. Refer to the Help Center article on configuring system emails.
Desktop features
The “Desktop Features” tab allows you to manage the features a user will see when in an active virtual desktop session. This list will change as new features are added. And there may be some differences in availability between cloud-based and on-premises instances.
For more details, visit the article on desktop features in the Help Center.