

Creating a role
Customers can create custom roles for faculty and sub-administrators. Use the information in this guide to learn how to create a custom role.
Create a custom role
The table below shows the values that make up a role.
|
Field |
Datatype |
Required? |
Notes |
|---|---|---|---|
|
Role name |
String |
Yes |
|
|
Role type |
Lookup value |
Yes |
|
|
Rule groups |
List |
Yes |
Multi-select list of user groups |
|
Rule permissions |
List |
Yes |
Multi-select list of entity permissions |
To begin creating a role, follow the steps below.
-
to the system using your credentials.
-
Click roles or the
 icon in the navigation panel.
-
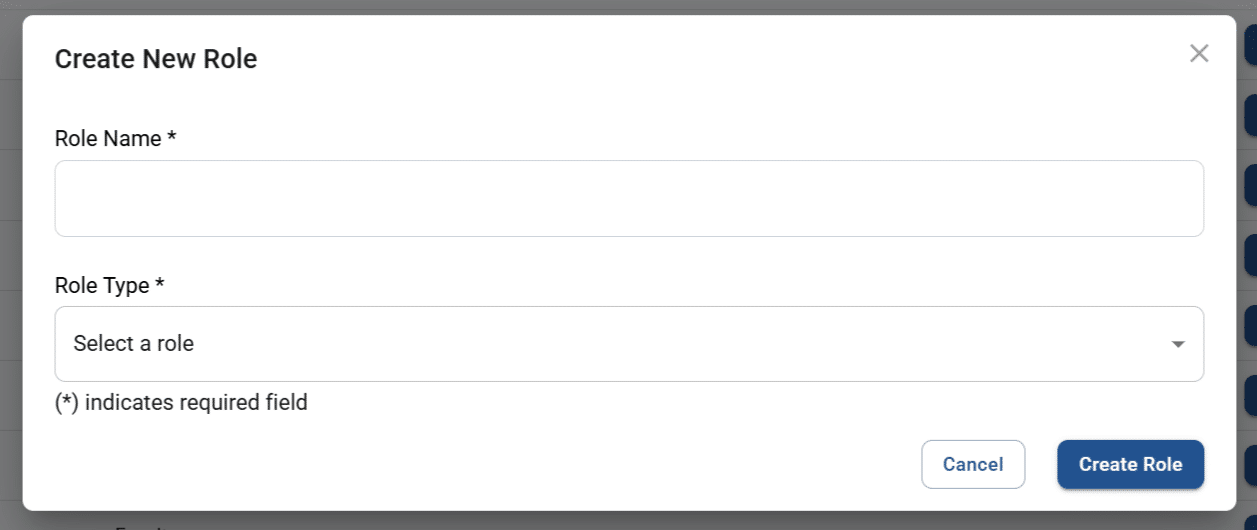
Click on the create new role button. This will trigger the Create new role pop-up screen.
-
Select a role type. A default set of permissions will be populated based on your selection.
-
Faculty
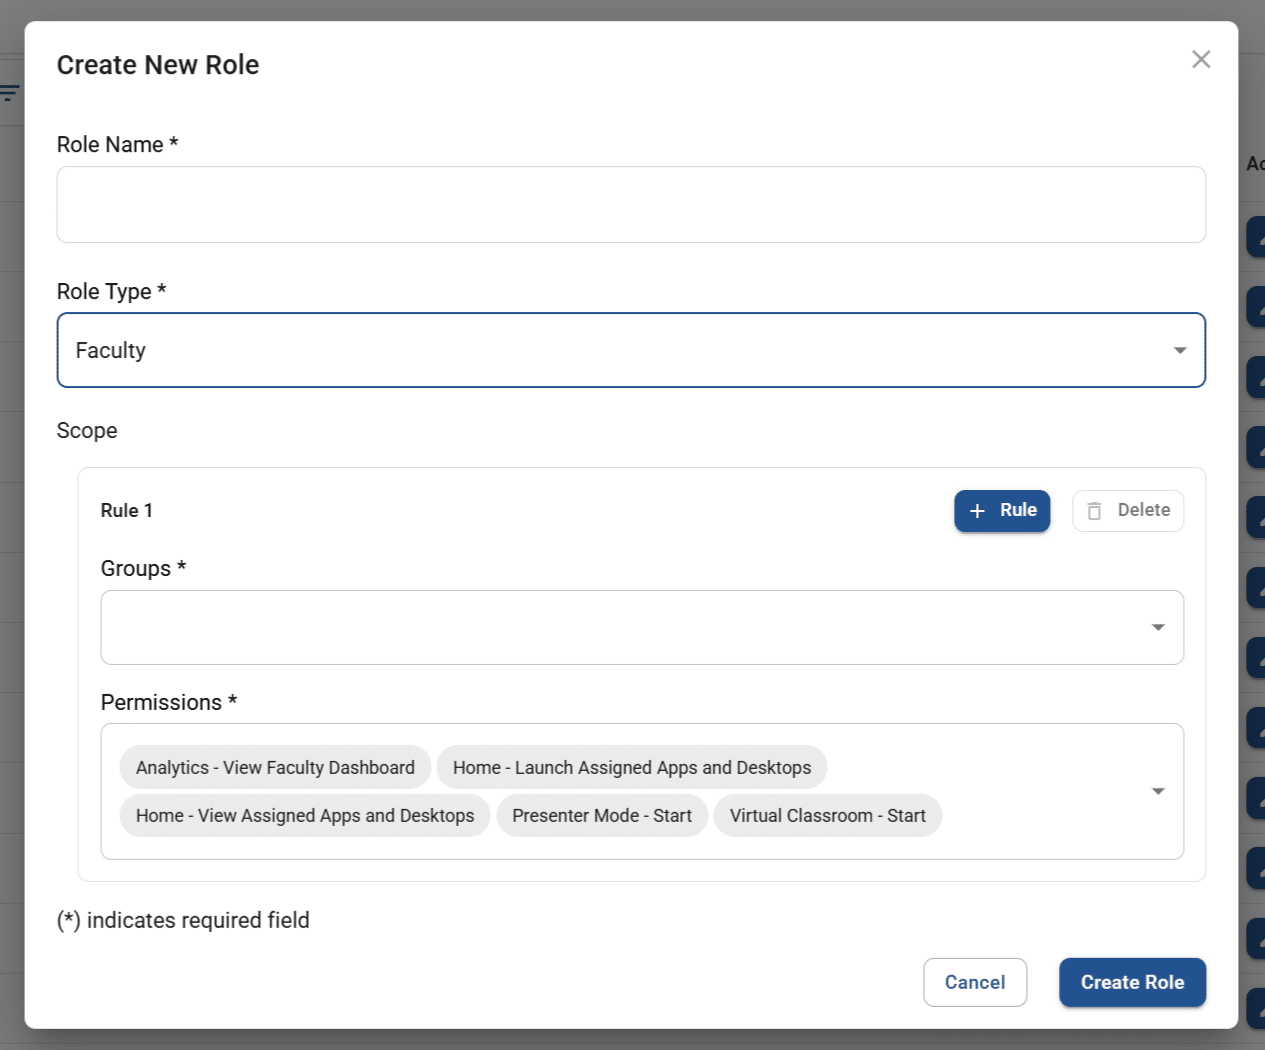
The default permissions for faculty are:-
Analytics – View faculty dashboard
-
Home – Launch assigned apps and desktops (present for all users)
-
Home – View assigned apps and desktops (present for all users)
-
Presenter mode – Start
-
Virtual classroom – Start
-
-
Sub-admin
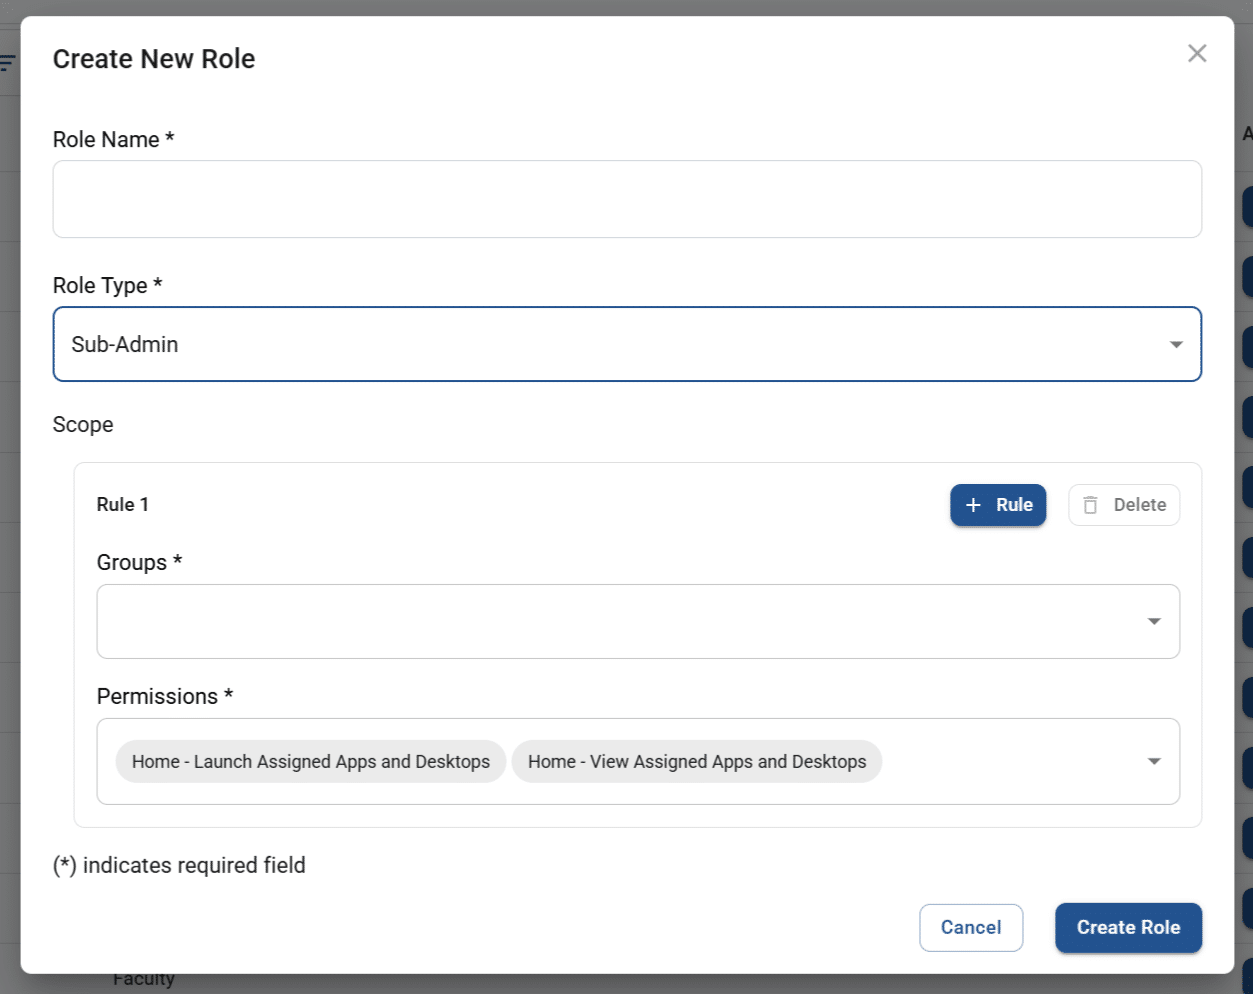 The default permissions for sub-admins are:
-
Home – Launch assigned apps and desktops (present for all users)
-
Home – View assigned apps and desktops (present for all users)
-
-
-
Adjust the permissions for your role by checking and unchecking permissions from the list. The full list of permissions is as follows:
-
Analytics – View faculty dashboard
-
Apps and desktops – Manage
-
Apps and desktops – View
-
Audit logs – View
-
Calendar – Manage licenses
-
Calendar – Manage maintenance
-
Calendar – Manage start servers
-
Calendar – View licenses
-
Calendar – View maintenance
-
Calendar – View start servers
-
Groups – Manage
-
Groups – View
-
Home – Launch assigned apps and desktops (present for all users)
-
Home – View assigned apps and desktops (present for all users)
-
Licenses – View
-
Servers – Manage
-
Servers – View
-
Sessions – Join
-
Sessions – Manage – Terminate session
-
Sessions – View
-
Users – Launch as (only available for cloud instances)
-
Users – Manage
-
Users – View
-
Presenter mode – Start
-
Virtual classroom – Start
-
-
Select 1 or more user groups for the scope of the role.
-
To add another rule set (combination of groups and permissions), click the rule button and repeat steps 5 and 6.
-
Click create role to save your new role settings.
Migrated from the Apporto Help Center: https://www.apporto.com/help-center/creating-a-role